How To Properly Setup Apple Time Capsule For The First Time
Setting Up Time Capsule For the First Time
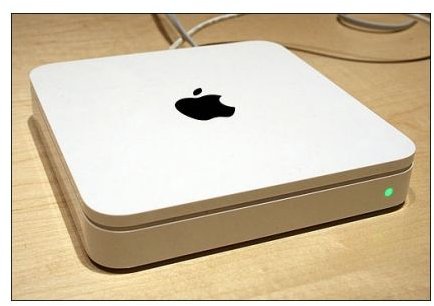
When you first open Time Capsule, you will notice that it comes with a Time Capsule Airport Utility Disc. You do not need to waste time installing this software if you already have the latest version of Apple’s Airport Utility on your Mac.
To get started setting up Time Capsule, plug the time capsule into a power outlet and connect it to your computer via ethernet. OS X should automatically recognize it, but if not, open up the Airport Utility. You can do this by doing a spotlight search for it or navigating: Finder - Applications - Utilities - Airport Utility.
After your have Airport Utility open, it will automatically search for Apple wireless devices. After it finds your Time Capsule, select the continue button. The first screen will ask you to enter a name and password for your Time Capsule. Keep in mind this information will be used for your Time Capsule access only, not your Airport wireless connection. After you have filled in that info, click continue.
The next screen will simply ask you how you want to secure your Time Capsule disks. You can just leave the option set on with device password. This will secure your Time Capsule access with the password you created on the previous screen. Users will not be able to connect without this password. The 2nd option on this screen asks you if you would like to allow guests to connect without a password. Make sure that “Not Allowed” is selected. Click continue
The next screen you come to will allow you to configure other devices with your Time Capsule. Just click continue for now.
The final screen is crucial. On the screen you are at at now, select “Disable wireless and connect to a computer or network using Ethernet”.
Now, you will need to open up your Time Machine preferences. To do this, you can either click the Time Machine icon if you still have it in the dock. If not, you can click the time machine icon located on the top navigation bar (next to the bluetooth, sound, and battery indicators).
In the Time Machine preferences window, click the button that says “Select Disk”. A box will pop-up that has your Time Capsule hard drive. By default, it should say “Data”. Select it.
Time machine will now do its first backup. It will take at least one hour depending on how much data you have.
A couple tips to make sure everything goes right: After Time Machine is done doing its first backup, restart your computer. After it restarts, you are going to do another backup. Click the Time Machine icon, or select Time Machine from the top nav bar and select “Back up now”. This time, Time Capsule should not take near as much time to backup. After it has finished, you are going to repair disk permissions. To do this, navigate Finder - Applications - Utilities - Disk Utility. Select your hard drive and click repair disk permissions. Restart your computer once more.
Be sure to read part 2 of First Time Setting Up Your Time Capsule to finish the process correctly!
This post is part of the series: Setting Up Apple Time Capsule and Time Machine For The First Time
Apple Time Capsule and Time Machine is often confusing to setup. However, following certain steps, you can setup your Time Capsule correctly the first time, avoiding any future troubles. Check out this guide for anything you need to know about setting up Time Capsule, Time Machine, or both.
