One of the most difficult situations that a computer user has to face is the deletion of the partition table. If you happened to think about hard drive data and partition recovery, we are here to help you. Let’s see how to recover your lost partitions and restore them.
Losing hard drive data due to the deletion of the partition table is a serious concern for a PC user. If all your hard drive data partition recovery efforts were useless, this guide will help you to get your data back.
Novice User’s Guide to Hard Drive Partition Recovery Using Partition Table Doctor
Using Partition Table Doctor is an easy way to recover your deleted partitions. It is a commercial tool and great for a novice computer user.
Partition Recovery Guide:
1. First download Partition Table Doctor - for Windows before starting the data recovery process.
2. Install and run Partition Table Doctor.
3. Select the hard drive that needs a partition recovery.
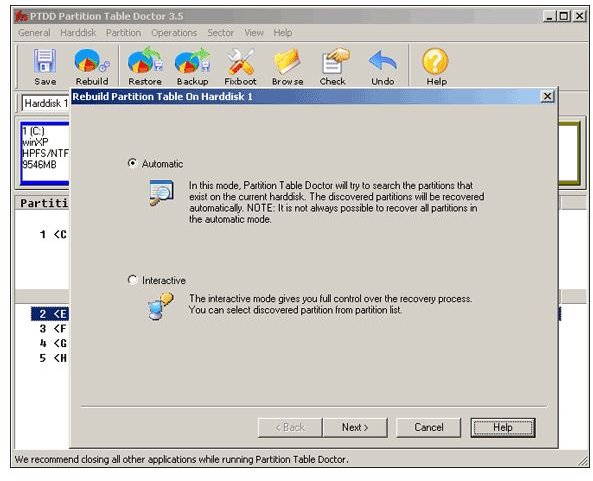
4. Click Rebuild button or press F3 key.
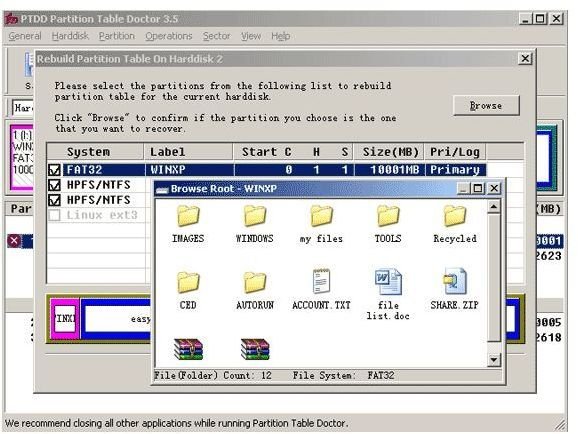
5. Although both methods are similar, select Interactive mode when you have to select either Automatic or Interactive mode. If you use Interactive mode you will be able to see a preview of the folders and files by using Browse option.
6. Once rebuilding is over select Save from the General menu or press “Ctrl + S”. Then save before exiting.
7. Restart your computer. Then you will see that your hard drive partitions are recovered.
Advanced User’s Guide to Hard Disk Partition Recovery Using TestDisk
TestDisk is an advanced tool to recover your lost hard drive partitions. These are the advantages of TestDisk.
Advantages:
- Free software to use.
- Can be used to hard drive data partition recovery of FAT, FAT 32, NTFS, and Linux (ext2/ext3) file systems.
- Can be used in Windows, Linux, and Mac OS.
Partition Recovery Guide:
Let’s consider the hard drive data recovery for a hard drive with NTFS partitions. Because NTFS is the file system that most of the Windows users have. For other file types read this guide about Running the TestDisk Program .
1. Download TestDisk Program for Windows . (If you are a Windows user)
2. Extract the downloaded zip file of TestDisk in to a folder.
3. Run testdisk_win.exe in the win folder.
4. Choose Create and press Enter key.
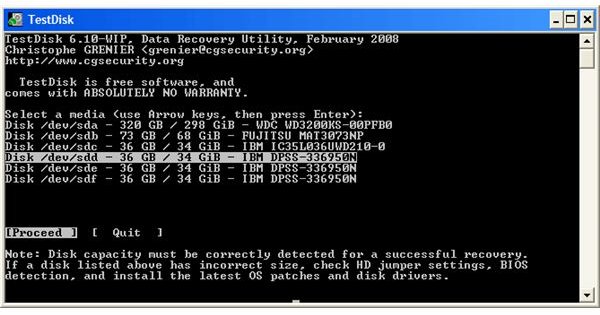
5. Now all detected hard drives are displayed in the TestDisk software. Make sure your damaged hard drive is also there. Check whether the size of the hard drive which is to recover deleted partitions is correct.
Related Links
- Hard Disk Management Basics Explained: Partitions and Logical Volumes
- Repairing a Bad Sector on your Hard Drive
- How to Clone a Laptop Hard Drive with Acronis True Image
- How to Maintain Your Hard Disk
6. Select the hard disk that needs a partition recovery using arrow keys. Select Proceed from the bottom and press Enter key.
7. Now you will see a window with partition table types. Since you are using a Windows PC select Intel. Anyway the correct type is auto detected. Next press Enter to continue.
8. In the Current partition table status select Analyze to search for deleted portions to recover them. Press Enter and confirm your selection to proceed.
9. Then you can analyze your current partition for missing partitions and errors.
10. As in the following example your partition it will show a corrupted partition data. Press Enter at Quick Search and confirm your selection to search for missing partitions.
11. In the next window you have to confirm again by typing Y and pressing Enter.
12. Then the TestDisk software will show you detected partitions in real-time.
13. Once search is completed select the recovered partition and press P to list your files and press Enter.
14. If all the partitions are found and listed data is correct, then select Write to save the new partition table. If your partitions are still missing then select Deeper Search and press Enter.
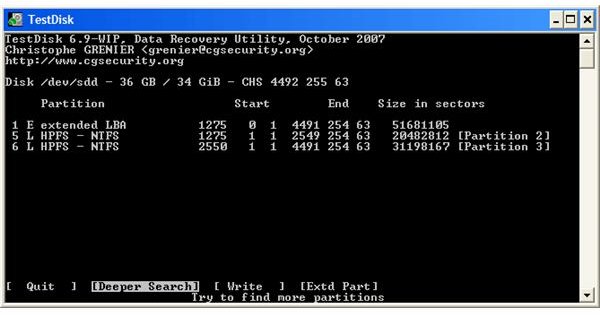
Deeper Search
15. Deeper Search is for hard drive partition recovery of FAT32 , ext/ext3 boot sectors too. Overlapping partitions are listed with D for deleted. Now press P to list files and make sure that they are the files of a deleted partition. Next press Q to quit to the previous display.
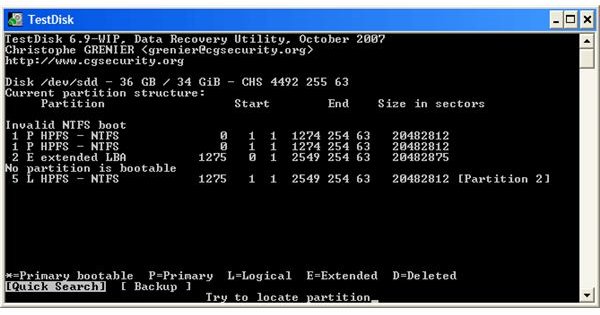
16. Now the available status are Primary, Logical, Deleted and *bootable. Primary partition is the very first partition of the hard drive. It starts with cylinder 0, head 1, sector 1. (See 0 1 1 under the Start of the table. Additional partitions are X 0 1. Here X is a number other than 0). Logical partitions start with non 0 cylinder, head 1, sector 1.
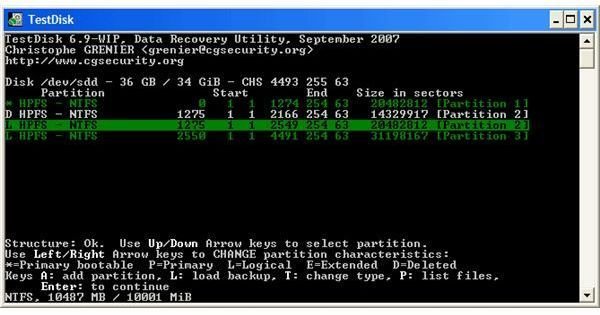
17. Now change the status of the newly recovered partition to Logical status (L).
18. Then your partition is ready to write. Select Write and confirm the selection.
19. Still the NTFS boot sector of the first partition is displayed as Bad. So it must be repaired as in the following image. Select Backup BS and press Enter. Confirm the selection. Now it must display as the sectors are identical.
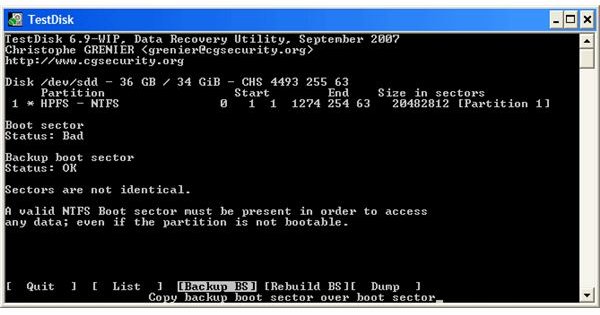
20. You have done it. Select Quit for restarting and your hard drive data partition recovery mission is successful.
This is an advanced method. Don’t use it if you have no idea about basic partitioning tools such as FDISK. But this is a more effective way for hard drive partition recovery.
Related Links
This post is part of the series: Hard Drive Partition Recovery
At any moment your all valuable data may get vanished as a result of a simple mistake. In the worst case you might have to think about a hard drive partition recovery. Don’t worry. We have some guides for you.


