Recently replace that hard drive on your HP Pavilion? Here’s how to get all those files from the old hard drive onto the new one.
Let’s be honest here: Laptops are fantastic and wonderful machines that serve us in unimaginable ways, and there’s no way we’d ever want to get rid of them. Sometimes, however, they can be a ridiculous amount of trouble, and that fickleness shows through more strongly in the hard drive area than any other. The problem with a laptop hard drive (as opposed to a desktop hard drive) is that replacing the drive is much more difficult, so if it fries out via corruption or otherwise, it’s a huge pain to fix.
But let’s say you’ve already replaced the drive and you just need to know how to recover the files from your old drive. Thankfully, this is a heck of a lot easier than the actual replacing process - it just takes a few minutes to set up.
If The Old Drive Is Damaged
Most of the time, people replace their laptop hard drives because they get damaged or corrupted. This means that when you try to access the files on it, you either get an error message, or nothing appears at all. In the worst cases, the drive won’t even be recognized upon start up of the device, and if this happens, you’ll need to find out how to fix it. So, let’s say you’re in just this sort of rut. How is it that you can “un-damage” a hard drive and get some or all of your files back? It’s actually pretty simple, but it’s a bit of a process.
External Drive Case
First, you’ll need to connect your hard drive to another computer via adapter, or via external drive case. Of these two options, I’d recommend using an external drive case that adapts to USB, because it’s the safest of the two and will probably be cheapest unless you have a desktop computer that supports the same drive type.
Some options you have for external drive cases include some that I’d vouch for by a company called “Startech” (link in the references) for their small size, ease of setup, and simple usage instructions. These drive cases allow you to take your 2.5 inch SATA drives (or other drives, but you need different cases for different drives), plug them in inside the case, and then plug the case into your computer via USB port. This basically turns your old internal hard drive into a portable external hard drive, and it’s perfect for working on that old laptop drive that needs to be recovered.
USB Adapter Cable
The other option is to use an adapter cable to connect your hard drive to another PC, which is probably a little cheaper and could be considered even simpler.
While they work in the same fashion as drive cases, hard drive adapters (such as the very useful “Ultra USB 2.0 IDE/SATA Cable”) plug into your drive, and then run a cord from the adapter to the USB port of your computer, all for around $25 or so. If you get one of these, the benefits include ease of travel and compatibility with more hard drives. Unfortunately, it has the major downside in that it doesn’t protect your hard drive at all while it’s being used. Either way, it’s certainly another viable option.
The Recovery Process
After you’ve connected your hard drive to a computer’s USB ports, open “My Computer” and take a look at the list of drives; if your drive appears, you’re in luck - that is, you have a better chance of recovering the lost files - and if it doesn’t appear, then you’ll have to try something else.
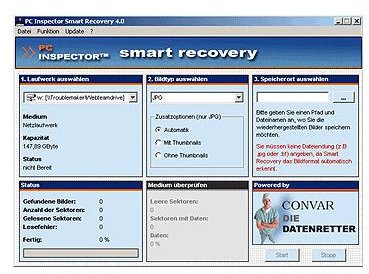
If The Hard Drive Does Appear: All you really need to do is download and run a recovery tool such as REMO Recover . This will search your hard drive for the hidden or deleted files, locate the problem within the drive, and then do its best to fix it so you can get your stuff off of it. Another great application (and the one I personally prefer) is PC Inspector which, unlike REMO, is completely free of charge. What you need to do after downloading it is simple: Open the application, run the recovery tool, and then select the drive you want to recover. Let it do its thing, and when it’s done, you should be able to access the files normally.
If The Hard Drive Doesn’t Appear: If your drive isn’t even showing up after you’ve connected it, the first thing you should do it make sure your connection is solid. There should be no scratches in cords you’re using, and no problems with connecting in the past. If you’re sure it’s properly connected, once again run the aforementioned “PC Inspector”, but this time select “Find Lost Drive.” This should look long and hard for your drive, eventually find it, do its best to recover your files and, ultimately, get your stuff back in total working order.
There are many other tools you can use to recover hard drives, of course, but many of them cost money and are a lot harder to use than other programs.
If The Old Drive Still Works
If your drive remained intact for the entire time that you owned it, then congratulations - you are one of the people who made it. To get the files back from an internal laptop hard drive when it’s not inside of your laptop is pretty easy. Firstly, you will need to connect the old hard drive to a computer - any computer - via either of the methods listed above, and then continue following the instructions on accessing the hard drive. Once you’ve opened the drive, you can copy all of the files to your new/other computer.
Another option you have would be to copy the files onto an external drive or flash drive, then attach that to your laptop instead of taking up space on the new hard drive. Either which way, you should be free and clear for this one.
Best of luck with getting those files back! Post questions or comments, and I’ll help you out as best as I can.
References
- [Helpful Link] Ultra USB Adapter, http://www.tigerdirect.com/applications/SearchTools/item-details.asp?EdpNo=3276554&CatId=3770
- [Helpful Link] StarTech Drive Case, http://www.google.com/products/catalog?q=external+drive+case&hl=en&safe=off&client=firefox-a&hs=bCB&rls=org.mozilla:en-US:official&prmd=ivns&bav=on.2,or.r _gc.r_pw.r_cp.&biw=1280&bih=630&um=1&ie=UTF-8&tbm=shop&cid=8885693598983377826&sa=X&ei=0n1eTs32JMq40AHz3sTsAg&ved=0CIgBEPMCMAA
- [Image] HP Pavilion, http://www.shopping.hp.com/webapp/shopping/store _access.do?template_type=computer_store&landing=desktops&aoid=51292&keyword=hp+pavilion&tafcjnef=fy10&DS_KWID=p104539248
- [Image] PC Inspector, http://www.pcinspector.de/images/SmartRecovery/Screenshot.jpg
- [Information] All information comes entirely from prior author knowledge on the subject.


