It is now possible to install the Android Honeycomb OS on P1AN01 chipset devices such as the Advent Vega - an exciting and impressive upgrade for a low budget tablet!
Why Choose an Advent Vega?
The Advent Vega is an inexpensive but impressive tablet device based on the P1AN01 chipset, and includes the NVIDIA Tegra 2 mobile processor which means that it is able to run the new Android Honeycomb operating system for tablets.
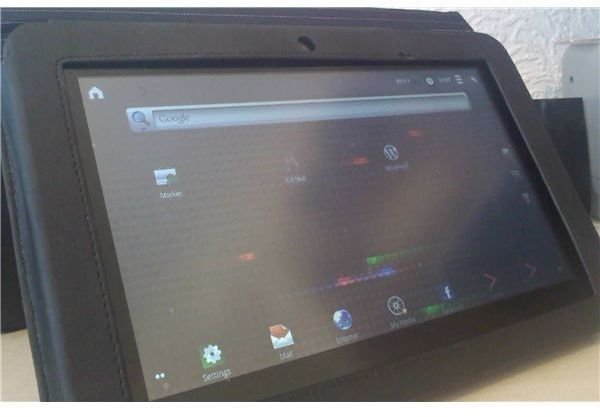
However, no Vega ships with Honeycomb; instead, the manufacturers of this and its various clones ship the device with Android 2.2 installed, usually without the Market app installed. This results in various shortcomings, including an inability to download and install approved apps without bending the rules somewhat.
Thanks to the efforts of a group of developers that can often be found at the XDA-developers and Modaco online communities, however, a version of Honeycomb has been ported to the Vega. This is currently a Beta version and features various incomplete aspects (for instance, you might find that the camera is disabled) but all in all it is an impressive piece of work. What’s more, it is pretty straightforward to install Honeycomb on an Advent Vega!
Getting Started
Before proceeding, you will need to make sure that you have the following downloads saved to a folder on your PC:
- The Windows USB Drivers
- The Manufacturers ROM , currently 1.10
- Super Simple Recovery Installer
- Automatic USB Driver Installer, aka AUDI
- Finally, of course, you will need the VegaComb ROM, available via villainrom.co.uk/releases/vega/
The two ROMs you download (the manufacturer’s original Advent Vega ROM and the Honeycomb ROM, known as VegaComb) will both be around 80-90 MB, so be prepared for a wait if you’re on a slower connection.
Some of the files you’re downloaded will be zipped, and not all should be unzipped, so leave them as they are until we reach the portion of the upgrade process when the files are required.
Preparing for Installation
Whether you have just purchased the Advent Vega and haven’t installed any new software (such as the Android Market ) or you’ve been running the device for a while with various ROMS, you need to prepare the device for flashing the new Honeycomb ROM by tidying up your Vega.
This means restoring the default ROM, but also should mean copying any vital data that you have on the tablet (photos, music, video, etc.) to your PC.
There are of course various reasons why you might do this. We don’t want you to lose any personal data, and understanding how to install the default ROM is useful to know as it will enable you to deal with any issues that might occur in the unlikely case of a failed upgrade.
Switching to Recovery Mode
The next thing to do is disconnect your USB and power cables from the Advent Vega . This is required for you to prepare the tablet for recovery mode, from which point it can have the default ROM applied and then, subsequently, the new VegaComb upgrade.
The top edge of the tablet has three buttons: power, a lock screen switch and the back button. To switch to recovery mode, you need to use the power and back buttons, so begin by holding down the power button for around 10 seconds to switch the device off.
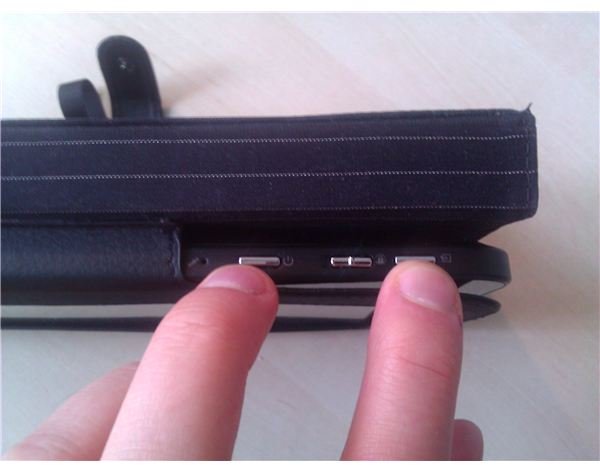
Recovery mode is notoriously difficult to start, and requires a combination of button presses as follows:
- Hold the back button for 2 seconds
- With the back button still depressed, hold the power button for 2 seconds
- Release the power button, retaining pressure on the back button for a further 2 seconds, and then release
However, while this is a general rule, it seems that not all Advent Vegas are created equally. Starting recovery mode on my own device doesn’t work in this way, however, instead requiring a very quick tap of the power button while holding the back button.
The general rule is that if the screen lights up, you’re not in recovery mode, so power down and try again.
Restoring the Default ROM
With a successful switch into recovery mode you can connect your tablet to your PC. You might also connect the power cable as you don’t want the battery running out while flashing a new ROM!
The PC should detect the tablet, and ask you to select drivers for the device, so select Have Disk and find the unzipped Windows USB drivers, selecting Boot Mode Recovery.
With this installed, browse to the s****oftwareImage_v1.10_Vega_Final.exe file and double-click to run it. Follow the instructions for installing the stock ROM on your Vega, and a few minutes later the device should be as good as new. This step is particularly useful for any situation in which you might want to restore the factory settings.
Unlike other devices, it is nigh-on impossible to brick the Advent Vega. As such, if you have problems with this or any of the following steps, get the device back into recovery mode and start again!
Install VegaComb on the Advent Vega
A few preparatory steps are now required for you to get your device ready for Honeycomb. The first is to unplug the USB cable, and then on the Vega go to Settings > Applications > Development and select USB Debugging.
Next, return to your PC and unzip the AUDI software. Find the audi.exe file, right-click and select Run as administrator – this will ensure you have all of the right drivers on your PC for running the Vega with Honeycomb/VegaComb installed.
This software is pretty self-explanatory – in the top-left portion of the window, select I want to install the Modaco Custom ROM using ADB. ADB is the Android Debug Bridge and this will enable you to prepare the device for VegaComb.
Click Next Step and then connect your Vega to your PC (you should also have the power lead attached). You may need to wait a while as Windows detects and installs the device. In the next stage, on the right-side of the screen, you have the option of creating a restore point. If you choose this, wait while it is created and then choose Delete all Vega drivers. Wait while this completes, and then select Install correct driver; again, this may take a few moments, and the AUDI tool will let you know when it is safe to proceed as the section in red at the bottom left with change to green.
Installing Honeycomb with the Super Simple Recovery Installer
One of the files downloaded previously was the Super Simple Recovery Installer, a tool that enables you to select a ROM file from the recovery mode on your Vega.
Find the file and unzip it, and then run Windows_install.bat, which will install the ClockworkMod Recovery tool (this is a utility for installing new ROMs; it is also available for Android mobile phones ). The tool will run in the Windows command prompt, a screen with a black background, so pay attention to what it says, and when it finds your tablet and installs the tool, you will be prompted to tap Enter. If no device is detected, however, you will need to repeat the step above using the AUDI tool.
Switching your attention back to the Vega, you should see that the notifications menu displays the device as connected by USB. Tap this and select Turn on USB storage, which will then turn your Vega into an external storage device.
Next, open Windows Explorer and copy the VegaComb ROM file downloaded previously to the root (that is, don’t copy it to a folder) of your Vega, connected at present to your PC as a USB storage device and rename it to update.zip.
We’re getting close to the end now, so eject the USB storage device from your PC via the system tray and disconnect the USB cable from your Vega. The device must not be connected to your PC when you perform the next step!
On the Vega, tap Apps and then find Recovery – tap this to reboot your tablet.
(If the following menu doesn’t appear within 5 minutes, put the device back into recovery mode and repeat the steps from using the AUDI tool.)
The ClockworkMod Recovery menu will shortly be displayed, a tool that you interact with via the volume controls (for cycling up and down through the menu) and the Home (select) and Back (previous menu) buttons.
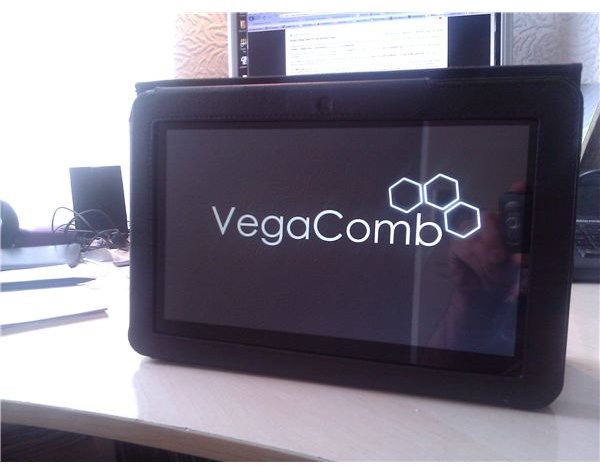
To flash a new ROM, use the menu to select both Clear Cache options, and then select Install ROM from Zip file. In the following menu, select update.zip and then wait a while as it completes. If you’re not returned to the ClockworkMod Recovery menu automatically to select Reboot your device, tap the back button a few times before selecting this option, and watch as your tablet boots into the VegaComb tablet OS!
Honeycomb, Up and Running on the Advent Vega!
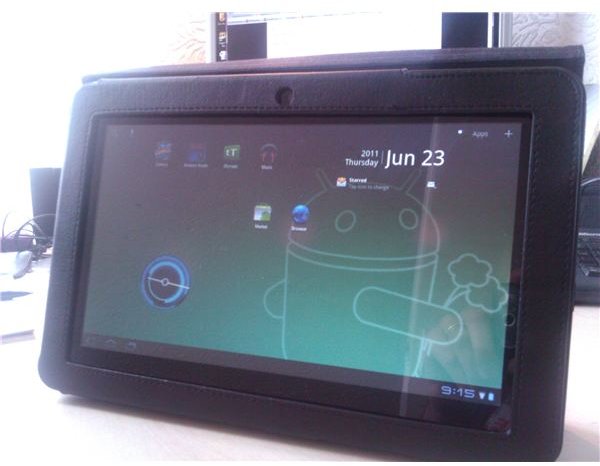
As explained previously, VegaComb isn’t yet ready as a stable ROM, so you will find that a few things don’t yet work, such as Adobe Flash, the device camera, and one or two other features such as the office software. These quirks will likely be resolved with future development (which will require you to update or patch the dveice), but the fact is with VegaComb installed on your Advent Vega you’ve pretty much spend £200 or $300 or so on a Honeycomb tablet.
That’s obviously quite a bargain and less than half the price of a Motorola Xoom!
References
HungryCodeMonkey, https://www.hungrycodemonkey.com/blog/installing-honeycomb-on-the-advent-vega-android-tablet-vegacomb-beta-part-1/
All screenshots provided by author.


