Turn your business logo into an Excel AutoShape with these easy steps.
Problem: You are looking for a fun way to kill some time while the Internet is down. Plus, you have a great business logo and you’d like to use it in Excel.
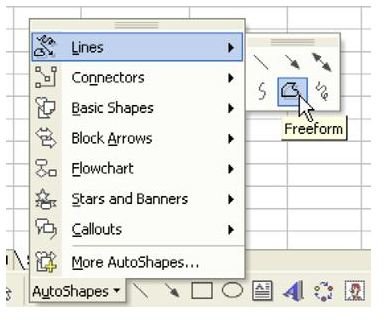
Strategy: Paste your company’s or any other logo to a worksheet. From the Drawing toolbar, select AutoShape – Lines – FreeForm, as shown in Fig. 1413. (Note: Click any figure below for a larger view of that image.)
If you’re using Excel 2007 or 2010, go to the Insert tab, click on Shapes and choose the Freeform option from the Lines grouping.
This is great for drawing straight lines. Trace your company logo. Start at one corner of the logo. Click on the corner, as shown in Fig. 1414.
As shown in Fig. 1415, move the mouse to the next corner and click again.
Continue clicking at each corner. When you get back to the original corner of the logo, click again and the AutoShape will appear, as shown in Fig. 1416.
You can now move, color, re-size, and rotate the AutoShape. As shown in Fig. 1417, here is Max Cell with a little color and 3-D added in.
Result: You will have an AutoShape of your logo that you can resize or shrink to your heart’s content.
Summary: Use the Freeform AutoShape tool to draw any angular shape.
Commands Discussed: AutoShape – Lines – FreeForm
Images


References and Additional Resources
If you’re looking for more tips and tutorials, check out 91 Tips for Calculating With Microsoft Excel . This collection of easy-to-follow guides shows how to customize charts and graphs, various formatting tricks and even how to play games like Craps in Excel. If you can’t find what you’re looking for, leave a note in the Comments section below.
Other Resources:
Microsoft Excel Official Site, https://office.microsoft.com/en-us/excel/
Bill Jelen, Microsoft Excel 2010 In Depth, Available from Amazon.com .


