Creating banners and posters in Photo Explosion is fairly easy. You also have many options for creating the banners and posters. In this tutorial, you will learn how to do just that. Continue reading to follow my steps on creating posters and banners using Photo Explosion.
You can create posters and banners right from your home office computer using Photo Explosion . Photo Explosion has different templates that you can choose from to create posters and banners. In this tutorial I will walk you through the steps of creating a banner and poster in Photo Explosion.
Opening Photo Explosion and Navigating to The Banners and Posters
Open your Photo Explosion program and let it load. When the program loads, you will see the interface. On the left side of the interface you will see the Create button. Click that button and then click the Photo Project button on the right.
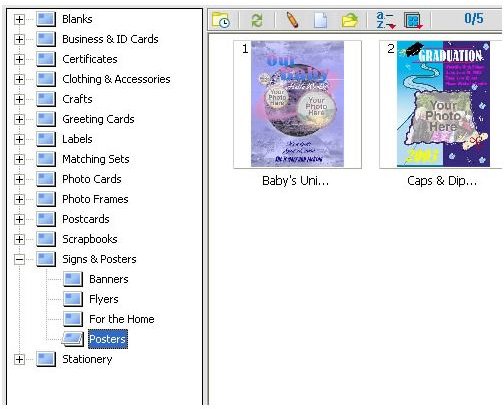
Now you will see a list of folders in the left panel of your window. Click the plus sing beside the Signs and Posters folder. When the folder expands, you will see the Posters and the Banners folder. They are two different folders. We’ll create the poster first. Then we will create the banner.
Creating a Poster in Photo Explosion
Click the Posters folder in the left panel of your window. On the right side of your window, you will see the different posters that you have to choose from. Double click a poster to get started. The Poster will open in a new window on the left.
Now you can add your own photos to the poster. On the left side of the program you will see the different folders. You will need to navigate through the folders to locate the photo or photos that you want to use for this poster. Click the photo and drag it to the photo slot on the poster. You can resize the photo by dragging the corners. After you have adjusted the photo, click the Apply button. If there are other slots to add photos, you can go ahead and add them.
Now you can change the text. Double click the text and the text box will appear on the left side of the window. Delete the text and type what you want in the field. Then change the font options to what you want and click the Apply button. Now you can click the Output button and save the poster or print it.
Creating a Banner in Photo Explosion
Now I will show you how to create the banner. The banner is created about the same way as the poster. To get back to the banners, click the Get Project button at the top of the window. On the left side of the panel you will need to click the plus sign beside the sing and posters folder. When the folders expand, click the banners folder. On the right side of the program you will see the banner templates. Double click the banner that you want to use.
Now you can customize your banner. Customize the banner the same way you did the poster. After you have customized the banner, you can save it or print it.


