
If you are trying to think of a unique Christmas gift to give to someone this year, why not coupons? Christmas coupons are great stocking stuffers and presents. This guide will show you how to create your own Christmas coupons in Adobe Illustrator.
DIY Christmas Coupons
DIY Christmas coupons are a great way to show your love at Christmas. With these coupons, you can use things like taking the trash out for your husband, or allowing the kids a free day from chores. There are many things that can be placed on these coupons, and you can create as many as you want in a book.
You can place the Christmas coupons in Christmas stockings, or place them in an envelope and give them to the person you made them for. Continue reading to get an idea of how to create Christmas coupons in Adobe Illustrator. If you do not have Illustrator, you can use other desktop publishing software programs . The steps are pretty much similar, except for borders and graphics.
Ideas for Creating the Christmas Coupons
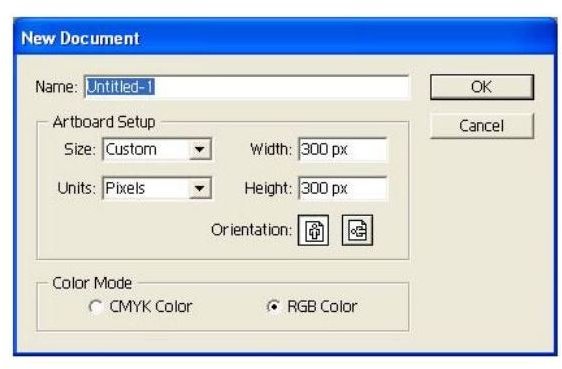
When creating these coupons for Christmas, you will first need to jot down the things you would like to put on them. So, sit down, think hard, and jot down your ideas. Next, you will load Illustrator and create a new document to work on. This document needs to be the size of your printer paper. You can get more than one coupon on each sheet. Next, select your rectangle tool from the toolbar and draw a rectangle on the canvas the size you want for the coupon. You can create the first one and then duplicate the others to keep you from having to create each one.
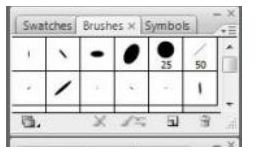
After you have your rectangle, you can open your borders and click a border to decorate the coupon. If you don’t have any borders that you want to use, you can download free Adobe Illustrator brushes. You can find these brushes by doing a search on the search engine you use. You will need to download, unzip, and install
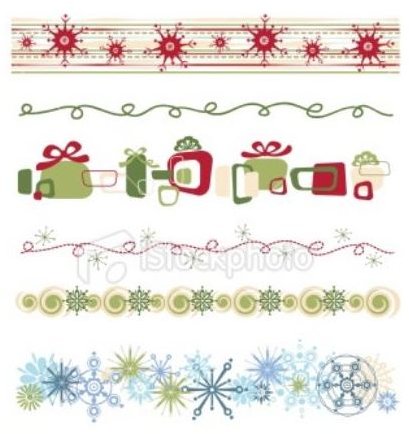
the brush. Then you can open it in Illustrator to use as a border.
If you want to use a graphic on each of the coupons, you can. Simply use the Import option and import the graphic you want to use. If you want to use a different graphic for each coupon, you probably should hold off on the graphic until you have all of the coupons duplicated.
You can go ahead and type all of the text on the coupon and edit it. When you duplicate it, you can simply edit the text. Change the text options to what you want. You can use different text options for the different sections on the coupon.
When you are ready to duplicate, you will need to select everything on the document by holding Shift while clicking with your mouse. Once everything is selected, you can right click and select the Duplicate option. When the coupon is duplicated, you will see it on top of the first one. Use your mouse to drag it below the first one. Continue duplicating until you have all of the coupons that will fit on one
page.
Now you can go back and edit the text on each one to change it to say what it is you are offering. You can also add a graphic to each one if you like. When you are finished, save it to your computer and print it.
Printing and Putting the Christmas Coupons Together
When your coupons are complete, you can print them from your computer. To put the coupons together, you can do a couple of different things. One option you have is simply stapling them together. Another option is to punch holes in one of the ends and use ribbons to bind the coupons together. You can use different types of ribbon like silk, plastic, and glitter varieties.