
Creating your own wedding program is fun and easy, and you’re going to love saving the money—so you can spend it elsewhere! Plus, what’s better than bestowing your own personal touch? You just can’t do that with a commercial product. If you’d like to know how to write a wedding program, read on.
Do You Know How to Write a Wedding Program?
When guests enter your wedding venue, they will be pleased to find an usher—or perhaps a younger relative or family friend who is
dying to play a role in the wedding—handing out programs. With a wedding program, all guests gain a way to identify the various people who are part of your wedding party.
If you’re wondering how to write a wedding program that’s beautiful but uncomplicated, look no further than Microsoft Word. You don’t have to be a genius to make a brochure, whether you want one that just opens like a booklet or a trifold. I like the trifold because it allows a total of six writing panels considering the front and back sides of the paper.
First, to figure out what you’re going to put on your brochure and where the various panels of copy will be in relation to one another, sketch your ideas onto a blank piece of paper. Fold the paper the way your brochure will fold and let your creativity have free reign. You’re making what’s known as a layout for your DIY wedding program.
First, Open Word:
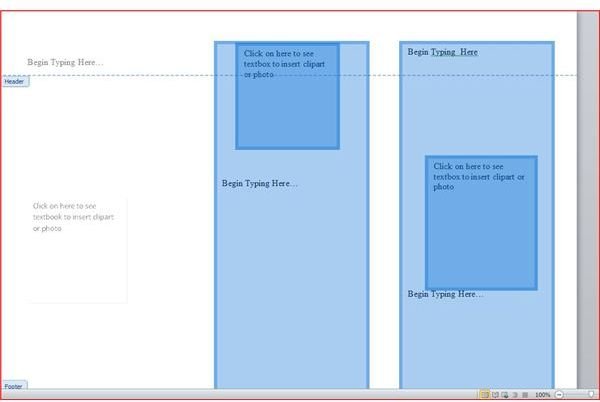
I like using Word when I make brochures because it’s so familiar. Open a blank page, go to Page Setup, and choose Landscape orientation. Then you can insert textboxes on it—two if you’re going for a booklet style brochure, and three equal textboxes if you’re making a trifold brochure. Format the textboxes (by right-clicking on the outline of each box) and choosing Format Textbox, then No Lines. The textboxes make it easy to position your text on each panel of the brochure. You’ll need to make one page and save it as the Front Side, and then save it again as the Back Side.
You can insert photos or clipart into the textboxes. If you can’t get them positioned just where you want them, insert smaller textboxes into the bigger ones, and then insert the artwork into the smaller boxes. Don’t forget to remove the lines! You can format the artwork to fit the boxes or change the size of the textboxes.
What Will You Write?
On the front panel, which will be on the right-hand side whether you use a booklet or trifold style, put your names plus the date, time, and location of your wedding. Decide whether you want a photo of yourselves or some clipart on the front. Center your text and choose a great font . If you click on the screenshot, you’ll see a sample of the one I created.

Remember that you’ll have six panels, three on the front and three on the back. Decide whether you want to devote one or two panels to the names of your wedding party; format a textbox to cover two panels if you’re doing it like the sample to the right. Refer to your sketch to see where this will end up in the folded final product. In my example, I’ve begun with the grandparents and worked my way down to the flower girl.
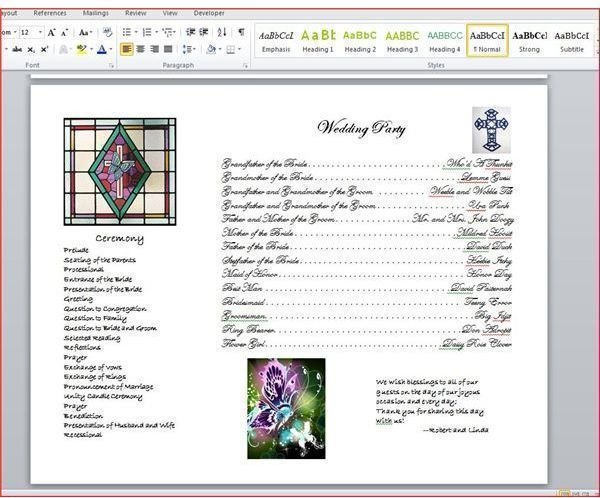
Use another panel to list all the different “parts” of your actual ceremony. Some people simply choose to list these events in order, true program style (see the left side of the screenshot at above right):
- Prelude
- Seating of the parents
- Processional
- Selected reading (or readings)
- Reflections
- Prayer
- Exchange of vows
- Pronouncement of marriage
- Unity candle ceremony
- Prayer
- Benediction
- Presentation of husband and wife
- Recessional
Identify Your Music and Readings
You can also opt to expand this area by identifying the music you’ve chosen for the Prelude, the Processional, and the Recessional. It’s also nice to list psalms, hymns, or special readings that make up your ceremony; people like to know those things.
Expand on this by identifying all your major musical selections in the wedding program. At the reception, people will watch the bridal couple’s first dance, the father/bride dance, the mother/groom dance, and the parents dance. Name the songs and the artists. All this information makes your wedding program into a true souvenir.
A few other options you might want to consider are:
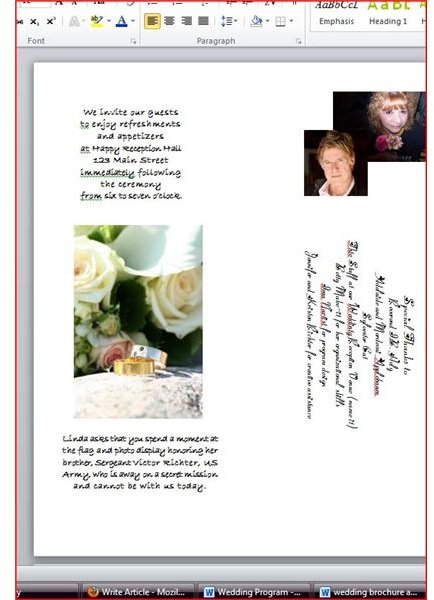
- Mention of a family member who cannot be present or someone special who has passed away.
- A reminder of when and where the reception begins, and the time for the cocktail hour as well as the dinner if you are having both.
- If your wedding has a special theme , explain why it’s meaningful to the two of you.
- Write a few words to your guests, expressing your gratitude that they are celebrating your wedding with you.
- Include a romantic verse that holds special meaning for the two of you.
- Devote some of your space to thanking the officiant, the caterer, the wedding planner, and other people who have helped you: The relatives who assisted with wedding favors or decorated chairs will appreciate a public mention, as will anyone who gives a reading or sings at your wedding.
Figuring out how to write your wedding program is pretty easy. It’s not that difficult to work with Word. Just remember you can size the textboxes to suit your wording or to help position photos as necessary. Use a paper punch to make a small hold in the upper left-hand corner of the front panel, and tie a ribbon through it.
Screenshots created by the author featuring
Microsoft Word clipart
floral picture on last screenshot from sxc.hu, wedding rings by Pinnie
drawing of bridal couple on page 1 from sxc.hu, wedding couple by Cookie 3076
Fonts used include Edwardian Script, Fiolex Girls, and Bradley Hand II.
Robert Redford’s photo used entirely without his permission.


