By learning how to create feathered edges in Inkscape you can add to your skill inventory and improve the quality and diversity of your work. Here, in just a few simple steps, you will learn how to feather edges in Inkscape.
Overview
By feathering the edges of an image, you cause them to fade into the background, resulting in a touch of elegance for your creations. This Inkscape tutorial will take you through the step by step process of feathering edges in Inkscape while illustrating important steps with screen shots.
This tutorial uses Inkscape version .48 for Windows, which is the latest production version at the time of this writing. Although you may have a version of Inkscape that is different than the one used here, you should still be able to follow along as you learn how to feather edges in Inkscape. If you do not have Inkscape installed on your system, you may install it via a free download .
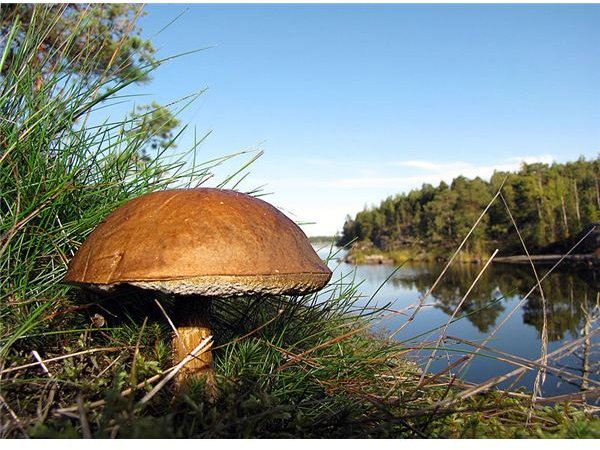
As part of this demonstration, this tutorial will create feathered edges for the following image.
The key to learning how to create feathered edges in Inkscape is to understand that, unlike Photoshop, the current version of Inkscape does not have any built-in funtcion for the effect. This means that we will have to emulate the feature the best we can using gradients and a mask.
Image Credit: Wikimedia Commons/Petritap
Creating the Feathered Edge Effect
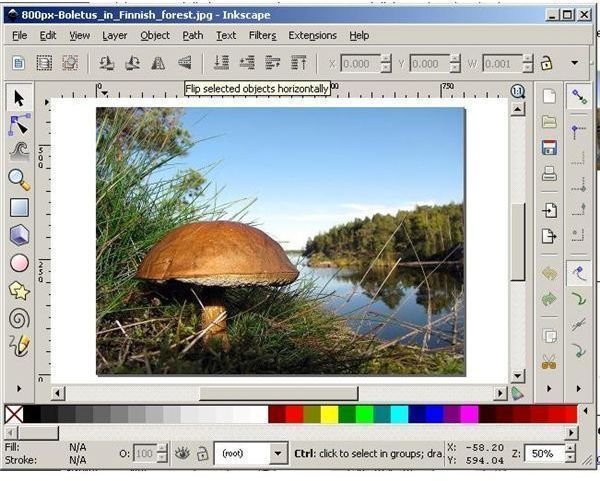
Begin by opening your image into Inkscape . Create a layer and fill it with a black rectangle to serve as the underlying background.
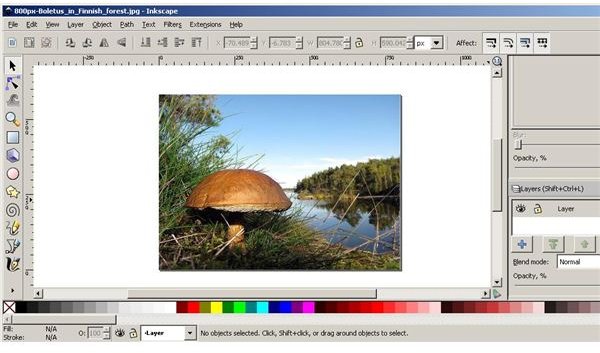
Next, cut the image and paste it into a new layer. You can open the “Layers” palette by simultaneously pressing the
Next, create a new layer and draw a white rectangle shape for use as its background.
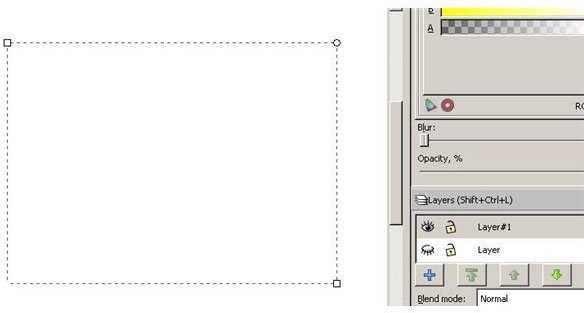
Now, grab the gradient tool from the toolbox and apply a radial gradient to the white layer. Use the handles to spread it through the entire rectangle. You will notice that you can use the gradient tools to adjust the opacity and blur of your gradient as desired.
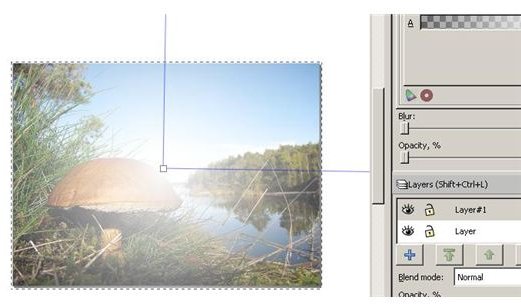
Now, select both layers and then click “Object” from the main menu and then “Mask” and then “Set.”
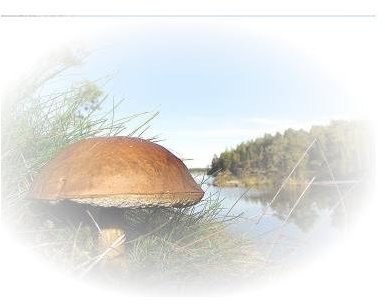
You now have an image with feathered edges. You can change the appearance of your final result by experimenting with gradient and color variations as well as with the settings for opacity and blur as they pertain to the gradient.
Wrapping Up
In this Inkscape tutorial, you learned how to feather edges in Inkscape, even though the feathered edge feature is not part of the Inkscape platform. Now that you have mastered this technique, you can make it part of your knowledge toolbox to add creative options to the work you perform on a daily basis. Try this procedure yourself and try variations: you’ll be glad you did.


