
With the new ribbon interface found in MS Publisher 2010, many often-used commands have changed location. This tutorial shows how to access the Set Transparent Color tool so that you can easily remove the background color of an image inserted into a Publisher document.
Same Command - New Location
Although many of the applications in the Office 2007 suite switched over to using the new ribbon interface, Publisher 2007 still retained the traditional menu format. However, with the release of Office 2010, the interface of Publisher 2010 has seen a complete overhaul, and it too is now sporting the infamous ribbon. With this change, many commands have changed locations, including the one used to set the transparent color for the background of an image.
If you’re still using Publisher 2007, you can find instructions for removing the background color of an image at the following link: How to Give an Image a Transparent Background in Publisher 2007 . If you’ve moved on to Publisher 2010, keep reading into the next section.
Basically, the tool used to perform this function in Publisher 2010 is the same as the one used in Publisher 2007 – it’s just not located on the Picture Toolbar anymore. Instead, you’ll find it on the Format tab of the ribbon.
Setting Transparent Color in Publisher 2010
Once you have an image inserted into a Publisher 2010 document, you can make the background color of that image transparent by following these steps.
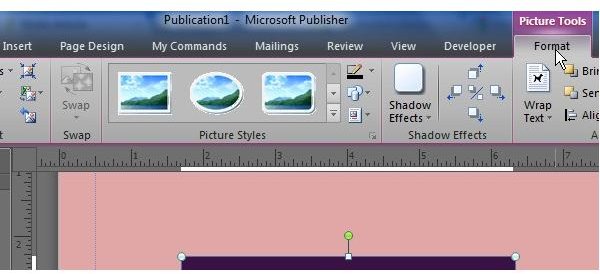
Step 1: Click on the image to select it. This will cause a new tab to appear on the ribbon: Format. It will be located in the Picture Tools section as shown below. Click on this new tab.
Note: Click any image in this tutorial for a larger view.
You’ll find quite a few commands for editing your image on this tab, but for now, we’re only interested in one – the one that will let you get rid of the background color for the picture so that it will blend into your document better.
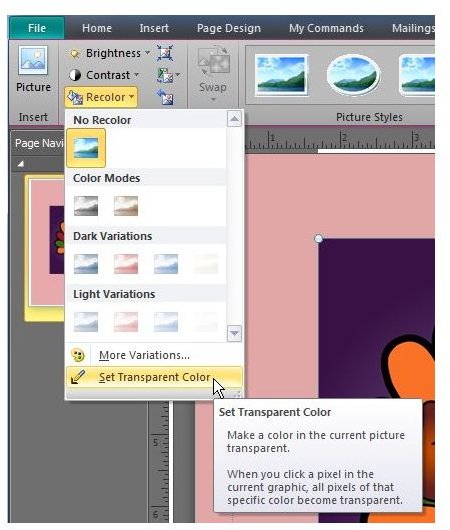
Step 2: Click on Recolor in the Adjust grouping on this tab. This will open up a new menu of options. From this menu, select Set Transparent Color. This selection is located at the end of the list, as shown in the figure below.

Step 3: Now, use the tool like you would in any previous version of Publisher. Simply click on the background color that you would like to remove and that area of the image will become transparent.
Adding Shortcuts
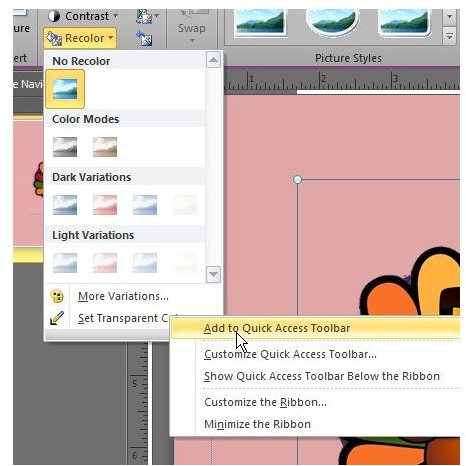
If you use the Set Transparent Color tool often, you may want to consider customizing either the Quick Access toolbar or creating a personal tab on the Publisher ribbon that includes this command. To add the command to the Quick Access toolbar, access the command as above, right-click on it, and select the Add the Quick Access Toolbar option.
For more details on how to customize the ribbon to include your favorite commands, see Ribbon Customization Options in Office 2010 .
References
- All screenshots taken by author.
- Microsoft Publisher Official Site, http://office.microsoft.com/en-us/publisher/


