Scanners are used to convert photos and other images into digital image files. Unfortunately, there are some problems which can occur if you aren’t used to working with a scanner. Scanning isn’t hard, provided you take the time to learn a few tips for achieving better quality scans.
How Scanning Works
A scanner uses a light combined with light-sensitive sensors to create a digital copy of physical photos, drawings, and other documents and images. The light bar of the scanner moves to reflect light off the picture or item being scanned, and the light that is reflected is picked up by the sensors mounted on the light bar. While scanning is a fairly simple process, problems sometimes arise with the resulting scans. These problems are generally easy to prevent, resulting in high quality scanning for beginners and pros alike.
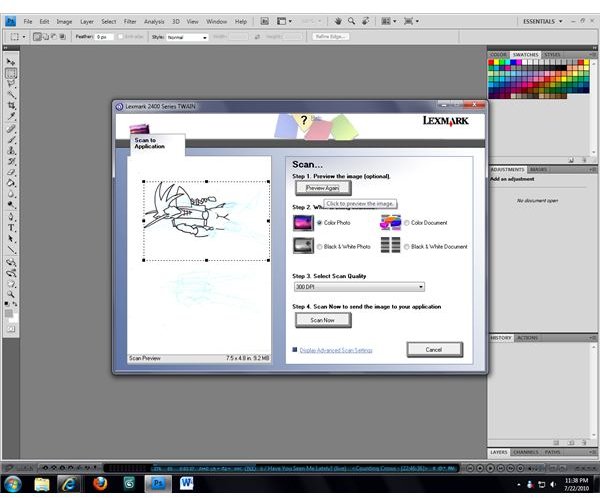
Previewing a Scan
One thing that can significantly improve the quality of scanning is the use of scan previews. Before scanning a photo or other picture into the graphics program you are using, use the preview function to get an idea of what the final scan will look like.
When you open the scanning dialog page from your graphics program you should see an option to preview the scan. Clicking this will run the scanner through its initial scanning cycle, but the image won’t be fully converted for editing; you’ll just get to see a preview of the image within the dialog page.
This will not only give you an opportunity to correct placement issues or other problems that can cause a bad scan, but it will also give you a chance to crop the image or make other adjustments before it has been scanned.
Cleaning the Scanner
When the scanner’s glass gets dirty, particles will be visible in the final scan. Before scanning, examine the glass panel for obvious signs of dust or other potential obstructions such as hair or fingerprints. Use a glass cleaner to clean the scanner glass, spraying the cleaner onto a clean cotton cloth, then wiping the glass instead of spraying it directly onto the scanner glass itself.
Make sure that you don’t leave any streaks on the scanner glass after cleaning, as they can show up on your scanned images as well; use a non-streak glass cleaner or wipe the glass with a dry cloth after cleaning to avoid streaking.
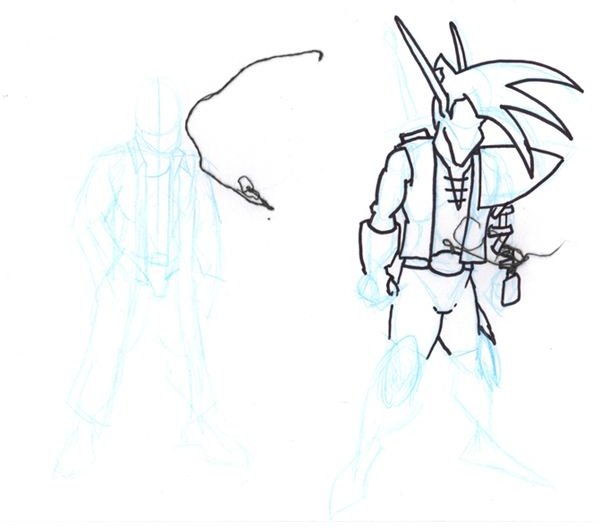
Using Non-Photo Blue Pencils
As pencil marks don’t always show up well in scanned images, it is recommended that you use pencils for sketching and then use ink or markers to prepare drawings for scanning. Unfortunately, some of the pencil marks you’ve created may show up in the scanned image if you used a standard pencil. Erasers may not remove all of the pencil marks and can damage the paper as well in some cases.
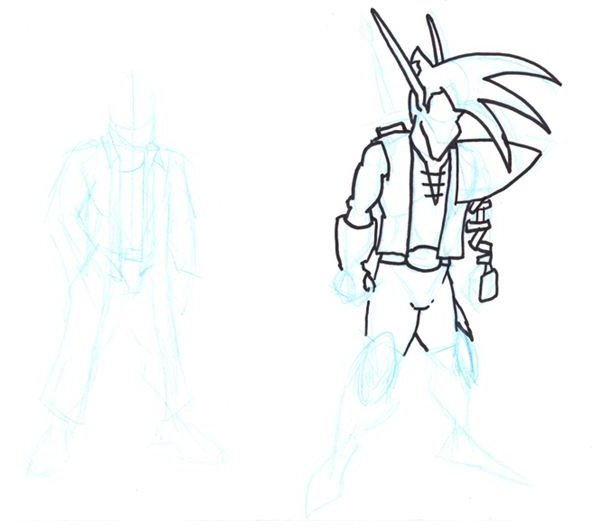
To eliminate this problem, buy non-photo blue pencils; these light blue pencils are designed in a shade that black-and-white scans won’t pick up. Make all of your sketches in non-photo blue, then use a black pen or marker as you normally would.
Scan your drawing in black and white (generally referred to as a “monochrome” or “black-and-white line drawing” setting in most graphics programs). Your black ink or marker drawing will scan perfectly, and the blue sketch lines you created won’t show up.
Image Credit: All images by J. Edward Casteele, used with permission.


