If you’ve ever wondered how to unpack, install, import, and use Photoshop Action files, this beginners tutorial is for you. This tutorial will walk you through the process of downloading and installing the Action files, and then show you how to use them.
Photoshop Actions: What Are They, Anyway?
Photoshop Actions are essentially a series of recorded steps done in a process. When someone creates an action, they go through a process of steps to achieve a desired effect in Photoshop. When played back, the program will go down the list of steps in the Action file and enter in the saved settings one by one with little to no user input.
This can make repetitive processes such as resizing a lot of images very quick. It can also make long processes - such as adding certain multi-step image effects to photos - very quick. What used to take 15 minutes or longer now can be boiled down to 15 seconds or less. This beginner’s tutorial will teach you how to use Photoshop actions, as well as downloading and installing them. This tutorial used Adobe Photoshop CS4, but will easily work for anything from Photoshop 6.0 and up.
Downloading and Installing Actions
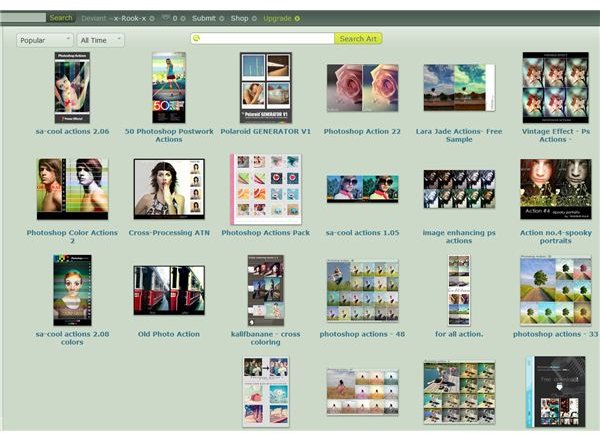
First, you need to find somewhere that has a Photoshop Action that you would like to use. There are hundreds of places on the internet that you can go to download free Photoshop action files. I personally prefer deviantART.com as a lot of very professional artists provide resources for free there. A quick Google search will yield hundreds of great results, though.
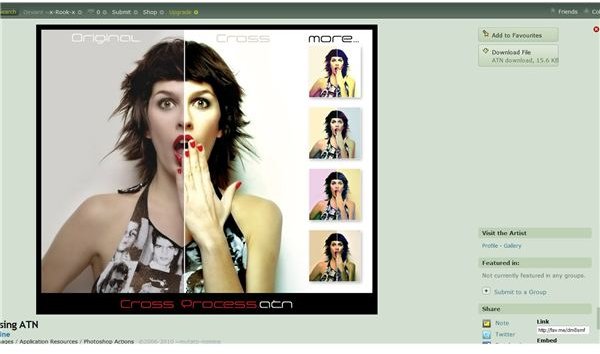
Here I’ve found a pretty cool looking Photoshop action file that will take a regular photograph and make it have that nifty cross-processed effect that everyone seems to really dig.
Download the Action file. If the file is an .ATN file, you can skip to the step below. If the file is a .ZIP or a .RAR file, you’ve got to unpack the files. Here’s a helpful article on how to unpack .RAR files.
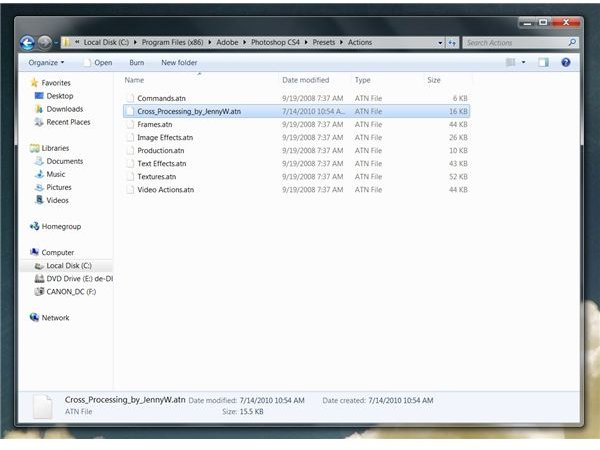
Once you have an .ATN file (or possibly several) open the folder that contains Photoshop. This typically looks something like this:
C:\Program Files (x86)\Adobe\Photoshop CS4
Inside the Photoshop folder, there will be some subfolders. Now it is your job to go into the folder Presets and then the folder Actions.
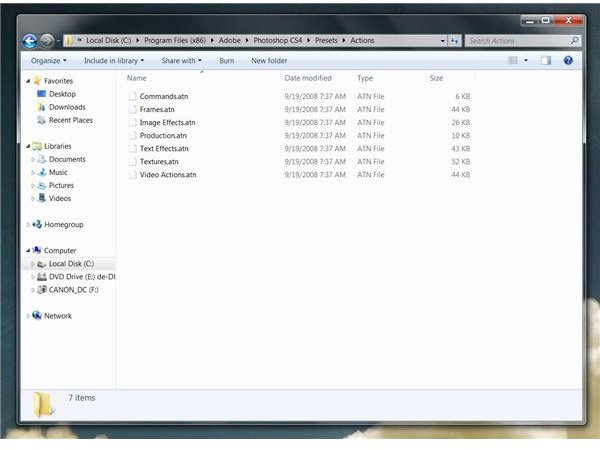
When you have done this, click and drag your Action file into the folder, and you’re done!
Importing and Using Photoshop Actions
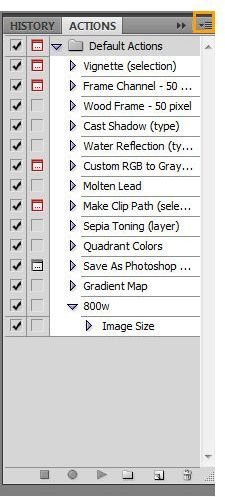
Go ahead and open Photoshop, and take a look at the Actions window. If it isn’t open by default, simply go to Window in the top menu and click “window.” Now, pay attention to the little box that has an arrow pointing downward and a list next to it (highlighted in orange in this image).
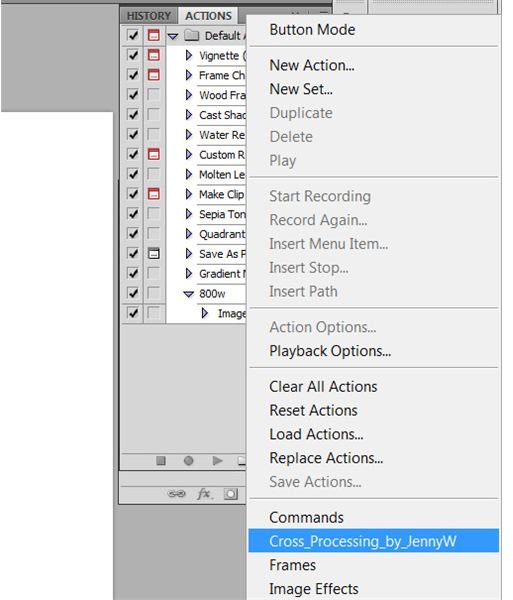
Click the button that I’d highlighted in orange in your Actions Window. Look to the bottom of the list. There should be the name of your downloaded Action in the list. If there is not, simply go to “Load Action…” and select it from the folder you downloaded to earlier.
Now, open an image you would like to test the effect on, Here I’ll just use a picture of myself for convenience’s sake.
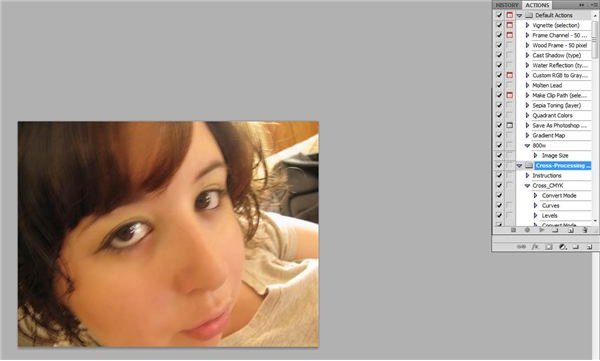
Find the beginning of your Action. Normally you have to expand the Action by clicking on the title of it. Click your starting step to highlight it. Now all that is left to do is press play at the bottom of the Action window!
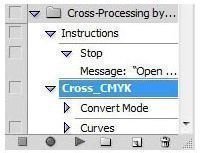
Along the way, the program might stop and ask you for input. Carefully read what they are asking you, and then follow the instructions. When it’s finished, you’ve successfully used a Photoshop Action.

Credits
This tutorial uses screenshots from Adobe Photoshop CS4 and is intended for educational purposes only. The Photoshop Action used was Cross Processing ATN by mutato-nomine on deviantART. Thank you for making such a great Action available for public use!


