
Want to learn how to shade objects in Photoshop? Well it’s quite a simple process. You may find that you choose to shade projects for different design objectives, and Photoshop will help you save time on doing just that.
Shading Shapes
Let’s say you are trying to shade an object or line art for a comic book . We can use a circle for example. The circular shape lends itself to a quick shading technique. Import the circle and let’s prepare to shade.
Click any image in this tutorial for a larger view.
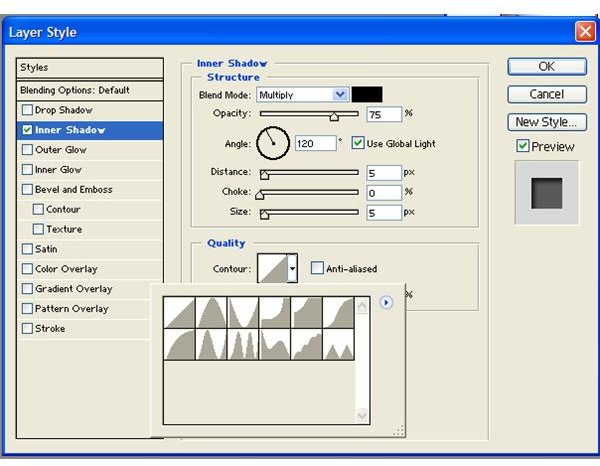
Photoshop Inner Shadow

Go to “Layers” and select “Inner Shadow”. Move the slider to cover the shape to 90 pixels . You can also change the opacity of the shadow by sliding the “Opacity” slider to the left or right. Slide the “Distance” slider to 40 pixels.
If you click on “Quality” and select the drop down menu you will notice that you can change the contour or the manner in which the shadow falls on the circular object.
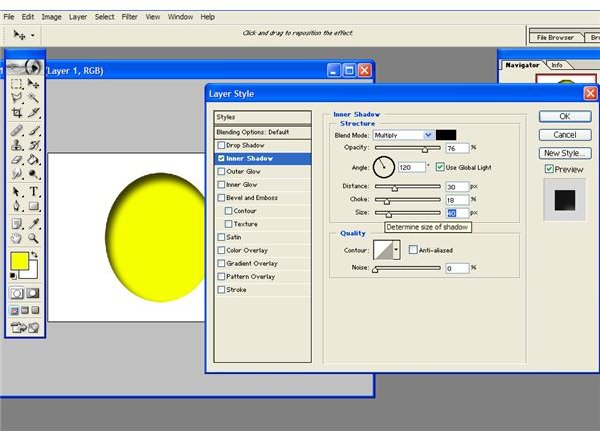
Once you are satisfied with the direction that the shadow is falling on the ball, then we can apply the shadow to the ball.
Another Photoshop Shading Technique
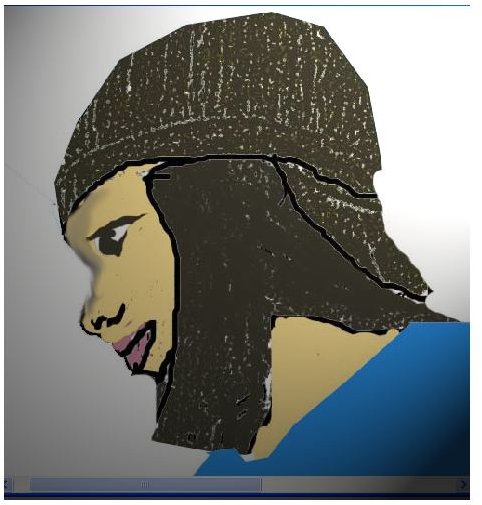
Now let’s try to apply a shadow to a line drawing , using a different technique. We want to start with a portrait line drawing of a face and clothes, so that we have a base to cast the shadow upon. Start by opening up your portrait in Photoshop. Then select the magic wand tool and click on the face.
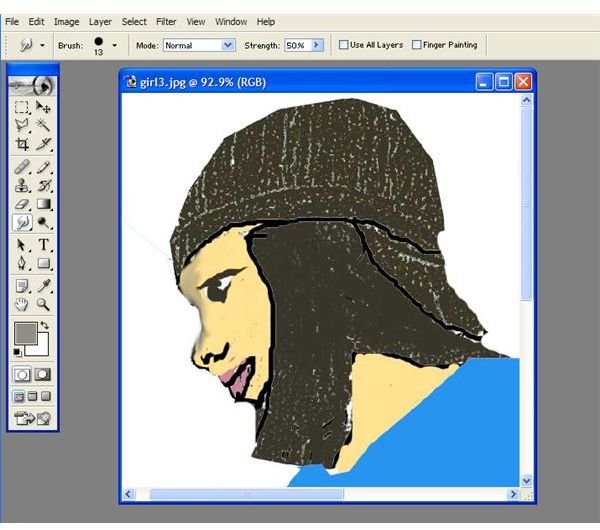
In the tolerance field, type “25 pixels”. This will allow you to select most of the face. In order to select more of the face, hold down the “Shift” key and click on the face with the magic wand. You will notice that your selection will expand, giving you more of a selection of the face. Now click on the “Paint Bucket” tool on the tool bar, and select the foreground color. This will open up a dialog box and color palette. With the “Eye Dropper” tool select the color that you want to use for the face and click “OK”.
Now we have a face color. Repeat the same step for the hair and clothes, then once you have established your character’s color. Now it’s time to apply some shading. Select the magic wand and click on the face. Let’s use the “Filter” menu. Go down to Render > Lighting Effect. You will have a number of different lighting options to choose from. Lighting gives the effect of shading. When you select “Lighting Effects”, a dialog box will open. Slide the “Intensity” slider over to “35 Full “and slide the “Focus” slider to “69 Full”. Notice there is an oval to the left with your picture preview.
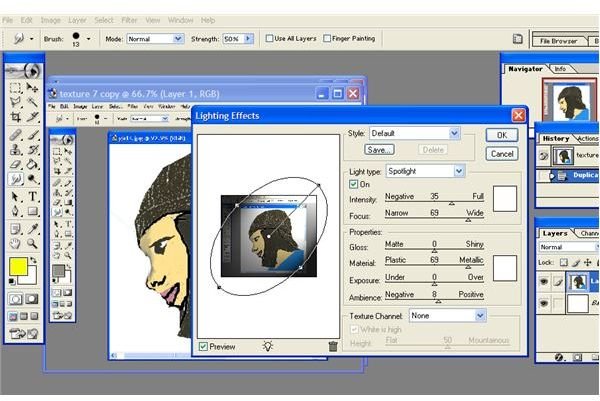
Click on the “Control” points to rotate the circle around and point the lighting in the direction of your choice. This will give you a “Shade Spotlight” effect. You can experiment with different lighting effects to give you the illusion of shadowing. Here is an example of the “Five Lights Down” effect on the same portrait. If you are really the traditional type, then you may want to try shading your line art with the Photoshop tools. This gives you a lot more control over the area that you would like to shade. If you have a detailed piece, you can use the “Smudge” tool to shade.
Take your line drawing and go to the “Tool” bar and select the “Smudge” tool to shade. Go to the outer edge of the line of the nose. Beginning from the top nose bridge start a sweeping motion from left to right. You will notice the line softening and beginning to look very smudged. We are assuming that the light is coming from the right. The image should look like the one below.
There you have it, three shading techniques in Photoshop. You are now equipped with adding that extra dimension to all of your design projects.


