Have you ever tried to find the perfect icon to use for your graphic design project, but something just wasn’t right? Maybe it was the size, the color, or the icon itself? Well, if you happen to be a graphic artist, or have access to Photoshop, why not create Photoshop icons?
When you as a graphic designer are asked to provide an icon to represent yourself on a social networking site or as a screen avatar for a business meeting, where is the first place you look? Possibly you will search online and go to the various royalty free galleries or other image sharing sites online, to grab an icon that represents you or your freelance company. But the disadvantages to this are that you may face a copyright or infringement issue, by grabbing icons from most of the image galleries online. Another reason is that time is also a factor. Who wants to spend hours searching for that perfect icon that is the right color and size for your representational needs? Why not begin to create your own icon library with Photoshop?
Photoshop is a powerful program that will allow you to create icons from scratch. It’s probably best to start with some common icons that you may use on a day to day basis. The smiley face is a common icon that is used in emails, social networking sites, and even on blogs and forums. So let’s start with that tutorial.
The following tools from the photoshop toolbar will be used to create this icon. The lasso tool, move tool, magic wand and paint bucket.
How to create a smiley face icon in Photoshop
1. Document
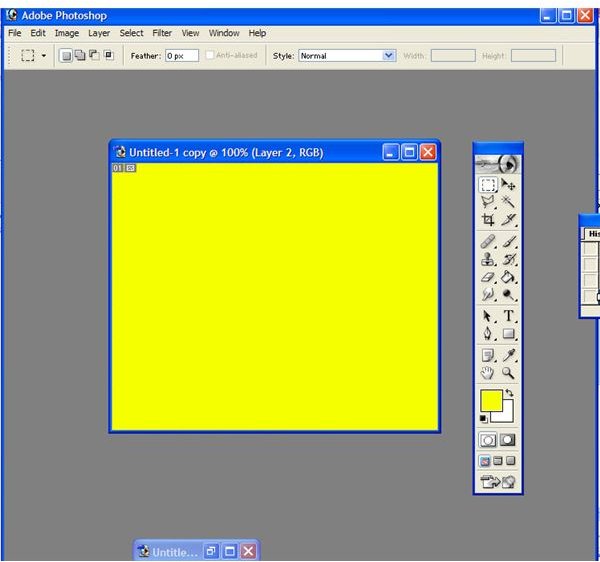
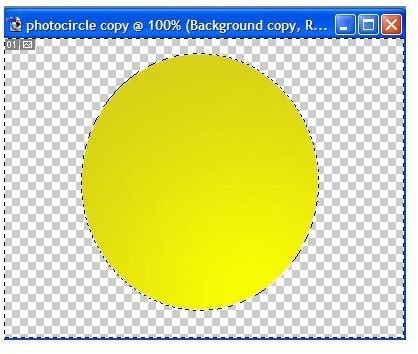
Begin by creating a new document. Start with a small document size of 200 px width by 200 px length. Now we want to create our initial circle. Click on the paint bucket tool and fill your canvas with yellow paint:
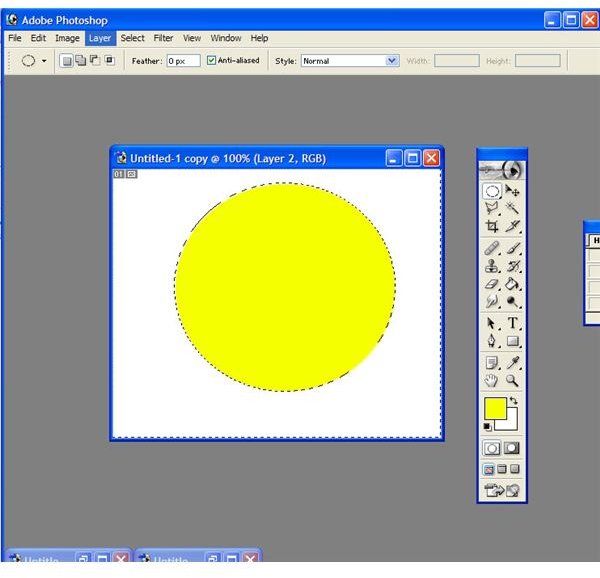
Now click on Circle Marquee took in Photoshop and Add a New Layer to your canvas. Once the circle Marquee tool is over the yellow background go to Select>Inverse. The outside of the the circle should be selected. Go to Layers> Merge Visible Layers.

Now hit Delete on your keyboard, and you should have a circle like the one below.
Now we want to add a simple gradient to the background. In the layers palette, right click the layer you are working on and go to Blending Options, then apply these settings: Bevel and Emboss and Gradient Overlay.
Applying those two layer styles will leave your circle looking like this:
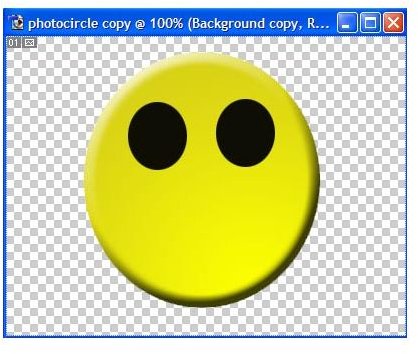
Now we want to delete the background. Select the entire area with the magic wand tool around the face, and inside the eyes and mouth. Now press delete on your keyboard to remove the selected white area. You should be left with this:
2. Face
Let’s add in the eyes. Add a new layer by right clicking on the face and choosing, Add a New Layer. This layer we will name Eyes. Use the circular marquee tool to create the one eye on the right. Click the paint bucket tool to fill in the circle with black. Duplicate this layer by right clicking and selecting Duplicate layer. Now use the move tool to move the eye in the proper place. You will have to click on the appropriate layer to move each eye.
3. Mouth
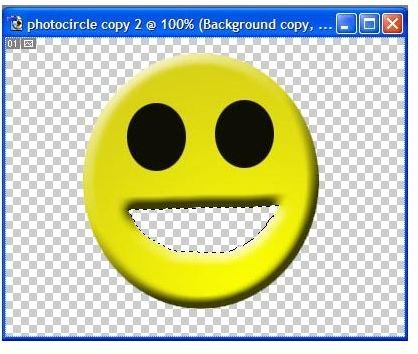
Time to add in the mouth for our character. Start by drawing a half moon shape with the lasso tool on a new layer. You will get something similar to the image below. Next, delete the inside of the mouth so that there is a space in the middle.
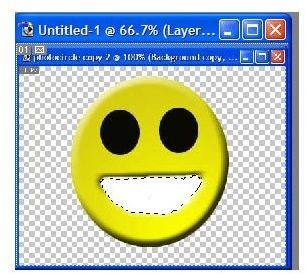
There you have it, the finished smiley face. This smiley face tutorial can be used to expand on other icon design concepts.