Text Wrap is a key element in page layout and design. Learn the five basic Text Wrap settings in InDesign, what they look like, and how they work. If you’re migrating to InDesign from Quark, you’ll learn what happened to Runaround and where exactly to find that pesky Text Wrap palette.
When I made the switch from Quark to InDesign, those first hours were full of the glaring differences. I have to hold down *which* keys again to resize an image while resizing the frame? Why can’t I edit master page items in my document? Those were minor issues, in retrospect, because next I was ready to throw in the towel. Where is Runaround?
By all rights, Runaround (Quark’s name for Text Wrap) should be in the Paragraph palette, since it was in the Paragraph window in Quark. Of course, it was not there. I scoured the menus, fired up Adobe InDesign Help and searched for “Runaround.” No dice.
A coworker finally took pity on me and showed me where it was. Under the Window menu, in the Type & Tables submenu. Oh. Obviously.
On the bright side, in CS3 and up, Text Wrap gets its own spot in the Window menu. Which is as it should be, because Text Wrap is a feature that deserves to be front and center.
What is Text Wrap?
Whenever you want text to go around something else, that’s text wrap. While there is a time and a place for drawing specially-shaped frames (I still want to call them text boxes) to force your text to flow a certain way, most times this can be accomplished through settings in the Text Wrap dialog. Read on to learn how to use Text Wrap in InDesign
Learn Text Wrap’s Five Basic Settings
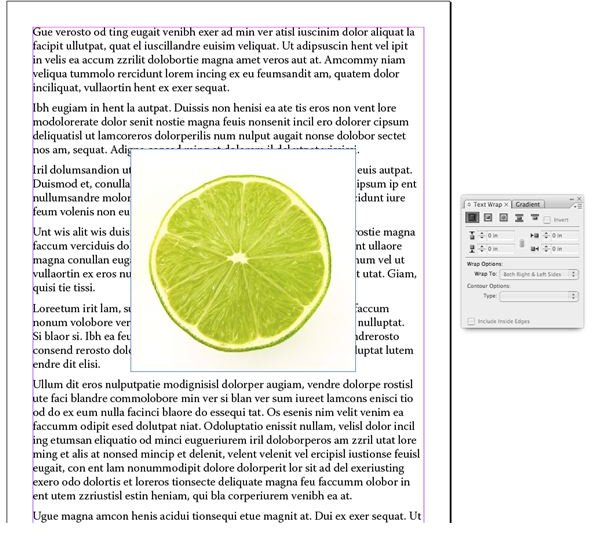
Take a look at the Text Wrap palette. You’ve got five basic settings. From left to right they are:
1. No wrap. This is the default. Text will flow behind the object. If the frame has a background color, the text won’t be visible behind the object.
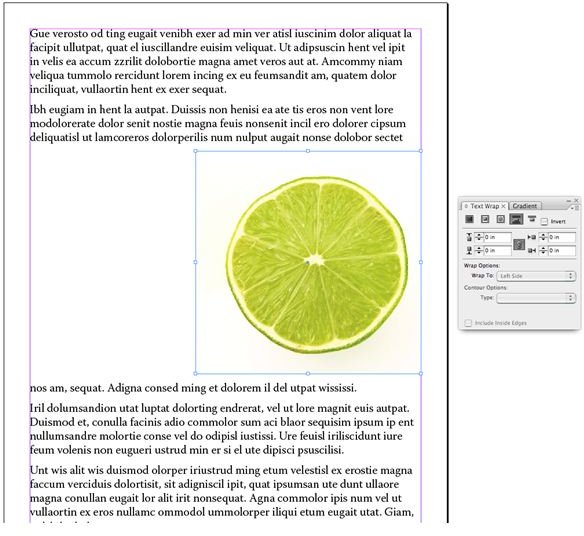
2. Bounding Box. Text will flow around the frame that the object is in.

3. Shape. Text will flow around the edges of the object itself. You can select how InDesign selects the edges under Counter Options in the Text Wrap panel. Detect Edges is InDesign’s internal method, where it attempts to find the edges of highest contrast. Another common method of defining object edges for InDesign is with clipping paths made in Photoshop, which InDesign recognizes.
4. Jump Object. Text will flow above and below the object’s frame boundaries, and not to either side at all.
5. Next Column. Text will be forced to the start of the next column or page once it meets the object. This is similar to hitting the “enter” key on your numpad in order to force text to the next column or page, but in this case you’re telling the object to function in that capacity.

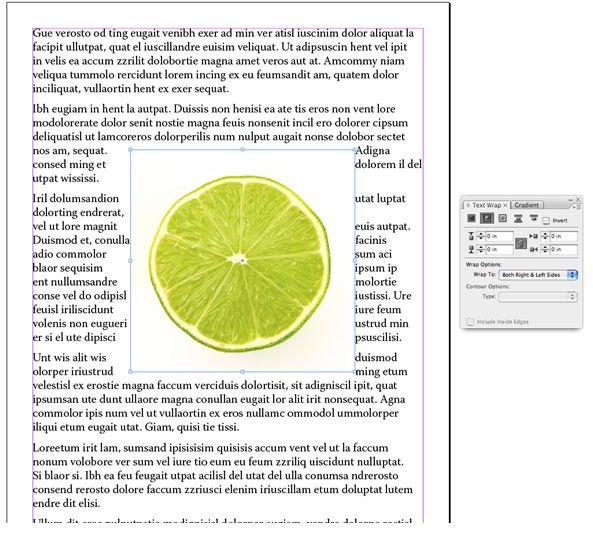
Sometimes when you’ve wrapped text around an object, the text butts up too close to the object for comfort. In these cases, you want to give your object a little breathing room. This is adjusted in the Text Wrap palette similar to how you adjust paragraph spacing. In the image here, I’ve added 1/8" space around the object, which has pushed the type out from the bounding box. The 1/8" shows as a lighter blue border around the object’s frame.
Whether you’re new to InDesign, new to layout, or making the switch from Quark to InDesign, knowing how to use Text Wrap is an invaluable tool in your designer’s arsenal. I hope this short tutorial has been somewhat enlightening. Feel free to contact me with questions.


