In Part 2 of this tutorial on making a pep rally flyer in Microsoft Publisher, we take a look at making modifications to the flyer template in order to customize it for your event.
This article is Part 2 of a two-part series. To read the article from the beginning, go to Part 1 (https://www.brighthub.com/multimedia/publishing/articles/5756.aspx ).
Modifying the Flyer Template
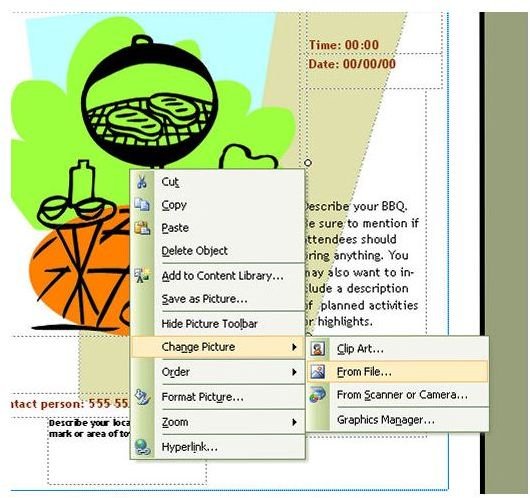
The first modification that we want to make here is to substitute the image for one that is more suitable for our flyer. To replace this with an image that is already stored someplace on your hard drive, right-click on the current image, select Change Picture and then From File. See the screenshot depicted in Figure 1.
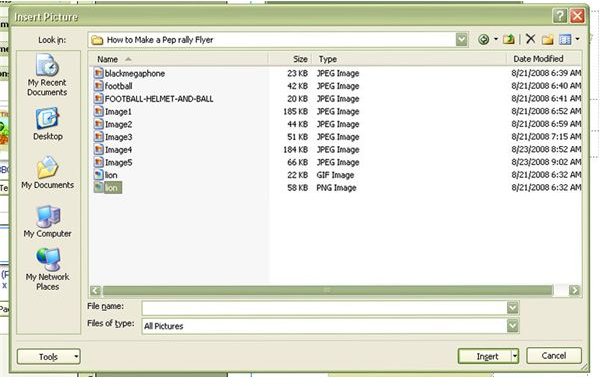
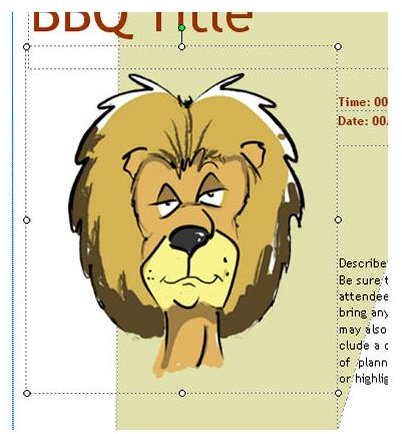
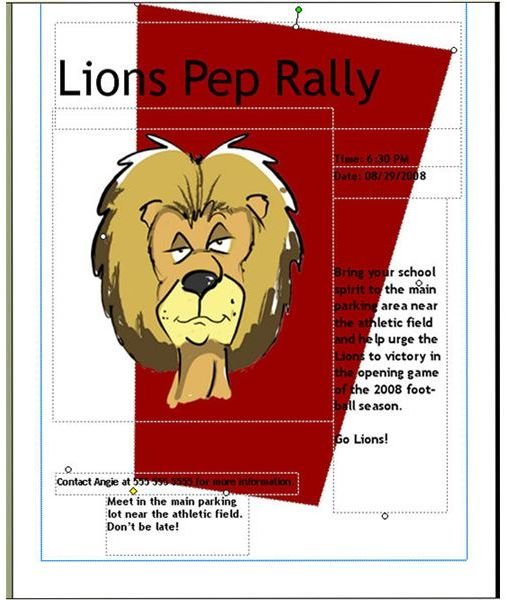
The Insert Picture dialog box will now appear on your screen. Navigate to the directory that contains your image. We’ll replace the picture in the template with one of our mascot, a lion. Select the image and then click Insert to continue (Figure 2). The picture we chose will now replace the one that was part of the original template (Figure 3).
Next, we need to make some modifications to the text in the flyer to reflect our own event. If you haven’t done this before or if you just need a refresher course, take a look at Microsoft Publisher Tutorials: Modifying Text . We’ll go ahead and add in the information about the pep rally and change the color of all of the text to black. Take a look at the screenshot in Figure 4 to see the result of these changes.
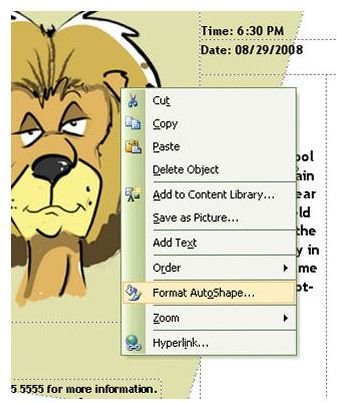
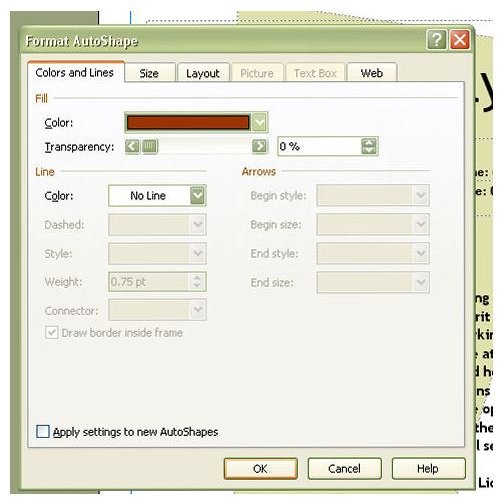
To add a little more color to the pep rally flyer, let’s make some changes to the polygonal object in the background. Right-click on the object and choose Format AutoShape (Figure 5). In the Format AutoShape box that appears, pick the tab for Colors and Lines. In the Fill section, choose a shade of red from the Color dropdown box (Figure 6).
With this last modification, our basic pep rally flyer is done. Take a look at the screenshot in Figure 7 to see all of the changes that have been made. You can also download this file from the Desktop Publishing Media Gallery for your own personal use. From here, you can insert some additional images, extra text, or more detailed directions to the event to further personalize the flyer if you choose.
Screenshots