In this tutorial, we will take a look at how to create a new document. This is the first thing you will want to learn when getting stared with Illustrator. After you create your first document, you can begin creating graphics and other things in Illustrator.
Illustrator New Document
If you are new to using Adobe Illustrator, the first thing that you will need to know how to do is create a new document. A document is the place in Illustrator where you will create your graphics, text, or whatever you want to create. This is also known as a workspace. Some people also refer to it as a canvas. Either way, it is all the same. It is the part that you use to draw on. In this tutorial you will learn how to create the new document and what the different fields are. This is a beginner’s tutorial to creating a document in Adobe Illustrator.
Creating Your New Document in Adobe Illustrator
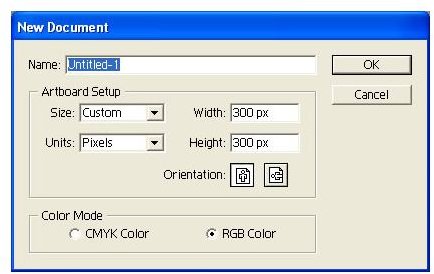
Go ahead and open your Adobe Illustrator program. After the program loads, you will see the tool boxes on the right and your main toolbox on the left. Go to the top of your window where the links are and click File > New. You can also press CTRL N on your keyboard to open the new document box. You should be seeing the following box.
The first field is the title field. In this field you can enter the title of the new document that you are going to be working on. You can leave this as it is or you can enter a name. If you enter a name in this field, this will be the name of your document when you save it. If you need to change the name when you save it, you can. Next, we will take a look at the Setup section. See the image below.
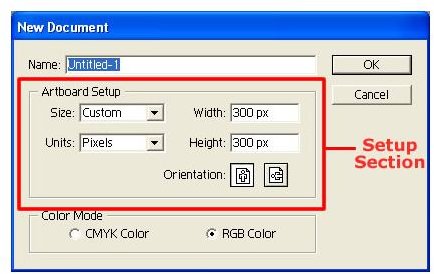
Let’s take a look at the size field first. You can click the box to drop it down. You will notice the different sizes that are available. If you want to use a preset size, select the size from this box. If you decide to use a preset size, you will not need to change anything else in the Setup Section.
You can create your own size document by dropping the Units box down and selecting the unit that you want to use. Then enter the
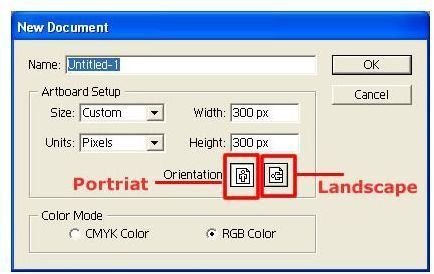
width and height in the width and height fields. The next two fields are the Orientation fields. The easiest way to explain these two fields is by using the printer as an example. When you choose to print something, you can choose landscape view or portrait view. This is what the orientation is. The little man standing up is the portrait view and the man that is sideways is the landscape view. So tick the field of your choice.
The last section is the Color Mode section. Most graphics are created using RGB. So tick the RGB field. Now you can click the OK button to create your new document to work on. Your new document will open in your Adobe Illustrator window.
Image Credits
Screenshots were taken by the author for educational purposes only.


