Want your ice to pop out more from your photograph? Well, Photoshop makes this easy. In Photoshop Elements, how to enhance ice is easily done with this tutorial.
Adding Textures
Adobe Photoshop Elements is basically Photoshop light. It allows you to add effects to your photographs and enhance the look of them, without paying the big bucks that the standard Photoshop version demands. As of 2010, Adobe Photoshop Elements costs about $100. But, back to what Photoshop Elements can add to your photos, including adding texture to your photographs. In this tutorial on Photoshop Elements , learn how to enhance ice.
The best way to enhance the look of ice is by adding texture to your photograph. This is done by overlaying your current photograph with another image or just a solid color. For example, with the ice, you could overlay the ice in the original picture with a blue, solid color, or just another shot of the ice. This will make it more prominent. You will, however, have to blend the two images so that it looks better.
Editing an Image in Photoshop
Now, it’s time to start making the changes. Open up your photo, and make any changes that you want first. For example, go ahead and crop out any bad sections or brighten it if it’s too dark. Then, save your changes.
Next, you want to open up the image that you are using for the texture. You should have two images open: your main image and the texture image. If you have Adobe Photoshop CS4 or later, you should be able to just select the text and drag it onto your main image. Once it shows up on the main image, release it.
Resize the texture until it is just over the section that you want to add texture to. In this case, just put it over the ice. To resize it, use the command or control plus T option.
Blending Layers
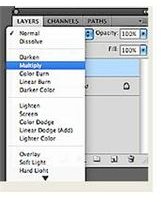
After you are done resizing the image, go to the Layers palette in the lower right-hand corner of your screen. Click on Layers, and this will bring up the dropdown menu. Select Multiply. This will create a multi-layered image, and start blending the two images together. But, you will probably want to blend these two images further since the texture image will be very visible at this stage.
Now, use the Overlay option. This will undoubtedly make your image too bright. So, you need to change the image opacity . To do this, make a copy of your original image, which will be the background image. Then, move the texture layer between the two copies.
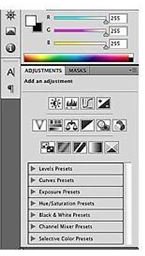
To actually change the opacity of a layer, select the top copy. Enter either a number in the opacity box, or use the amount sliders. You can also access the opacity option by going to Layers, and then Layer Style and Blending Options.
You can add additional textures using the above method, but you need to keep adjusting the opacity. Experiment with these steps until you get the desired effect.


