Night makes for some dramatic photographs. However, to take good nighttime photos, you need to know proper night photography techniques. With a few basic tips you can be shooting night photos like a pro.
Importance of a Tripod
Night photography can be extremely rewarding, but night photography can also be the most difficult for a photographer to master. Your subjects are obscured, and flash can overexpose objects. But night also has its rewards. You can capture very dramatic pictures, or photograph objects that you can’t get during the day, including constellations and the moon. Night photography techniques can help you learn and become skilled at this type of photography.
Perhaps the most important part of getting great night photographs is using a tripod. Low-light photography increases the chance that your pictures will be blurry. And, camera shaking just makes that worse. So, set up your camera on a tripod, and use a bubble level to ensure that your camera is level since hard to tell at night whether or not your tripod is level.
Get the Settings Right
Use a cable release. Pressing down the shutter release button causes your camera to shake. Even that little bit of movement could cause your pictures to be blurry at night. A cable release will counteract that problem.
Use a light meter to measure the ambient light. This will help you manipulate your shutter and ISO settings.
Make sure that your camera settings are correct before you leave home. Even with a flashlight you won’t see your camera menu all that well. So, get them correct while you still have light to work with.
As mentioned earlier, skip the flash. Your flash only illuminates a few feet in front of you, which means that you could highlight something right in the foreground, but not your actual subject.
Adjusting the ISO and Shutter Speed
While you will have to adjust the ISO , how you adjust it will depend on your subject. If you want to really focus on moving lights, then you want to use a slower ISO and a long shutter speed . These settings will allow you to show the movement of fireworks, meteors and the like.
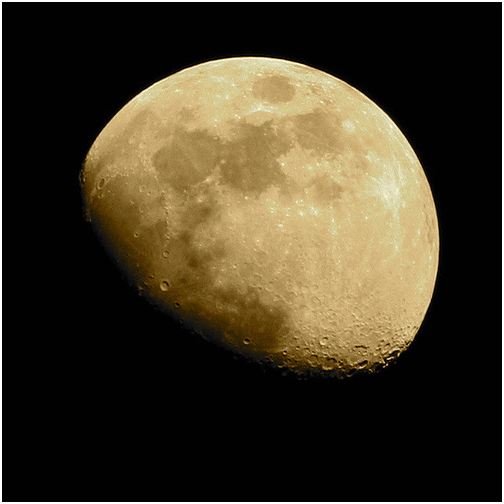
If, however, you want to create a freeze frame of the action, then you want a higher ISO and a faster shutter speed. This will allow you to basically stop the action that you are seeing. These settings are good for capturing the moon, the sunset and similar heavenly bodies.
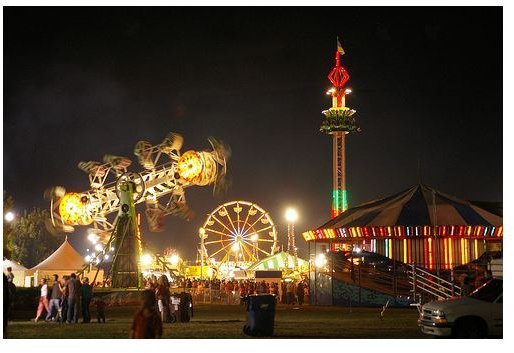
You will also have to increase the ISO if you are not using a tripod. For example, if you are walking around a fair or a party, then you probably don’t want to lug around a tripod. In this case, just increase the ISO, but just be prepared for noisy shots.
Set Up Your Shot
Whatever you decide to do with your ISO settings, always make sure that your subject is between the brackets on your viewfinder. When you are setting up your camera, focus your camera on the subject, and then step away and use the cable release. If you have time before sunset, take a few pictures beforehand to make sure that you got your focus right. And, then take a lot of pictures throughout the night.


