Have you ever wanted to take two separate images and combine them into one? In this article I will show you how to merge photographs in Photoshop. The easy to follow tutorial will show you how to place one image on top of another and using only some simple layers/masking tools merge the two of them.
Introduction
Many people who dabble in photo editing (even when it was only with MS Paint ) try very early to combine more than one photograph into a single image. Usually this starts off by trying to stick one person’s head on top of another person’s body! As we continue in seriousness with our photo editing we realize there are some very legitimate reasons for doing this too. When you have made your way into doing this in Photoshop, it ends up being much simpler than we had originally thought. Using some basic techniques in layers and masking we are able to combine most images painlessly. In this tutorial I will show you my simple way of how to merge photographs in Photoshop. This is by no means the only way to accomplish this, but I have found in these basic instances, it works quite well.
Why Merge Photos in Photoshop?
The first question we have to ask ourselves is why we would want to merge photographs in Photoshop. Of course the first thing that comes to mind is to enhance your Facebook profile picture by merging your head with a buff beach body right? Whereas this is one reason to merge images, there are many more reasons why a photographer may want to do this.
One reason is fairly common in portraits, especially group photography . As we all have noticed, there is always some Uncle Joe who has his eyes closed in all the family pictures. By knowing how to merge photos together you may be able to salvage one of those family moments by combining one where the good Uncle has his eyes open, with one that works for the rest of the group.
Another example is seen in landscape photography . Often landscape photographers (especially around sunset/sunrise shoots) have to make a conscious decision on whether they are to expose for the sky (and let the foreground fall dark) or if they are to expose for the foreground (and blow out the sky). One solution to this problem (besides invoking HDR photography or using a graduated neutral density filter ) is to take each photograph and merge them together in Photoshop.
These are just two examples and I’m sure you can come up with many more as well. For the rest of the tutorial, I will be using this landscape photography example to show you how to combine two images using a Mac and Photoshop CS5. Since the techniques that I am using are fairly basic, using tools and features found in most Photoshop versions, this tutorial should also help those using earlier versions of Photoshop, as well as those using Windows.
Getting Started: Prepare Your Images and Combine Them
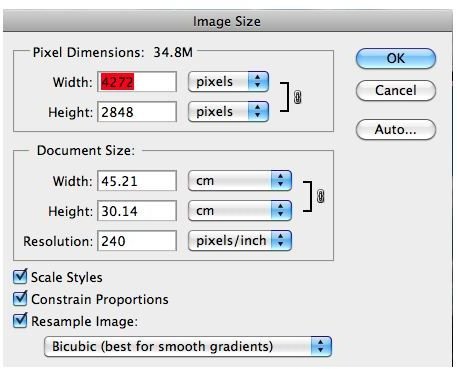
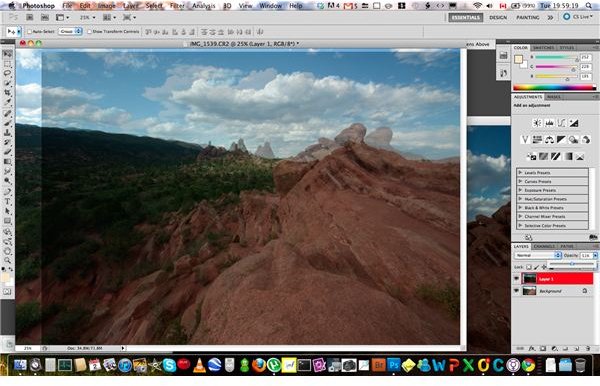
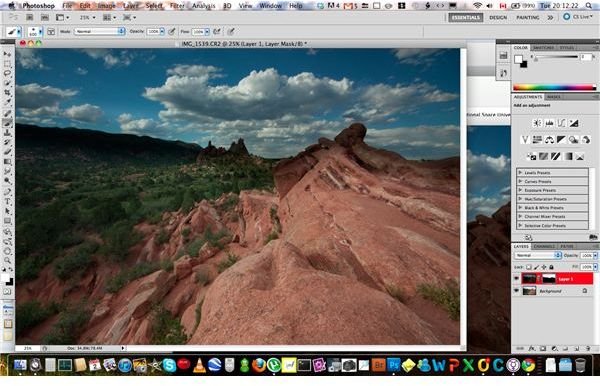
When learning how to merge photographs in Photoshop, the first thing that you need to do is open up the photos that you are going to merge together. If you have taken the two pictures together using the same camera settings, you are good to go. If the photographs are from different cameras or different times, make sure they are the same pixels/inch (not critical, but makes the image look better). To do this, click on Image > Image Size and look at the pixels/inch input and change it to match the other photo if necessary.
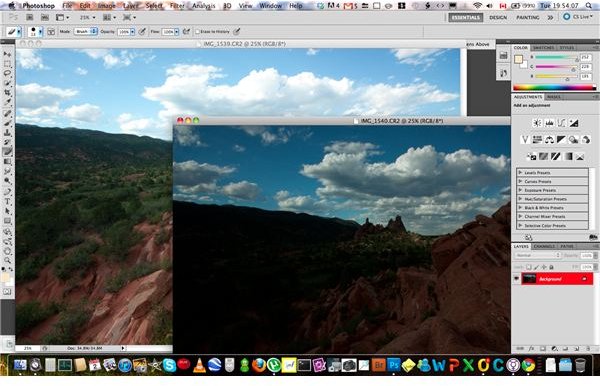
Depending on your version of Photoshop, the two images will probably appear in a tabbed view when you open them. Click on the tab of the image you want to have on the top and drag it down and to the right. This way the two images are no longer connected by tabs. You should have two images similar to that on the right.
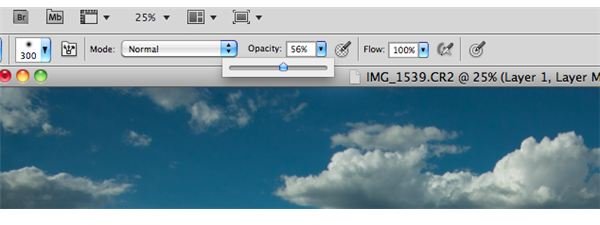
Hit “V” on your keyboard or click on the Move tool. Click anywhere on the image that will go on the top (from now on, we’ll refer to this as image 1) and while holding, drag on to the bottom image (image 2) and release. Give it a rough adjustment so that image 1 is lined up roughly where you want it on image 2. In order to get it lined up perfectly, I like to reduce the opacity of image 1 and adjust using the arrow keys until the image is perfectly on top of the other image (or placed exactly how you want it). Finally, bring the opacity back up to 100%.
Merge: Masking the Stuff you Don’t Want and Keeping What You Do
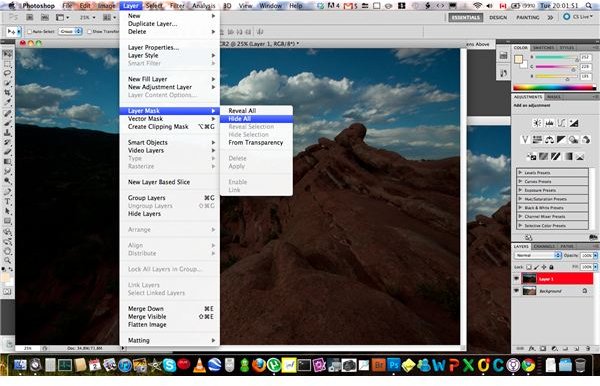
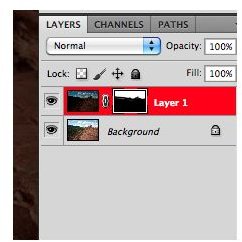
In order to show the sky from image 1 and the foreground from image 2 I like using what is called a layer mask. What will happen is that we will mask over the entire image 1 and then “paint on” what we want from image 1 to show on top of image 2. To start, make sure that image 1 is selected in the layers, then create a layer mask by clicking Layer > Layer Mask > Hide All. You should see image 1 disappear and be only left with image 2. Hit the “D” key to make sure that your two default colors are black and white and that white is on top.
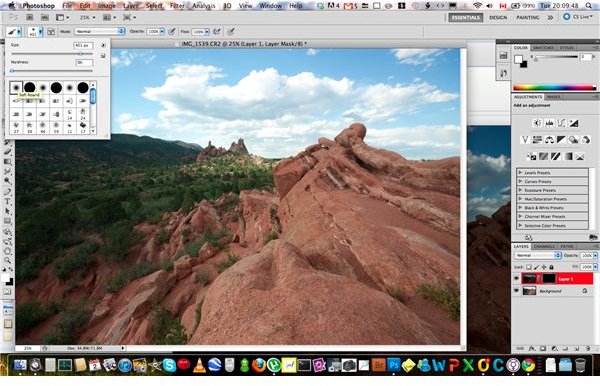
Now in order to “paint on” what you want from image 1 (in this case our sky) select the brush tool (or hit “b”) and choose the type of brush that you want. I find that a soft, round, “0” hardness brush works the best since it helps make the edges more natural and blending.
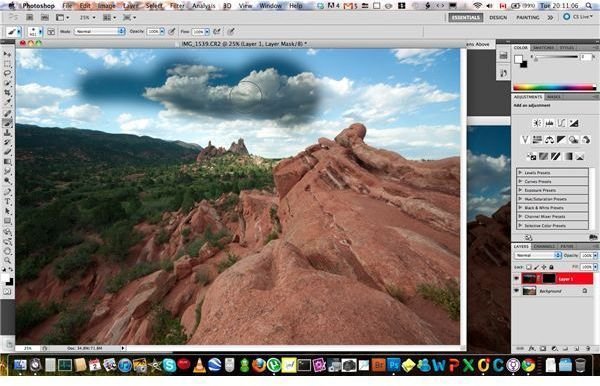
Start painting over your image 2 and watch your image 1 appear! Paint over everything that you want to show through (don’t worry about the edges just yet, we’ll get to that).
Now if ever you go over too far and paint in image 1 where you don’t want it to show (or in our case want to balance off the edges) hit the “X” key (to switch the top color from white to black) and paint over to “erase” again parts of image 1. Throughout the process you are probably going to want to adjust the size of your brush ( “[” and “]” keys) as well as the opacity (especially at the edges of what you want shown). Continue hitting “X” as necessary to “paint” and “erase” your image 1 until it looks the way you want it to.
Process and Tools
Finish It Off: Final Touches and Conclusion
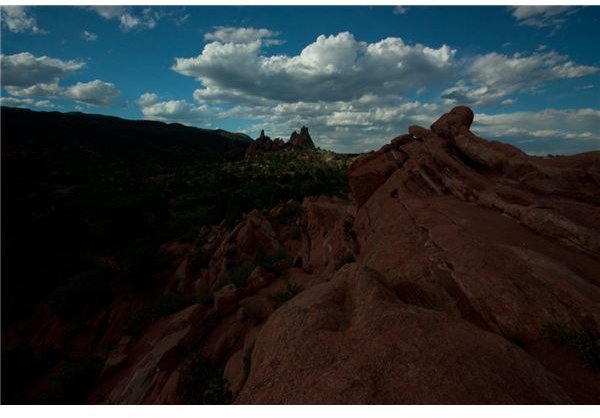
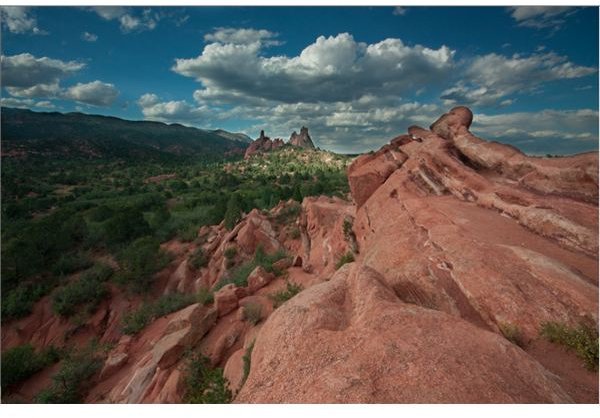
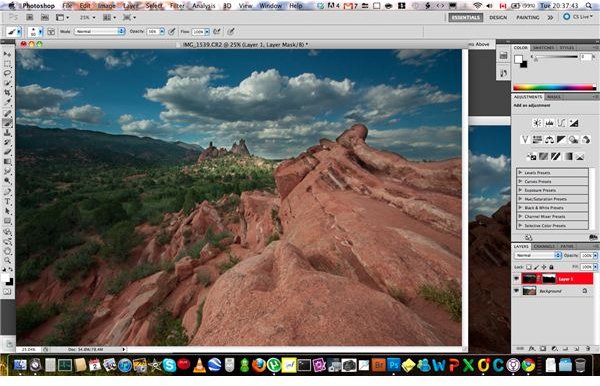
Once you are satisfied with the masking you have done and you know that you will not make any more changes to the masking, you can merge the two visible layers together to create one image by pressing Ctrl > Shift > E on your keyboard or Cmd > Shift > E on a Mac. This now takes your two merged images, makes them one, and you can finish off your editing process in Photoshop as normal. Take a look at the two previous and the final images below to see the difference.
Now that you know how to merge photographs in Photoshop the sky is the limit. You can try using the same process, merging three or more images together and only letting what you want through you base image. As you get better you can start experimenting with the different ways of selecting and “painting on” the images that may work better for you. With practice, painting around the edges will become more natural and will eventually be a breeze!
Before and After