A tutorial comprised of easy steps to changing eye color on photos with the popular online photo editor, Picnik.
Picnik is a popular, free online image editor that offers many photo editing options, from neat frames to cool seasonal shapes. One feature that Picnik offers is the ability to change a person’s eye color in a photograph.
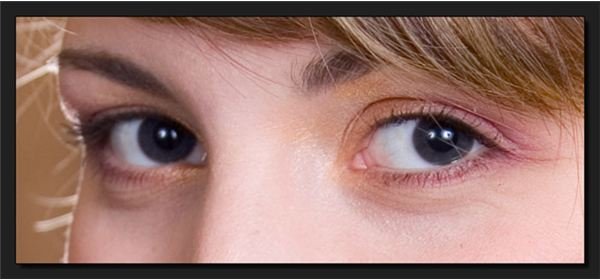
To change eye color with Picnik, first pick an image you’d like to use. Images that show eyes close up is best, since it’s easier to see the difference in the eye color once you change it. I chose an image of an individual with brown eyes, and I’m going to change the color from brown to gray.
Next, upload the image onto Picnik.com. You can do this right on the main page of Picnik, where a button reads: “Get started now!” Find the image on your computer and upload it.
On the Picnik toolbar, click ‘Create’. Your screen should look like the image below.
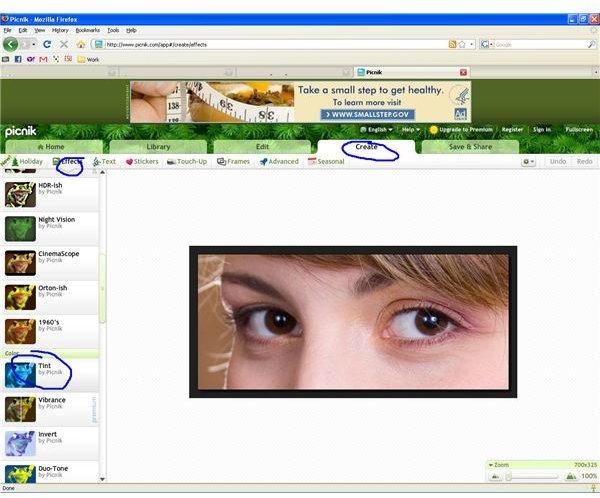
On the top part of the screen, click ‘Effects’. I have the location circled in blue in the image above. Then on the left-hand side of the screen, scroll until you see ‘Color’ and click the ‘Tint’ option, also circled in blue. Your image will turn a different color when you click ‘Tint’.
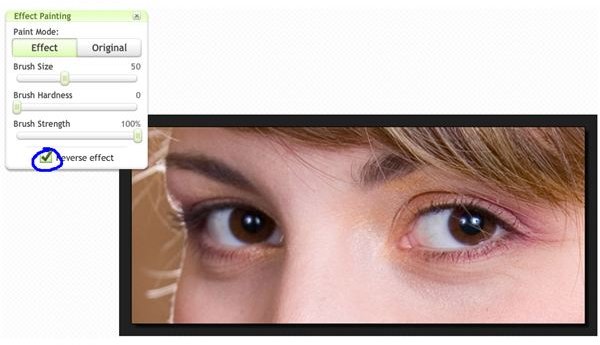
Now, click on the box that reads ‘Reverse effect’, as seen below. This will change your image back to it’s normal color.
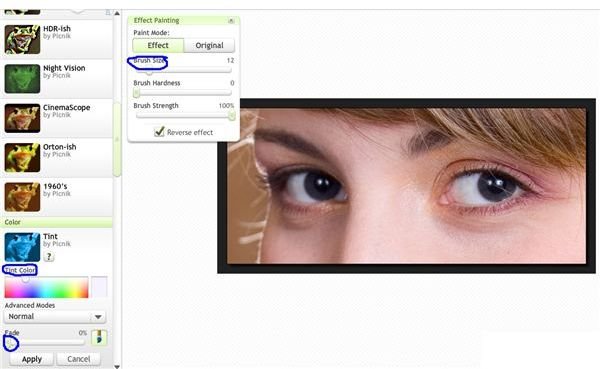
Where it says ‘Tint color’, choose the color you’d like to change the eye color to. You can alter the shade and fade of the color when you’re done. Now, change the brush size to an appropriate size of your image. Click and drag the brush around the eyes. If you mess up, just click ‘Original’ and use the brush to fix your mistake.
It helps to just use a large brush at first, then go back with a smaller brush to fix mistakes, especially if you are using a mouse with a sticky trackball or you don’t have steady hands.
By setting the ‘Tint color’ to white, you can make color images black and white, then change the eye color from grey to color, which is also a neat feature.