Convert a color picture into black and white in a few easy steps using Adobe Lightroom.
Editing in Lightroom
For many photographers, Lightroom is used mostly as an editor. A quick way to view and sort multiple images and make minor color corrections. With Lightroom 2, Adobe has given more functionality to the tools palette. Another plus is Lightroom works with RAW files and integrates seamlessly with Photoshop . This makes converting color images to black and white relatively easy while preserving control over the tonal values.
Black and White Conversion
When converting images in Lightroom, the original is not damaged. A virtual copy can be made to make side-by-side comparisons easier.
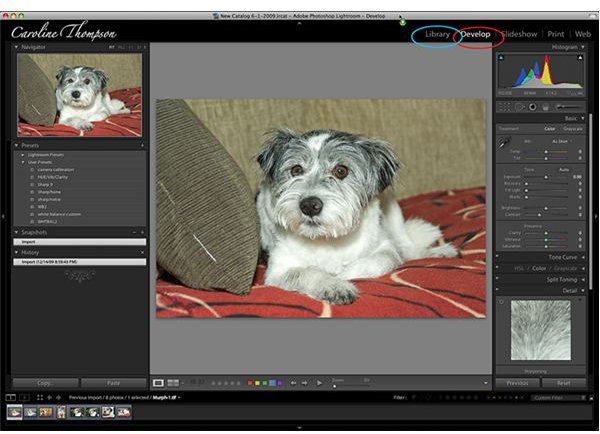
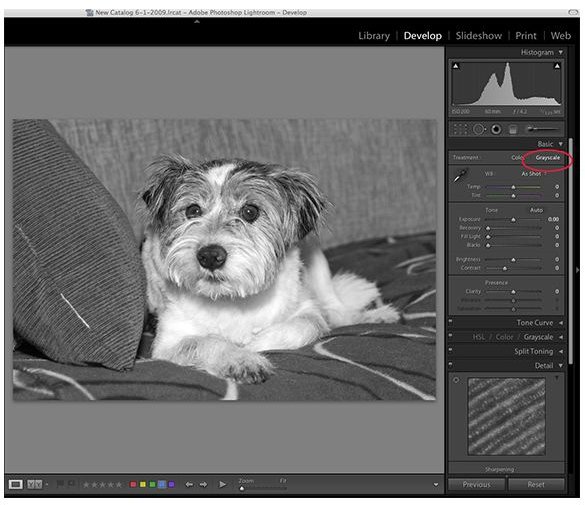
- First, choose the image to be converted in the Library Module and then switch to the Develop Module. (Figure 1)
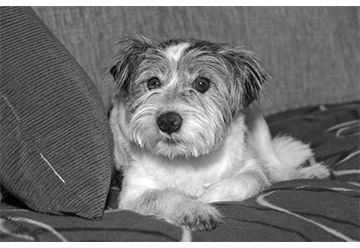
- Select the Grayscale option from the Develop Tools Palette. (Figure 2) This will give you an overall gray. The image will need to be refined from here. (Figure 3)
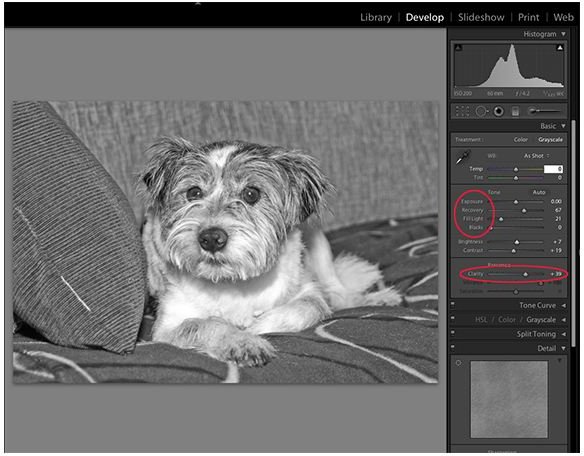
- Using the Exposure slider, make sure the overall exposure is correct. This should not need much adjustment from the original. (Figure 4)
- Next, move the clarity slider all the way over to the right, +100. (Figure 4) This gives you all the mid-tone grays. Vary the slider down from 100 until the desired tonal range is achieved.
- Now, make adjustments using the Fill Light, Recovery and Blacks sliders till the image has all the mid-tone grays, highlights and shadow detail that is desired. (Figure 4)
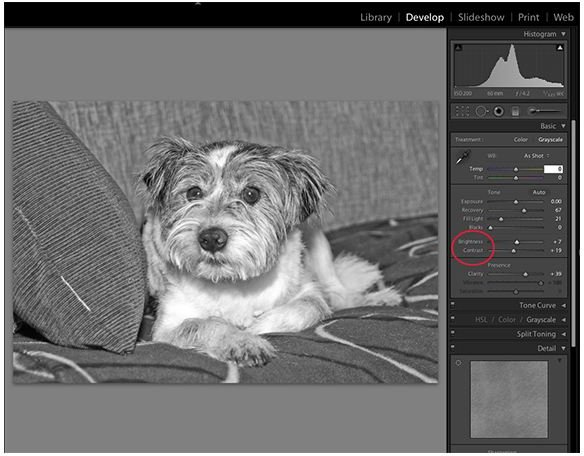
- After the image is adjusted to a desired result, fine-tuning can be done with the Brightness and contrast sliders. (Figure 5)
This is the quick and easy way to convert to black and white in Lightroom. Other adjustments and fine tuning can be made using other tools available in Lightroom.
Other Tools
Depending on the image and the desired results, there are other tools to fine tune the highlights and shadow detail. Every image has different tonal values and some have lighting challenges. This is where these tools can come in handy.
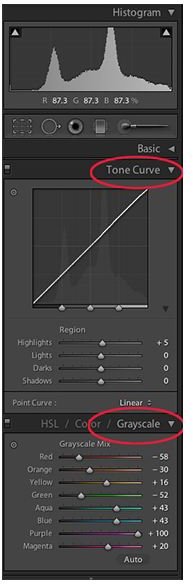
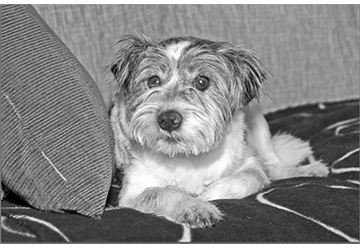
- Grayscale Mix - This is the most useful tool for selecting individual areas to be worked on. (Figure 6) With this palette, each of the original color hues can be worked on in black and white. For example, the white fur on the neck of the dog needs more definition, but if the brightness slider is used the changes will be global affecting the entire image. With the Grayscale Mix, the color of the fur can be refined using one of the sliders and nothing else in the image will be affected. (Except other areas with the same hue) More subtle changes and contrast improvements can be made using this tool. The blanket in the original was flat, but using the red slider boosted the contrast of the blanket. (Figure 7)
- Tone Curve - This is similar to Curves in Photoshop. The highlights and blacks can be defined by setting the points on the bottom of the graph or points can be set independently on the line. There are sliders that can be used to move the curve also. (Figure 6)
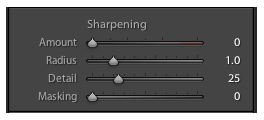
- Sharpening - This is not a color control, but needs to be done on most images. Sharpening can be done overall. Also, the size of the Radius and Detail settings can be made. (Figure 8)
By combining all the palettes, any image can be converted and enhanced in Lightroom. The variety of the tools and ease of use make Lightroom a good choice for black and white conversion.