Have you ever seen a photo of a frozen drop of water in mid air and wondered how they did it? Learn how to take one yourself in here!
Introduction
If you have ever spent a bit of time on Flickr or browsing photos online, you will quickly realize that some of the most popular photo to reproduce is a drop of water splashing in a pool of water. There are a million different ways to shoot a drop of water, but we will cover the basics so that you can unleash your creativity. Capturing a drop is fairly easy. You just have to learn the basics of lighting and timing.
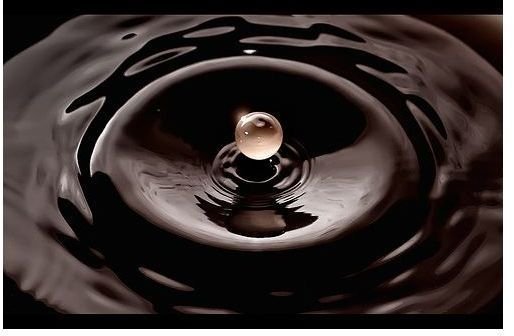
Photo by mescon
Camera Gear Needed
- SLR camera or other camera with a hot shoe to trigger an external flash
- Macro lens or other close focusing lens with manual focus
- At least 1 flash (speedlight) which you can trigger off camera (wirelessly or corded, matter).
- Tripod to keep your camera’s position stationary since we will be manually focusing.
- Nearby wall or sheet of paper (colored walls or paper can give interesting effects). You will use this to bounce your light off of.
A point and shoot may work if you can properly focus manually and trigger an external flash. Also, on camera flash could possibly work if you are able to bounce your light. This just doesn’t allow for much freedom of movement with your flash.
Creating the Drops
What You Will Need To Make the Drops
- Bowl or tub to catch and hold the water.
- Plastic bag (ziploc) to hold the dripping water.
- Stand or clamp to hold the bag above bowl or tub.
- Small pin (any small sharp object will do)
Water Setup
Fill the tub or bowl and baggy with some water. Place the bag of water above your tub or bowl. Clamp it to a stand or secure it so that it is directly above your bowl and drops the water in exactly the same place (this is important for focusing). Next make a small hole in the baggy. Just one small hole will do. This will give you evenly timed drips of water that fall in the same location. You are now ready to setup your lighting and camera.
Capturing the Drops
Lighting
Place your flash off to one side of the bowl or tub. Place the sheet of paper behind the water drop. The light will reflect off the wall or paper to evenly highlight your water giving some nice reflections (specular highlights is the technical term).
Camera Settings
First, place the camera on a tripod facing where the water lands. Have the camera level with the surface of the water so you aren’t shooting down on your subject. Begin by pre focusing on where the drops of water lands. You can use a ruler, the tip of a pen, or even your finger to help you auto focus on there the water will land. Once you have properly focused, set the camera into manual focus so the focal plane does not change. Next, set your camera into manual (M) mode. Set your shutter speed to your camera’s flash x-sync speed. This is usually 1/125 to 1/250 of a second. The fast shutter speed, in addition with the flash of light, will freeze the motion of the water. Set your aperture to F/5.6 or so to allow for sufficient depth of field (DOF). Set your ISO to the base (lowest) ISO. Either ISO 100 or 200 will work fine. Finally, check to make sure your flash will trigger and begin firing away when the drop hits the water.
Note that water and camera gear do not mix. Have towels nearby and be careful! :)
Conclusion
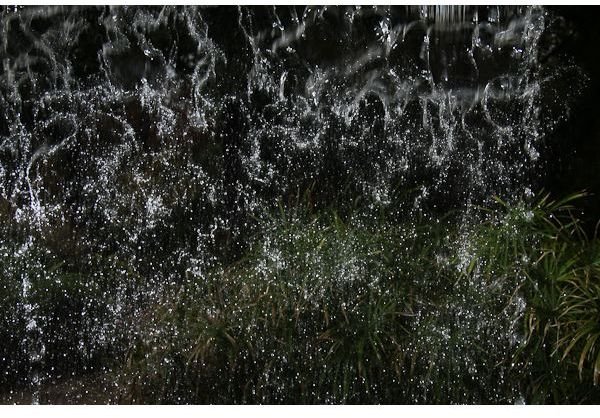
Now that you have learned the basics, you too can create your very own requisite water drop picture and be awed by your work! Lastly, have fun with it and experiment with the many ways you can capture water both in its stationary and moving forms. Try using different white balances, colored water, milk, colored bowls, or new angles! Look for water in all its forms and light it in unique ways like the waterfall to the left I found at a local arboretum.
Photo by .dr4gon


