Have you ever wanted to take a nice picture of your black dog? In this guide, we show you how to take pictures of black or dark colored dogs using a variety of lighting techniques.
Introduction
Taking pictures of dark or black dogs can be a real challenge. Taking pictures of anything on both extremes, black or white can be difficult. The key to nailing these shots is the lighting. To get great looking shots, you do not even need a professional lighting studio or a bunch of expensive flashes although it does help and you can get some interesting results (more on this later).
Natural Lighting
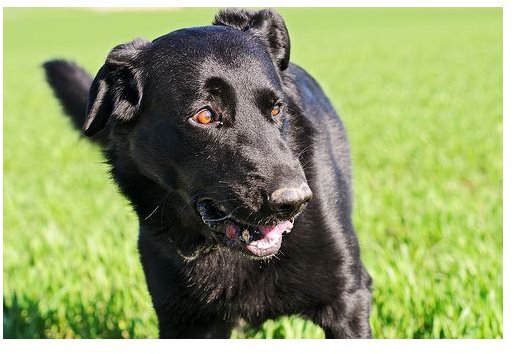
Natural lighting is everywhere around us (in the daytime). The sun is an excellent source of light because it is so plentiful and readily available. This can also cause some real problems if you do not use the sun to your advantage. The best time to take pictures outdoors is right after sunrise and before sunset because this is when light is the softest. The worst time is during the middle of the day when the sun is overhead creating harsh shadows. Alternatively, a cloudy day is good for taking pictures because clouds diffuse evenly diffuse sunlight and create pleasant lighting conditions. When taking pictures of your dog outside, it is best to position the sun so that it is coming from one side of your dog. By lighting one side of the dog, you create a greater depth and make your photos livelier. They tend to pop and catch your eye right away.
In the example to the left, the sun was positioned to the side which provided a nice catch light in the eyes, lit one side of the dog, and consequently showed off the dog’s beautiful fur. A wide aperture (smaller f number) was also used to separate the dog from the background (grass) and help freeze the action.
Rusthy the black dog by Tambako the Jaguar .
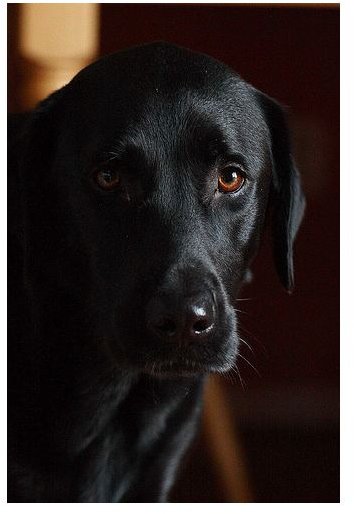
Indoors, less lighting is available so you should make the most of it. Photograph your dogs next to a large window that does not have direct sunlight pouring in it. A north or south facing window works great for providing nice soft diffused light, perfect for portraits of both pets and people!
Morning Sierra by Phil Romans
Studio and Flash Lighting
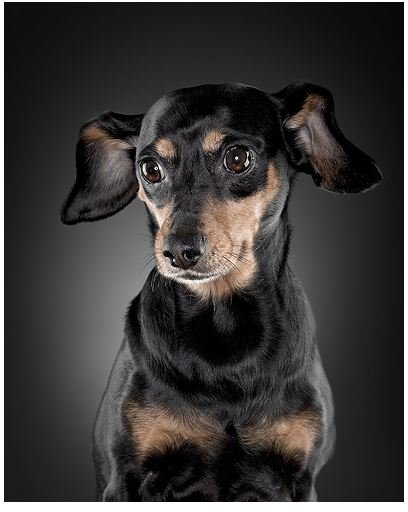
Using artificial lighting can be tricky. Some professionals dedicate their entire careers to studio photography and fancy lighting equipment. Do not be discouraged if you do not immediately get the results you want. When starting off, use one flash at a time. Once you have mastered that technique, add a second flash as fill light to supplement your key light (primary flash). When using flash, try to soften the light with an umbrella or by bouncing it off a wall. This helps to spread out the light which is what you want as we talked about earlier. Experiment with different positions of lighting to create different effects and see which ones you like the best. In the example to the left, four lights were used to create this effect.
Gretta by joshuahoffmanphoto
Remember to keep practicing at it and have fun with it! Your dedication and enthusiasm will show in your photos!


