One way to put the spotlight on a person or object in a digital photo is to blur the background in the image. In this tutorial, we’ll look at how filters can be used to achieve this effect in Photoshop Elements 7.
Blurred Backgrounds and Depth of Field
Photographers have long used depth of field techniques to draw the viewer’s attention to specific certain elements in photographs. This same type of effect can also be achieved with photo editing software by selectively blurring areas (usually the background) in a digital photo so that other areas stand out more and capture the eye. Here, we’ll show how to achieve such effects by using filters in Photoshop Elements 7 .
How to Blur the Background of a Digital Photo
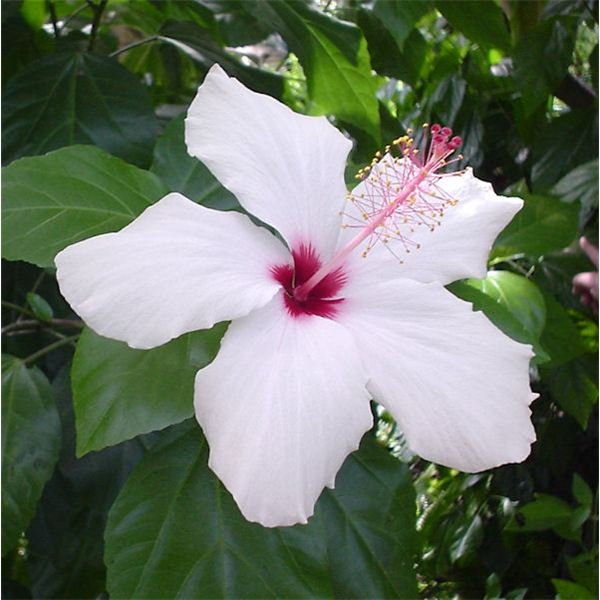
Step 1: Select and open the photo that you want to edit in Photoshop Elements 7. As an example, I’ll use the photo shown below. Here, I want to isolate the flower in the photograph and blur the foliage in the background. (Click any image in this article for a larger view.)
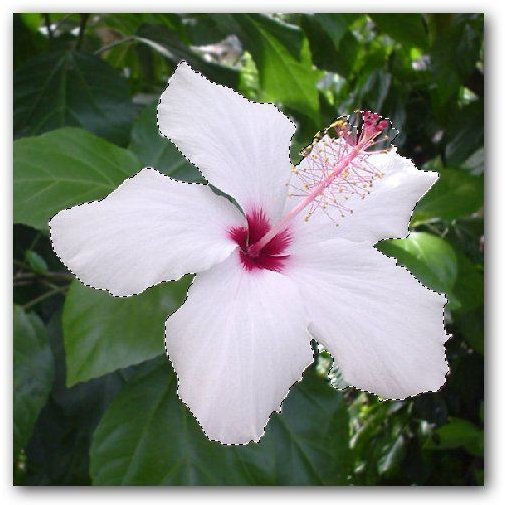
Step 2: Use the selection tool of your choice to select the objects in your photo that you want to remain sharp. In this case, I’ll select the flower.
Step 3: From the Select menu on the main tool bar of Photoshop Elements 7, choose Inverse.
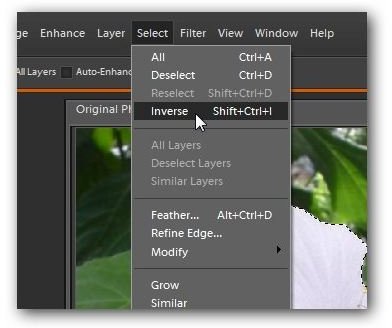
This will invert your selection so that now your selection contains everything but the objects originally selected. In other words, now the background is the actual selection so any filters we apply will leave the initial objects chosen untouched.
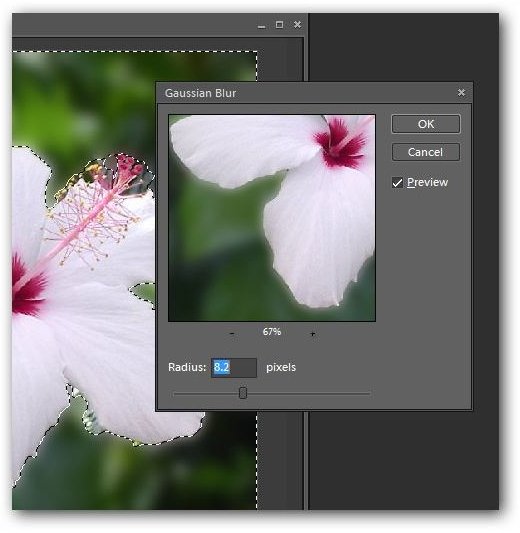
Step 4: From the Filter menu, select the type of Blur that you would like to apply to the background. Note that some of these filters are one-step applications while others allow you to modify the settings. In this example, I’ll choose one of the latter types and use Gaussian Blur.

Step 5: When the Gaussian Blur dialog box appears, use the slider to adjust the Radius until you get the degree of blurring that you want. It may help to put a check in the box next to Preview so that you can view the changes on your photo before applying them.
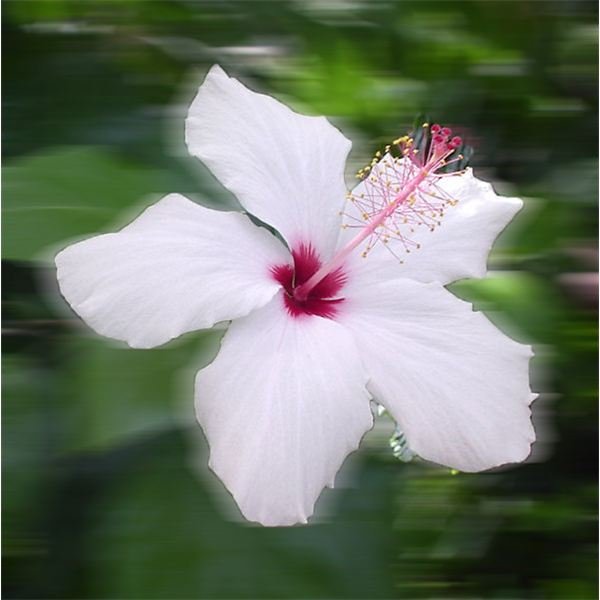
Step 6: Click OK in the Gaussian Blur dialog box to apply the changes to your image. The results of the process are shown in the image below.

If you don’t like this particular blurring effect, you can always undo the action and try another. Below are a couple of other examples using different Blur filters.