
How do you use flash so that it creates natural-looking photos? Read this photography article and learn the different flash photography techniques!
Learning Flash Photography
For a long time, I disliked using the flash on my digital camera because I found that it produced harsh effects. Too many times, skin imperfections were highlighted and/or my subjects got red eye and I’d have to tweak my images using photo editing software . I didn’t understand how flash worked, until I chanced upon a really long document from Canon. Apparently, I wasn’t doing flash photography properly!
I know a lot of you are like me; some of you prefer ambient light only because we think that flash will spoil the great effect ambient light has. And yet, this is not true. With a little bit of reading, and understanding of the essential techniques in flash photography, we can make flash not look like flash.
Flash photography is complicated – that is a fact. It requires understanding what happens during those few milliseconds before you press the shutter button. It requires basic understanding of how exposure works and how shutter speed affects exposure and motion blur. In order to create great flash photos, you need to understand how aperture can affect exposure and depth of field, how the ISO setting affects exposure and noise. You need to understand all these basic concepts before you venture out into the flash world.
Different Flash Photography Techniques
Most of us think flash is only used in low light scenes such as indoors or at night. While this is true, the fact is, you can use flash almost every time to improve your shots. Here are a few ways you can use flash.
Direct Flash
Direct flash is the most common technique used in flash photography. As the name implies, with direct flash, the flash unit emits its light directly at the subject. If you have a camera with a built in flash, then you probably know how this technique works.
For many years, flash attachments were made to work as direct flash. They have become associated with harsh shadows and little depth of field . People using direct flash will often find their photographs have the famous red eye. Also, if there is a reflective surface (mirrors, glass, frames) behind your subject or between yourself and your subject, then you will see a spot where the light is reflected off the surface. If you look at the photo on the left (click to enlarge), you will definitely notice that spot in the middle. This happened because my sister wanted to photograph herself in her gown, but didn’t want others to see her just yet. She took a photo of herself in front of the mirror. The photo says it all - there’s really nothing to see here.
The advantage of using direct flash is that it reaches longer distances which other techniques cannot. Also, issues involving direct flash can be resolved with relative ease. You can move your subject away from the reflective surface or angle your flash so you can drop shadows down behind your subject.
Fill Flash
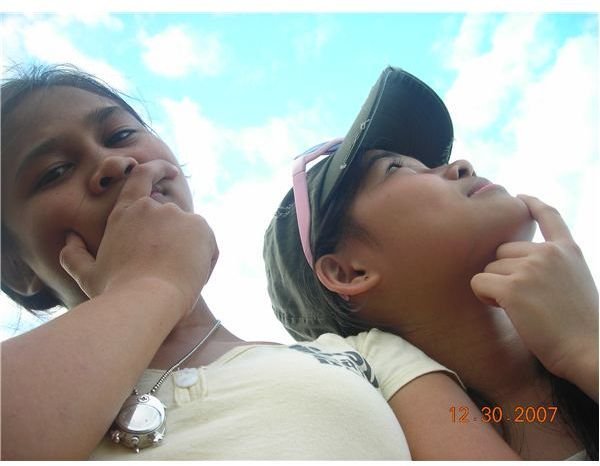
Using flash outdoors on a bright day can greatly improve your photos. The sun is a harsh light source and creates photos which have high contrast. Also, you have deep shadows in addition to the vivid colors. with all these contrasts, exposure can become difficult – exposing the highlights will make you lose the shadow detail while exposing for the shadow detail will blow out your highlights. In the photo of the two ladies on the right, you can see them clearly because the day is bright but without flash, the background is a little washed out.

To balance the light levels you should use your fill flash (also known as fill-in flash). It brightens your photo since it is lit from behind (remember how to make outdoor portraits ?)
In the photo of the man and woman on the left, you see more of the background because the flash was turned on and the light coming from the sun was neutralized. Moreover, the glare actually created a more artistic effect on the photograph.
Bounce Flash
The best way to avoid the problems of direct flash is through the use of bounce flash. Here, you will have to angle your flash units so you can create a soft, diffused light which is perfect for portraits . This will also help you prevent red eye and eliminate reflections.
Unfortunately, bounce flash is not as easy as it sounds. Before you use this method of flash photography, you will need to visualize the angle of the light. If you point the light to the ceiling, where will the light fall? At what angle will it hit your subject? You need to make sure that the light does not drop down too far in front or behind your subject.
Also, you need to keep in mind that if you make the light bounce off the ceiling, then you will lose some of the illumination. If you are using a dedicated flash with TTL (through the lens) metering, then you don’t have to worry about correcting your image. However, if you are using a manual flash, you will need to adjust your aperture in order to correct for the light loss.
Synchronizing Your Flash
Front curtain sync is the most popular style of flash synchronization. Here, the flash fires when your camera’s shutter first opens. When you want to freeze the motion at the beginning of the exposure, then this is the method to use.
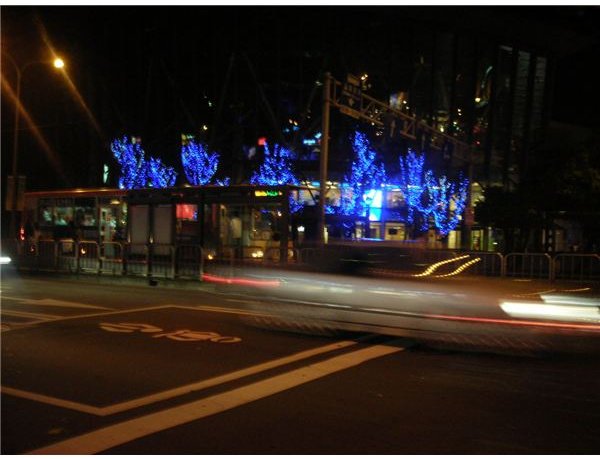
Slow Sync uses flash with a slow shutter speed. A modern camera calls this the night mode and this flash sync technique is most commonly used for low light situations . Using slow sync on a moving subject, such as a car, will record a streak of light (see photo on the left).
Shooting with normal flash at night will illuminate your subject, but you will lose the details of the surroundings.
Real Curtain Sync fires the flash at the peak of the shutter opening. When taking photos of moving subjects, this flash sync technique gives a more natural effect.


