Want to know how to make a light box for free (or certainly less than $5)? It’s handy to know how to make a light box whether you want to post photos on eBay or add product images to a blog or newsletter. Learn how with this easy-to-follow DIY photography tutorial.
Why Make a Light Box?
Ever had eBay photo envy?
You post a dark photo of your widget on a table only to find another guy selling the same widget using a bright photo against a white background. Did he pay a professional studio to photograph the widget?
Maybe, but he probably just used a light box, a popular photography gadget. Professionals typically use light boxes to photograph advertising products or news photos about a rare archaeological find, for example.
The pros spend upwards of $100 for a commercial light box, but here’s how to make a light box entirely with supplies you likely have around your house. You shouldn’t spend more than $5, even if you just arrived in town with nothing but a camera.
Your free, homemade light box has hundreds of uses. You can take better pictures of items to sell online. You can send Grandma a really clean picture of a sports trophy. Or you can take a simple photo for use in a corporate newsletter or church bulletin. You’ll get mad props for flowing the text around your product, just like the fancy magazines.
I could go on and on, but we’re here to learn how to make a light box.
Materials
• Cardboard box (a 1-foot cube is probably ideal but almost any medium-sized box will work)
• Tape
• Clean white tissue paper (the fancy gift packaging, not toilet paper)
• Scissors or utility knife
• White poster board
That’s it. You probably found all this stuff around the house. If not, get creative. Moving boxes are listed nearly every day on the Craigslist free page. You need a box a little bigger than whatever items you want to shoot.
No tissue paper stashed away with your wrapping paper? Surely you have a neighbor or aunt who keeps a stockpile. You only need two pieces.
Maybe the kids are too young (or too old) for you to keep new poster board on hand. If you look, though, you probably have some art project on a sturdy posterboard. Use the back. As long as the back is clean and white, and you don’t mind bending the poster, reuse your old science fair display. In a pinch, you can even use the back of a commercial art poster.
If you don’t have scissors and tape, you probably don’t have a camera and don’t need these instructions.
Difficulty: Easy. I made this light box in about 10 minutes, but I rushed it for the demo photos. Should take about 15 minutes.
Now that you’ve got your materials together, continue on to the next page of this DIY photography project to learn the simple steps it takes to make your own light box…
Images

How to Make Your Own Light Box - Construction
1. Reinforce the flaps in the bottom of the box with tape inside and outside.
2. Turn the box so the open end faces you.
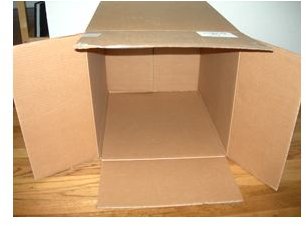
3. Cut big windows out of two sides of the box. Leave at least an inch of cardboard on each edge to maintain the integrity of the box.
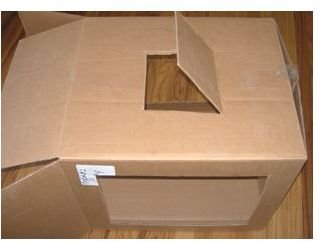
4. Cut a smaller window (about 6 inches square) in the top of the box, but be careful to leave the bottom edge of this cardboard open but attached. Just score it from the inside, leaving a couple layers of paper attached. If you are using a utility knife, cut the open edges at an angle to keep the flap from falling into the box.
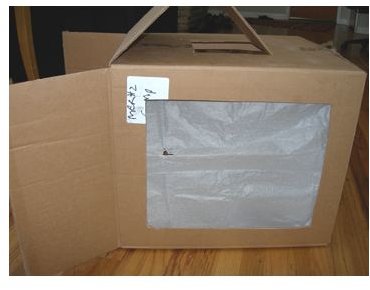
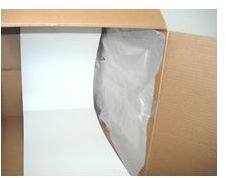
5. Carefully tape tissue over the inside of the side windows. For a sturdier, longer-lasting light box, use lightweight translucent fabric.
6. Slide in your poster board so it curves to cover the back and bottom of the light box.
The board provides a clean background for photos and the tissue paper will evenly diffuse the light. The top flap can be opened to shoot an overhead photo or adjust the light in the box.
There’s your basic light box. Now it’s time to experiment with lights and colors. You can probably angle a basic lamp toward the side of the box and get good, basic product photos. If you want to get fancy, you can use colored poster board. Maybe pastel pink for your doll collection or black for your Metallica bobble heads.
Thanks to the Strobist for the basic outline of these instructions on how to make a light box. His light box is a little less flexible than this one, but he has some other good photo tips on his site.
Finally, your new light box can also double as a marionette stage if you want to get really creative. Just operate the strings from the hole in the top of the box and shine in your light to illuminate your production.


