Photography is all about capturing a moment in time and space. But when you want to show much more than that you need to add some pizzaz! Panning lets you add a sense of speed and motion to your photography. Read on to learn how.
Freeze with faster shutter speeds
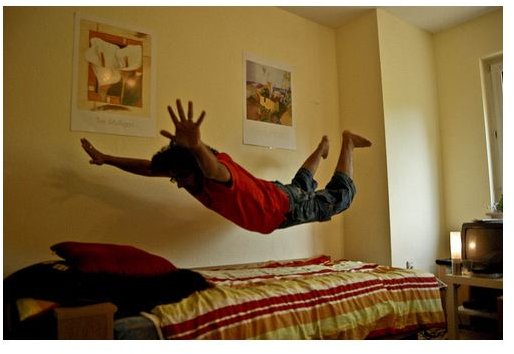
Motion blurs create a sense of speed to any object that you shoot. You’ve probably seen those classic snaps of Formula 1 cars zipping past as everything, where the background is blurred, giving a sense of direction and speed. So how are these photos taken? Okay, let’s start by looking at the principle behind capturing motion. To successfully capture motion, you’re going to need to increase the shutter speed of your digital camera. The photo below is an example of fast motion frozen by the camera using a fast shutter speed.
(Click on images to enlarge)
Panning is moving with your subject
Once you’ve mastered shutter speed, the next step is to learn a technique called panning. Panning involves moving the camera relatively with your subject. Most modern digital SLR’s come with a feature called continuous focus. Continuous focus tracks an object in motion and keeps it in focus.
The technique of panning
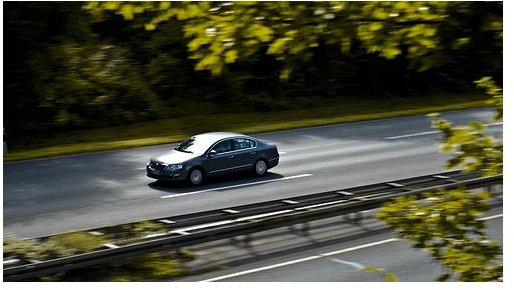
To capture a good motion blurred picture, all you have to do is set your camera to continuous focus, focus on the subject and then move the camera along the direction in which the subject is moving. You do not necessarily need to shoot from sports mode, but it is generally easier for beginners. You might not get it right the first time, but you’ll notice that you can get there with a just a few attempts (or may be not!). As a beginner, you might find it difficult to start with fast moving objects like cars. So here is a tip: if you know when your friends are out jogging, then get out before they do and try to catch them in motion. Just remember that they won’t be running as fast as a car, so dial down that shutter speed (maybe 60th of a second) and click along to get your own Olympic sprinter-style photos
Points to remember
The following tips should help you with your panning attempts:
1. Start tracking the subject as soon as he/she/it appears on one end of the frame.
2. It’s usually a good idea to release the shutter as the subject reaches the middle of the frame (of course, you could do it a bit later or earlier but might miss the frame).
3. After the shutter has been released, keep panning along with the subject, this usually helps provide a very well patterned background.
4. Keep shutter speed as slow as possible and the highest f-stop that you can manage.
5. The backgrounds are an important aspect of a panned photo, so look for contrasting colors and patterns.
Remember that panning is a semi-advanced technique so don’t worry if you dont get it perfectly in the first few attempts. Keep trying you’ll end up with a magical shot very soon.


