Child Photography & Nature: Tips on Combining the Two
Page content
A Child’s Dream
Running loose on a playground, in a park or an open field instead of cooped up in a stuffy photo studio is a child’s dream. Combining children and nature when taking photographs can be a win-win for the photographer and child as long as a little pre-planning goes into effect before shooting.
Tips
- Get to know the child. Have the parent or parents bring the child by your studio so you can introduce yourself and explain a little bit about the photo shoot. This gives the child a chance to relax in your presence and know what to expect.
- Use props. Toys, a squeaky animal with bright, eye-catching colors are essentials when working with very young children. Pack your props in advance.
- Plan bathroom breaks. On long nature shoots, make sure there is a nearby public restroom if the child is old enough not to wear a diaper. And for diaper wearing young ones, make sure the parent brings extra diapers and clean-up tools.
- Pack disinfecting wipes. Pack some wipes in case your shoot calls for the child eating something or playing in the dirt. Kids can get messy sometimes.
- Let the child explore. Even though you know what you have in mind for your photos, let the child explore his surroundings. The most wonderful thing about kids is they still look at the world with magical eyes. Chances are your child may discover a natural setting that hadn’t crossed your mind.
Ideal Camera Settings
- Pick the outdoor spot wisely. Combining children photography with nature won’t work well without considering the age of the child when choosing your natural setting. A young child–toddler or preschool age child, loves running and playing so a park or open field where they can run around is ideal. If you want a specific scene such as a child posing by a fence that houses cows in the background, an older child who would know how to safely lean or stand by the fence is probably a better fit. Think of the nature shots in conjunction with the age of the child.
- Safety first. Keep the child’s safety in mind when shooting photos. A photographer who broke his leg after falling into a bed of ants when shooting on a flimsy deck was stung over 2,000 times over several hours before someone heard his cries for help. He admitted as agonizing as this experience was, subjecting a model to a broken leg and ant bites would’ve been unforgivable. Whenever shooting photos, keep safety in the forefront.
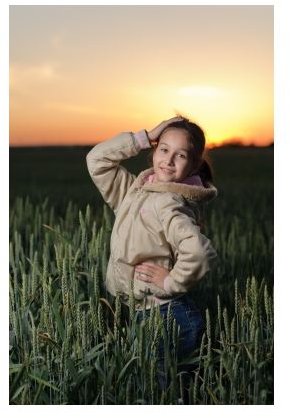
- Plan for ideal lighting. According to Photography Magazine, the most important attributes of landscape light when shooting outside are light quality, light direction and light temperature. Diffused light is a popular light quality with nature photographers because it makes subjects easy to properly expose. When shooting a child, an eye-catching technique is using back light in light direction to create a silhouette behind the child. Experts suggest using a digital camera with a white balance set to “daylight” to take advantage of the light’s temperature change. Light temperature is the color of light throughout the day and is a hard concept for amateurs to grasp, so the camera sets the white balance automatically.

Photography Tools
It’s a good idea to pack your equipment and assure you have everything you need to shoot outdoors well before your shoot. Here is vital equipment needed for your outdoor excursion:
- Camera
- Flash
- Tripod
- Batteries for your camera–make sure the batteries are charged
- Lenses
- Lens Filter
- Plastic bags to protect your equipment in case of foul weather
- 2 umbrellas–one for you and one for your child model
Don’t forget to pack disinfecting wipes and props for your child model.
References
Rosen Georgiev, Free Digital Photos
Photography, Nature Photography, https://www.photography.com/articles/taking-photos/nature-photography/
Africa, Free Digital Photos
