Want to learn how to use Photoshop Elements 9? This digital photography software tutorial shows you what this program can do. It also teaches about the different options and tabs.
About Photoshop Elements 9
Adobe Photoshop Elements 9 is a great, cheap alternative to the full version of Photoshop. But, you need to know what this program can do before you can get your money’s worth. Learn how to use Photoshop Elements 9 in this Adobe Photoshop Elements tutorial.
You can do more than simply edit photos with this program. You can also edit video clips, eliminating the need to purchase an external video editor . This program is compatible with Windows 7 as well as Windows and Mac multi-touch systems.
Media Management Hub
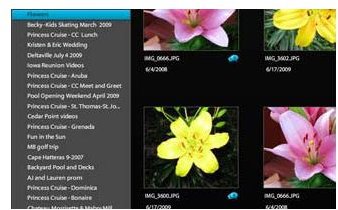
Adobe Photoshop Elements 9 comes with a media management hub. This allows you to see all of your media in one place, ensuring that you quickly find everything that you need. Import all of your clips and images into the hub, or scan your photos into the program at the same time. Elements will break up the images without instruction.
The Media Management Hub features include the following:
- Find specific images based on the people in them.
- Find photos based on when they were taken.
- View photos side-by-side.
- View your photos from any computer via the online Organizer.
To search for a photograph, open up the Organizer. And, then follow the below procedures:
- Go to File, and then Get Photos and Videos.
- Then, hit Select by Searching.
Or, you can bring in photos individually, by going to File and then Get Photos and Videos. In this folder, go to From Files and Folders. Then get your folders.
Edits
The best part of Elements is that it’s great for quick edits. If you only need to make minor touchups to your images, then use the photo editing features. For example, you can correct lens distortion and red eye by going to the Edit tab.
The main features in the Editing tab include the following:
- Add text to photos.
- Create panoramic mages.
- Put photos together to make group shots.
- Brighten up images.
To use the Quick editing features, follow the below steps:
1. Open up the program, and click on the Edit tab.
2. Select Quick at the top of the panel.
3. Click on the dropdown menu, and select the feature that you want to use.
If you want to do more than simply edits, go to the Full tab. Here you can add effects like masks, filters and cutting paths. You can convert your photos into vintage or monotone photos.
If you want to brighten an image, follow the below steps:
- Open up the photo, and go to Enhance.
- Select Adjust Brightness/Contrast.
- You’ll see three eye-droppers in the Levels Dialog box. If you select black, you can change the white-black balance of the image.
- Adjust the image, and press OK to save your changes.
Create Tab
Once you are done making your edits, you can move on to the Create tab. In this tab, you can convert your images and videos into personalized creations. Make greeting cards, photo books and calendars all from your images.
Use the available templates to create CD/DVD labels or photo books. Drag and drop your items into the layouts, and then resize them. Add frames to your photos. You can save your creations, and edit them at later dates. You can even use Raw images in your creations. Elements will change these photos so that they fit your pages.
You can then print out your creations from your home computer. Print out contact sheets that show you all of your photos, which you can use for clients or as just a log of your images.
To use a template, follow the below procedures:
- Open up the template.
- Select the background layer to change the background. Select the Cascade view to see all of your images by going to Window and then Images.
- Drag and drop the image that you want to use as the background on to the Background layer.
- Select a layer, and then drag and drop your foreground images into those layers. You can also use the Move tool to add images.
- Keep doing this until you have added all of your images, and then Save the file.
Share Tab
The Share tab allows you to share your images and videos with others via social networking sites. Add photos to a map, and you can choose whether or not others can download your images for their own use.
In this tab, you can also create postage stamps, slideshows and mini-movies out of your images.
To share photos, follow the below steps:
- Select the photo that you want to share.
- Select Share, and select the way that you want to share the photos.
- If you can share photos via email, select Email Attachments, and follow the below procedures.
- You can add multiple images to an email by hitting the Add button.
- You can adjust the size of the photo in the Maximum Photo Size menu and the Quality via the Quality slider.
- Hit Next, and then add your message.
- Select your recipients.
- Hit Next to send your message.
References
Adobe, https://www.adobe.com/digitalimag/explore/


