Windows Sound Recorder: How to Change Recording Time in Windows Sound Recorder
For low quality recordings the Windows Sound Recorder utility is still used, such as recording conversations while you are gaming online, recording a radio broadcast, simple sound effects and so forth. However, its biggest limitation is that by default it is only able to record sixty seconds of audio, which isn’t very much at all.
There is a simple way if you want to know how to change recording time in the utility, or increase your maximum recording time. Read the step-by-step guide and you should be able to record for however long you want to.
Increase Recording Time in Windows XP
The easiest way to start Windows Sound Recorder is to go to your Start menu, and then select the Run prompt. After the command box appears, simply type SNDREC32.exe where it says Open:, and the program will start. Of course you may have a shortcut on your desktop, in which case you can simply bring it up with that.
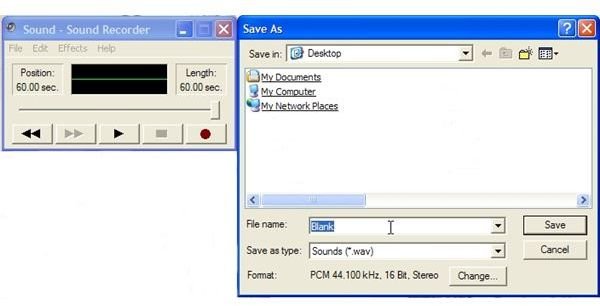
Now start Windows Sound Recorder by clicking on the record button and let it run for the standard sixty seconds. Note that you won’t record anything it will simply be a blank file which you will then use to increase the length.
Go to _Fil_e at the top, and select Save As from the dropdown menu; choose a location and save the file as Blank.wav
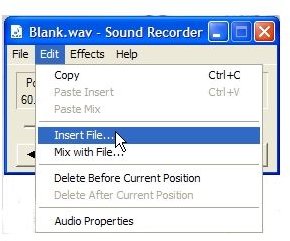
Now go to Edit at the top, and select Insert File; you will then select the blank WAV file you just saved and insert it. Each time you insert the file you saved, sixty seconds of recording time will be added to the original, hence use this to calculate how many seconds of recording you will need altogether.
When you have the desired length of time you want to record, for example 480 seconds for an 8 minute recording, save the file again as Blank or whatever you wish; every time you open this file in Windows Sound Recorder you will have the extended recording time, effectively using it as some kind of template.
You can also set the Windows Sound Recorder to open your template file automatically. First create a shortcut of the Windows Sound Recorder on your desktop, found in the folder Windows/System 32; right-click on the icon and choose Send to, and then send it to your desktop. Right-click on the shortcut on your desktop, select properties and paste the following in the target box:
C:\Windows\sndrec32.exe C:\Blank.wav
Substitute C:\Blank.wav for the location/filename of your file.
Increase Recording Time in Windows Vista
The version of Windows Sound Recorder bundled in Vista allows you to set the recording time by a switch called duration. Although it won’t be able to playback the files and it allows for fewer options in terms of audio quality, some people still use it for simple purposes.
To set the recording time, simply type /duration after typing SoundRecorder in the command prompt, and finally selecting your duration. For example SoundRecorder/duration 0001:00:00 results in a recording lasting one hour.
That’s all you need for increasing the recording time in Windows Sound Recorder.