Here is a detailed Awesome Note users guide for the iPhone version. Learn how to get the most out of your Awesome Note app here.
Awesome Note iPhone
The format of the iPhone has, even more so than other smartphones, taken the functions of the PDA and organizer and rolled them into your mobile phone. The iPhone has the ability to cater for all of your portable needs, including bringing in notes and calendar based features, and this is all done through their app framework. There have been hundreds of productivity apps that have been dedicated to organizing your life, events, and schedules. One of the best of these is Awesome Note for the iPhone, and now for the iPad. There are so many different elements in Awesome Note that many iPhone users need a little help getting started so they can begin integrating it into their life. Here is an Awesome Note users guide for the iPhone so those new to the software can learn about its benefits.
Basic Use
The primary thing you need to walk away with from an Awesome Note users guide for the iPhone is that it is
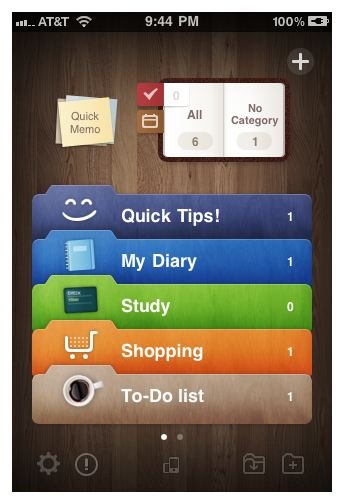
broken down into specific aspects of your life. Your Diary is going to be the most amorphous part of this entire iPhone app, mainly because it does not reflect a concrete tool. Since it is not easy to work with and does not benefit you in a direct social networking context, this may not be the first place you want to go.
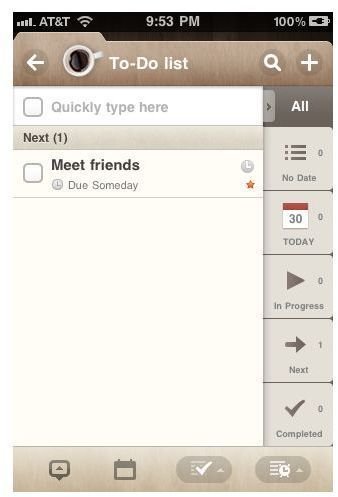
Instead, Study, Shopping, and To Do Lists are going to be the main functionality of Awesome Note for the iPhone, and you should make sure that you separate the content you include in each version as much as possible. The To Do Lists are going to be the bulk of this as Awesome Note allows you to really break down your day into a
series of events and then scroll through them one at a time.
The Study notes are a little less specific and you can tailor each note to your exact academic needs. Shopping
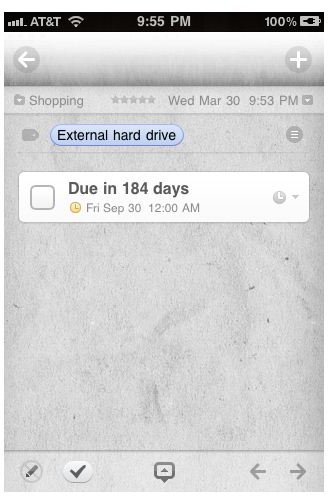
is interesting because it is not based around a “grocery store” list format, but instead longer term shopping goals such as home items you need to pick up. This is good because it allows for a set due time for your shopping needs, which creates a staggering between appointments that really allows Awesome Notes on the iPhone to be of practical use. This is only going to act as such, however, if you add the appropriate lists in each one, focusing on To Do Lists as the primary location and leaving Diary behind unless it is immediately pertinent. As long as each one has a different pattern of alerts and behaviors then it will go about notifying with specific purposes, so you will know how to approach them and will not ignore the alerts.
Folders
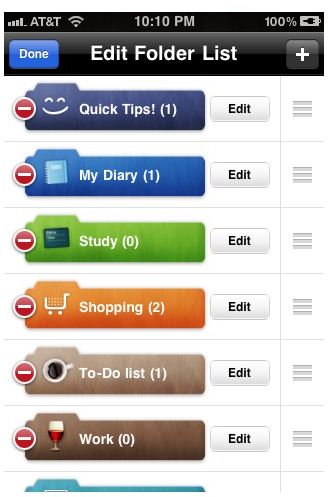
The folders that are given on this list, from My Diary to Anniversary, are just the default and not the standard for Awesome Note in every case.

An important part of the Awesome Note user guide for the iPhone is to customize the interface as much as possible. This means actually deleting some of these folders that you do not need and adding others for your specific life schedule. At the bottom right of the home screen in the Awesome Note iPhone app you will find two folder icons. The left hand one will bring up the Edit Folder List that will allow you to delete folders that you do not want. The right hand folder will allow you to then create a new folder, which you will name, set the icon for, set the note type you will use, assign a folder color, and set the note theme.
It is with these options that you can really begin to change the general layout of your Awesome Notes account, getting rid of what is unnecessary. For example, if My Diary and Anniversary are not relevant for your situation then they can go. You could even bring it down to a single folder screen. You may just want to keep things like the Travel Diary and Anniversary in the To Do List or you may do fine without them. This can make the navigation on the touch screen a little more streamlined, which makes it one of the easiest to use iPhone apps for this type of service.
Google Docs and Evernote
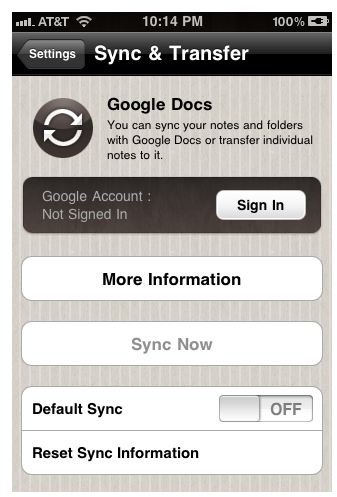
Another thing that many people will need to know from an Awesome Note users guide for the iPhone is how to sync to Evernote and Google Docs. When you are on the home screen you can choose the Settings icon in the lower left hand corner. Under Sync & Transfer you will have three options:
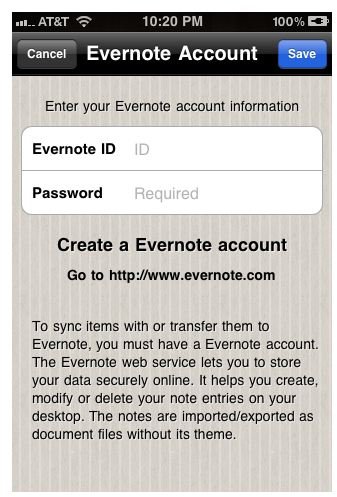
Note Transfer, Sync & Transfer (Google Docs ), and Sync & Transfer (Evernote). The primary thing that you must do for using Evernote or Google Docs with Awesome Note is that you need to sign into your account in their individual settings pages. Awesome Note will then sign into your Gmail account or Evernote account each time you use them.
This is going to create an automatic connection with your base account at the outside locations, which are much easier to use since they are done from a computer and have access to the multi-faceted e-mail account. This will allow you to essentially plug in Awesome Note on the iPhone to your regular scheduling life instead of having to just reconfirm your scheduling to the handheld format. This is going to give you more than just syncing in your Calendars feature on your iPhone , and you can eventually work on full customization in Awesome Note.
References
- “Awesome Notes How To.” https://www.bridworks.com/anote/en/howto/howto _01.php.
- Source: author’s own experience.


