Now we know a little more about what Junits are for, and what the philosophy is, let’s configure JUnits in our Android development environment, using Eclipse.
Introduction – Eclipse, Android and JUnits
In my last article, An introduction to Junits in Android development environment , we had a first contact with JUnits and testing development in a general way, with no examples using Android. Now, let´s learn how to join the JUnits and the Android development environment we are working on, in this case, using Eclipse.
We have different ways of starting this:
-We can create the testing classes in the same Android project we are working on.
-We can create the testing classes in one different project.
The choice is up to you. How will we do it? We are going to use a different project for testing classes. This way, we will have our main code clean, separated from the testing classes.
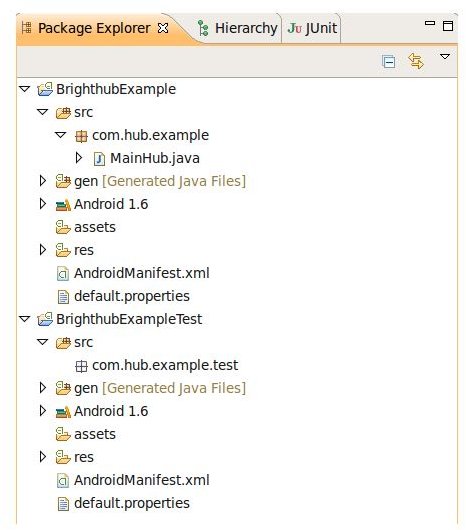
Let’s create the projects: in the image you can see both projects. One is called BrighHubExample and other one is called BrighHubExampleTest.
At first sight they both seem similar but they are not: In the main project (BrightHubExample) we have created an Activity (MainHub.java) and there is nothing created in the Testing project but the Android project structure.
Let’s check and compare the Android Manifest xml files in both projects:
In the Main project we have the following
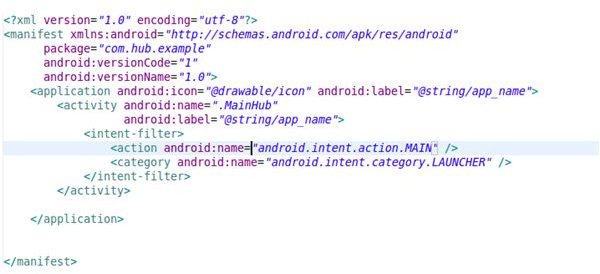
The usual Android manifest file, with the MainHub class declared as Activity.
Now let’s check the Testing Manifest:
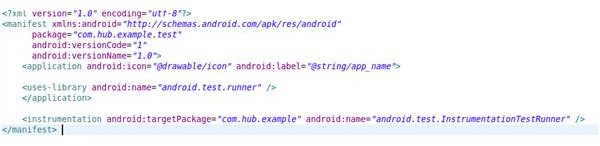
Here we have something new. Where are the Activities declarations? What do these lines mean?
In a Android Testing Project, we don’t need anything more than this:
<uses-library android:name=__“android.test.runner” />
<instrumentation android:targetPackage=__“com.hub.example” android:name_=__“android.test.InstrumentationTestRunner”_ />
With these lines, we make this project to use testing libraries. Here is an important point:
“android:targetPackage=‘com.hub.example’ “
Here we show that the target package for our testing is the com.hub.example package, the main project package.
We need one last thing to make the testing project work as desired; We need to add the Junit library to the project path.
Right click over the project → Properties → Java Build Path → Libraries
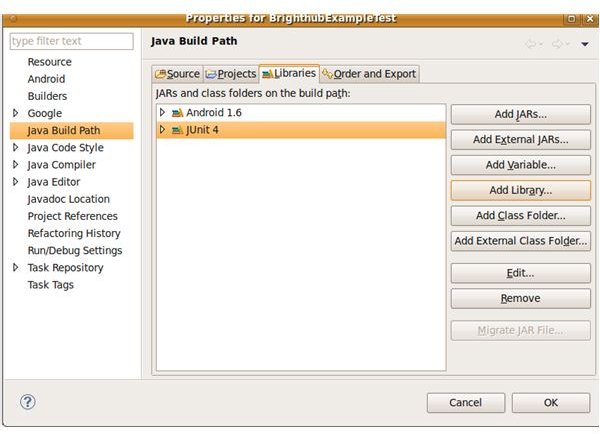
Here we click on the button “Add Library”. We select Junit from the list and make sure we are clicking the “Junit4” library. Once this is done, we have the Junit4 library in our project, ready to be used.
So, we are ready to start working with tests!
Creating and Running the first Junit
Create a new class in your Android testing project. This class will have the following structure:
package com.hub.example.test;
import org.junit.After;
import org.junit.Before;
import android.test.AndroidTestCase;
public class HubTesting extends AndroidTestCase{
@Before
public void setUp() throws Exception {
}
@After
public void tearDown() throws Exception {
}
}
This is the basic structure of a Testing Class.
We are extending it from “AndroidTestCase”; this is needed because we will run the test in the Android emulator or device.
I have added two methods: setUp() and tearDown. The method setUp is called before every test, and the method tearDown after every test. Any idea what the purpose of this is? Not now - but we will discover it soon.
We don’t have anything to test, but let’s see how to run the tests:
In our Testing project → Right click → Run As → Android JUnits Test
The JUnits will be executed in our device (or in the emulator) and we will see something like this in Eclipse:
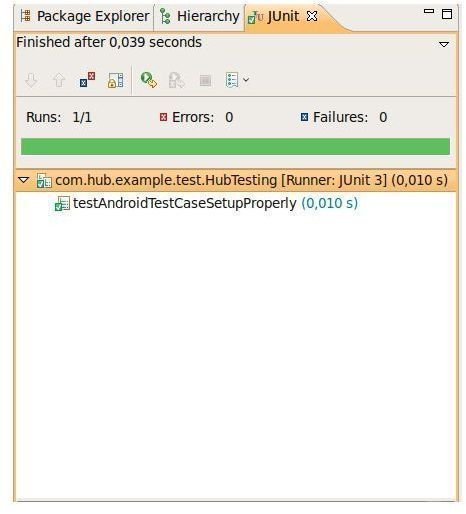
Here we will see if the test has passed or failed. If it’s green, good for you! The test has passed correctly. If something goes wrong, it will appear a bad red color…indicating the numbers of errors or fails in the testings.
Now we have all we need in our environment to start working!!
Ask, comment, interact!
Ask any question you have about the article, and I will try to answer as fast as I can. Comment my code, my writing, perhaps there is something that it´s missing or it is not complete - just let me know!! In other words, interact!!
Follow up
If you want to know when new articles are released, subscribe yourself to the Google Android RSS Otherwise, you can follow my research, articles and work in my professional twitter: jbeerdev
Testing in Android Development Environment
In this series of articles I will write about testing philosophy, JUnits in Android and how to create useful testing classes.
- An Introduction to JUnits in the Android Development Environment by Jbeer
- Junits in the Android Programming Environment by Jbeer
- Creating JUnits in Android by Jbeer


