Your Google Blogger site is a place that you can share whatever is important to you. Shouldn’t the design of the page speak of you as well? Customize your Blogger page by creating your own personalized Blogger banner.
Overview
A custom banner heading your Blogger site can make the page appear more polished and professional. In addition, making your own Blogger banner allows you to add your own personal touch to the page. You can use images, colors and text to produce a banner that suits your personality, coordinates with your blog layout and even your post topics.
Read on to learn how to go about making a Blogger banner as well as how to add a banner, whether your own or one created by someone else.
Click on any image to enlarge it.
Create Your Banner
You can actually insert any image into your Blogger header, but it will best serve you to edit a graphic so that it fits correctly as a banner. Otherwise, the image may be stretched and skewed, which can look amateurish and sloppy. In addition, by editing an image you can also add text with custom formatting and other modifications if desired.
Choose an editing program in which to create your Blogger banner. You can use anything from Photoshop to GIMP . Your best choice will be the program with which you are the most comfortable and familiar with. Start the application and insert an image you want to use for your banner background.
Since the banner is wider than it is tall, an image that is in landscape orientation will be a better fit. If you want to use a picture that is in portrait orientation, you can do so by inserting it into a long, narrow rectangular background. This is a beneficial option if you want to add custom text, such as a quote or phrase.
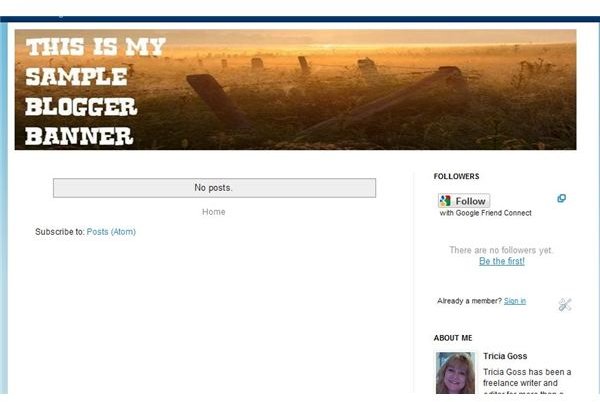
Add any text or special effects to the image that you choose. Once you have formatted your banner image so that it appears as you would like it to on your blog, adjust the size so that it is between 760 and 900 px wide and about 150 to 200 px high. Save the image and close the editing application.
Add Your Banner
Log in to your Blogger account and select Design. Click Edit in the Header section. The Configure Header dialog box opens.
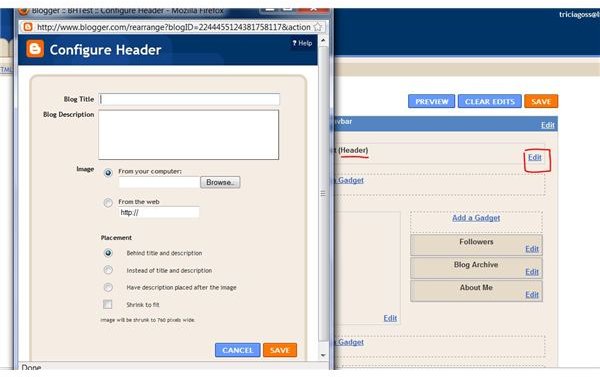
Next to Image, select From Your Computer and click the Browse button. Navigate to the Blogger banner you created and select it. Click Open. The Configure Header dialog previews your banner.
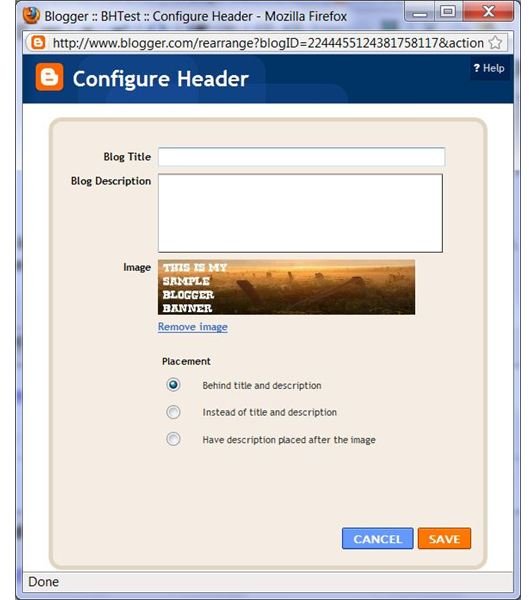
Select an option under Placement. If you choose Behind Title and Description, the banner will act as a background for the title and description that you have already entered, which is ideal if you want to simply use a resized image with your existing text. Choose Instead of Title and Description if you only want the banner displayed without any other text. If you select Have Description Placed After the Image, your description text will be listed beneath your banner.
Click the Save button to apply the changes. A highlighted notification appears informing you that your header changes were saved. Click the View Blog link to ensure that your Blogger banner appears the way you want it to. If not, edit the image to make changes or corrections. Otherwise, enjoy your new custom Blogger banner!


