If you appreciate organic beauty products or enjoy making things from scratch, then learning how to make homemade organic soap will likely be a rewarding and fun experience for you. Here we provide an introduction to soap science, and a step-by-step recipe to help DIY soap-makers start simply.
Learning how to make homemade organic soap is as simple as choosing a method and following some easy directions. There are two different methods of making organic soap from scratch. We’ll describe both and give step-by-step instructions for one, so you can create your own soap creation in no time.
Soapy Basics: Science
Soap comes in many different forms, but it all comes from a basic chemical reaction:
Fat or Oil + Lye = Soap
Of course, you can’t just mix them together and get a body bar; there are different processes involved. But that’s the basic gist of things. How many, and what types, of additional ingredients you add are what determine moisture and create the hundreds of great scents out there. If you want to show off to your friends, memorize the word “saponification.” That’s the scientific term for this chemical reaction.
Soapy Basics: Method
There are two different methods of making soap; at least as DIY projects are concerned:
- Cold Process is the most common type of soap-making method. Contrary to its name, this process does involve heat. You’re basically heating up and combining your ingredients (and scents), pouring the mixture into molds, and then letting the soap harden and cure for up to a month. With this method, saponification happens while the soap is curing.
- Hot Process is a variation on cold process, where instead of just heating up the ingredients, you fully cook the soap, triggering saponification during the active process itself. The soap is then spooned into molds and is basically ready to use as soon as it cools.
If you like, you can buy large blocks of soap meant to be melted, scented, and molded; or you can melt down existing soaps and remake them into your own creations. Since neither of these involves actually making soap from scratch (and since many of these pre-manufactured soaps contain additives contrary to the spirit of organic soap), we’re not going focus on those methods here.
Gathering Your Cold Process Ingredients
Since the cold process is most common, that’s what we’ll walk you through here. But first, you’ll need some ingredients. As discussed earlier, you’ll need fats and oils (the right combination is what determines the texture and behavior of your soap), lye, and any scents you want to add.
For the oil/fat mixture, you’ll want equal parts canola, palm, and coconut oil (in this recipe, 8 oz. each). For the lye mixture you’ll need lye and distilled water. Since lye is a very strong chemical, wear safety goggles and long sleeves when working, and make sure to keep it in a safe place, sealed unless necessary, and away from children. You’ll also want a few essential oils on hand to scent your soap, and you can experiment with fancier combinations once you get the hang of it.
Carefully Mixing Your Lye Solution
When added to water, lye becomes extremely hot (we’re talking upwards of 180 degrees F), so wear gloves and be careful. Measure out exactly 8 oz. distilled water and place in a pitcher. Carefully add 3.5 oz. lye, and stir gently. The lye may bubble, steam and become extremely hot. Use a long handled spoon and keep stirring carefully until the mixture is well stirred. Cover with a lid, and set aside until it cools to 100 degrees F.
Combining/Heating Your Oils
Carefully measure out your canola, palm, and coconut oils. (If you’re ever using solid oils to make organic soap, you’ll want to melt them in a pot first, then add the liquids to it). In a large, solid pot, carefully bring your oils to just over 100 degrees F, then remove from heat.
Soap-Making Time!
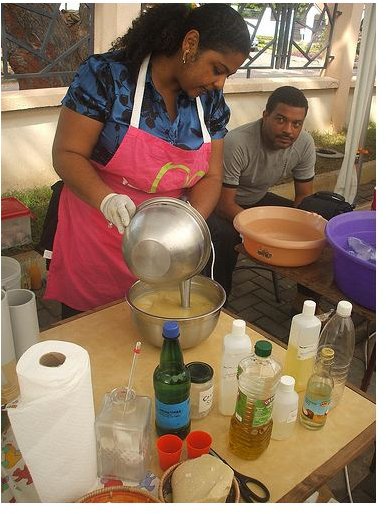
When your lye mixture has cooled to 100 degrees F and your oils are melted and heated to 100 degrees F, it’s time to mix them together. It’s important for both parts to be within 5 degrees of each other so they can interact properly, so keep an eye on that lye. (You can always heat the oil up again on the stovetop, but there’s not much you can do if you let the lye cool too much.)
Very carefully and very slowly, pour the lye water into the oil mixture, and you’ll notice that it starts reacting right away. You now need to stir until your mixture reaches a point called “trace,” which is often compared to a thin pudding. If you mix with a spoon, this can take up to an hour. If you use an immersion blender (alternating several seconds of blending with several seconds of stirring, not blending continually), it will take just a minute or so.
Once your soap blend is fully mixed and appears to have reached trace, stop blending and add any oils or additives you like. You can use oatmeal, flower petals, and any combination of essential oils that you prefer. If you want a moisturizing soap, this is the time to add your moisturizing oils, as well. Make sure all additives are thoroughly mixed in.
Molding, Waiting, Soaping!
It’s time to pour your soap mixture into a soap mold. You can use a large mold block (which you saw into bars after the soap is completed), or small soap molds, whichever you like. Cover with a towel, and set in a warm place. You’ll notice that the soap will actually get warmer as saponification kicks in, so keeping it covered can help keep that process moving steadily.
Immediately after you set the soap to mold, you’ll need to clean up, and do so carefully. Keep your goggles and gloves on, as the residue in the pot can still be quite harsh against skin. Use hot, liberally soapy water to clean all items used in the soap making process, especially the container you had your lye water in.
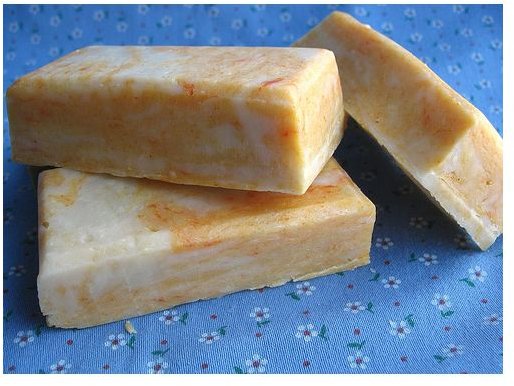
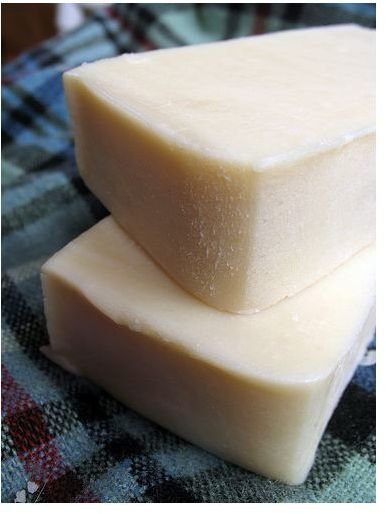
After a full day or so, your soap is solid enough to remove from the mold and, if you like, cut into bars. However, you should wait several weeks (a month to be safe) to make sure the soap finishes saponification, and fully cures, so as not to be irritating to skin. Once you’ve waited long enough, your soap is ready to enjoy. Learning how to make homemade organic soap may seem like a challenge at first, but it’s definitely worth it when you first lather up with a refreshing bar you crafted yourself.
Safety and Sources
As you go about learning how to make homemade organic soap, keep in mind that this is a serious chemical reaction, and is probably not a process for children. Wear goggles, long sleeves, and gloves when working with lye, as well as with the uncured raw soap mixture. Making soap at home can be a great activity, just make sure you’re smart about it.
Sources:
https://www.candleandsoap.about.com
Images:
Homemade soap bars: https://www.flickr.com/photos/ieatwaffles/3407297051/
Mixing soap: https://www.flickr.com/photos/niyyie/3830880968/
Homemade soap bars (2): https://www.flickr.com/photos/ieatwaffles/3531167189/


