Want to make the most of in season, local produce? Preserving fresh food for eating year round is easy and rewarding. Here you’ll find information on the three ways of preserving food at home.
Go Green - Learn to Preserve!
Preserving in season foods is a tasty, satisfying way to decrease the carbon footprint of your family. By stocking up on fresh food while it’s in season you can greatly reduce the amount of imported food you buy. Off season produce usually travels to our markets from other parts of the world, using up billions of gallons of fossil fuels. The more you preserve locally grown foods at home, the more you can lessen the environmental impact associated with how you eat.
Three methods are commonly used to preserve foods at home. By learning the basics of canning, freezing and dehydrating foods you’ll have the skills necessary to preserve the best of summer’s bounty.
Canning
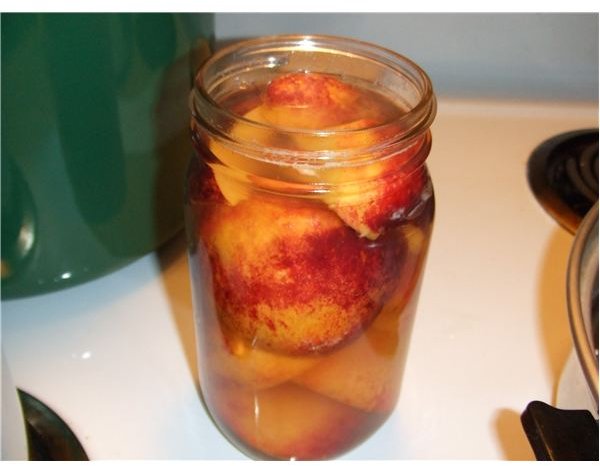
Yes, canning foods does take a considerable amount of work and time. However, don’t let this fact turn you off to the idea of canning
foods at home. Many delicious foods preserve wonderfully by canning. Once you taste a home-canned peach in the middle of January you’ll know your work was worth it.
Canning takes an initial investment of some basic necessary equipment. To can high-acid foods like fruits, jams, jellies, and pickles you’ll need a water bath canner. If you want to can low-acid foods such as vegetables (including pumpkin ), soups, or meat, you’ll need a pressure canner. Both types of canners can usually be found at hardware stores. While you’re there, stock up on other necessities like canning jars and lids, a jar lifter, and a funnel.
For step-by-step basic instructions on water bath canning, read this Introduction to Home Canning . For additional information, visit the National Center for Home Food Preservation .
Freezing
Freezing is perhaps the easiest way to preserve food and requires no special equipment. Particularly handy for preserving vegetables, freezing is an easy option and helps you avoid needing a pressure canner. Most produce can be frozen with good results, your only limit is the size of your freezer. Many homesteaders invest in a large chest freezer to increase their freezer capacity.
Soft fruits such as peaches, apricots, and nectarines can be pitted and frozen in zip-top plastic bags. Use the thawed fruit in cobblers, muffins, sauces, or syrups. Applesauce keeps well frozen, too. Freezer jam is another great way to utilize both in season fruit and your freezer.
Many vegetables keep best when they have been blanched prior to freezing. Submerge the vegetables in boiling water for a couple minutes, then plunge into cold water. This method works well for freezing green beans, shell peas, and corn (taken off the cob after blanching). To freeze spinach, first wilt the leaves by steaming for a minute or two, then drain and freeze. Hard vegetables, such as winter squash and carrots, should be cooked until just soft prior to freezing. Zucchini, bell peppers, and most greens besides spinach do not freeze well.
You can use zip-top bags or plastic freezer containers to hold your frozen food. For longer shelf-life consider purchasing a vacuum sealer. Use this chart to determine the recommended shelf life of your frozen foods.
Dehydrating / Drying
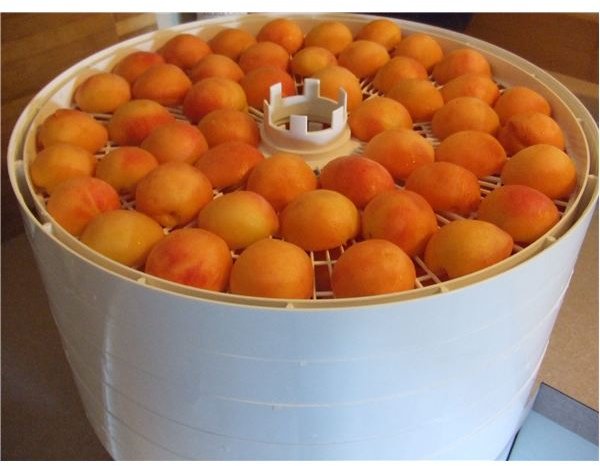
You can preserve foods and herbs by drying them using a food dehydrator, your home oven or, in some cases, the sun (for more information see How to Sun-Dry Foods at Home ). A food dehydrator will ensure your food will be kept in the recommended temperature range for the entire drying time. Using your home oven may burn the food unless the oven has a heat setting of 150 degrees or lower. You can avoid this by propping the oven door open to vent, but you’ll be wasting energy doing so.
Electric dehydrators use a relatively small amount of energy to dehydrate foods. You can produce great-tasting dried fruits and fruit leathers easily with a dehydrator. Dried plums, apples, pears, and nectarines are personal favorites. A food dehydrator can also be used to dry garden vegetables and to turn meats into jerky.
Herbs dry well in a warm location away from direct sunlight. Inside or out, dry herbs such as basil, thyme, and sage in small bundles left to hang upside down. You can also dry herbs on a low-heat setting in an electric dehydrator.
Photos: Author’s own


