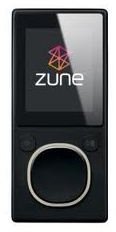
My Zune Won't Connect to the Computer! Troubleshooting Tips and Fixes to Help Connect Your Zune to the Computer
USB Port
If you connect your Zune to your computer via the USB cable and it doesn’t recognize it then it could be a USB port problem. Try another USB port in the front or back of your computer. Do not use a USB port on your keyboard. The USB port for MP3 players needs to be a high-speed port and USB ports on keyboards are not high-speed ports. Also be sure to use a USB port on your computer and not an external port.
USB Cable
Check to be sure the USB cable is connected securely to your Zune. Take it out and put it back in again. Also check the USB port connection. Unplug it and plug it back. Sometimes in connection problems just disconnecting it and reconnecting it will fix the problem. Try another USB cable if you have one. Check the cable to be sure it looks okay as in not dusty and the cable itself looks okay and doesn’t have any tears in it.
Restart the Zune
Restarting a Zune will fix many problems. To restart the Zune:
- Make sure the Hold switch is turned off.
- Hold down the Back and Up buttons until the Zune logo appears on the screen.
- Your Zune should start up normally.
Try to reconnect your Zune and see if your computer recognizes it.
Restart Your Computer
A computer reboot fixes many problems. Disconnect your Zune and close all open programs. Click Start and Shutdown then Restart. When your computer boots back up, open the Zune software by clicking on the icon on your desktop or through Start and Programs. Connect your Zune to your computer via the USB cable.
If your computer still is not recognizing it then do the above steps but this time shutdown your computer instead of rebooting it.
Update Zune Software
Disconnect your Zune from your computer. Open the Zune software and click on Settings. Select Check for Updates under General and if it finds updates then update the software. Connect your Zune to your computer and check if it connects.
Uninstall/Reinstall Zune Software
If you uninstall the Zune software you will not lose any music, pictures, etc. To uninstall Zune software:
Click Start and type msconfig in the Start Search box and press Enter. If you are prompted for an administrator password type the password and click Continue. Click the General tab and select Selective Startup. Under Selective Startup uncheck Load Startup Items. Click the Services tab and select Hide all Microsoft Services check box and click Disable All. Click Ok and restart your computer.
When your computer boot backs up, make sure your Zune device is not connected and click Start and type appwiz.cpl in the Start Search box and press Enter. In the Uninstall or change a program window click Zune, click Uninstall and click Yes. Uninstall the following software:
Microsoft User-Mode
Microsoft User-Mode Driver Framework Feature Pack 1.0
Windows Driver Package – Microsoft WPD
Windows Media Format 11 SDK
Windows Portable Devices
Close out of the window by clicking the X in the corner. Click Start and Computer. Click the C: drive and click on the Program Files folder. Find the Zune folder, right click, and select Delete.
Next we will empty the Windows temporary folder. Click Start and type %temp% in the search box and click Ok. Click on Edit and click Select All. Click File and Delete. Answer yes to the confirmation: Are you sure you want to send these items to the Recycle Bin?
Now that the Zune software is uninstalled we need to reinstall it by downloading the current version. Make sure you are signed on as an Administrator.
Next you need to change back to the normal startup. To do this click Start and type Run in the search box. Type msconfig and click Ok. Click the General tab and click Normal Startup and Ok. Restart your computer.
When your computer comes back up open the Zune software, and reconnect your Zune via the USB cable.
