Do you have a huge music collection on compact discs or CDs? Would you like to carry them with you wherever you go by having them on your iPod? This article will teach you how to copy your music CDs to your iPod with iTunes and take your music with you. Read on to learn more.
Copying CDs to your iPod
We all love our iPods and, more than that, the music that they allow us to take along wherever we go. Apple provides the fabulous iTunes application which is the central hub for getting music, videos, audiobooks, photos etc. into and out of your iPod. The iTunes Store is the place to get music for the iPod and Apple has made sure that the process is as simple and painless as possible. Say you’ve been “into” music from before the times of the iPod and have collected a multitude of compact discs (CDs) carrying your favorite music, is there a way to get it all into the portable and powerful iPod? The answer is Yes! In fact, the process is called ripping and can be done very easily allowing you to download your CDs onto your computer and then have them available on your iPod or any other portable music player.
Downloading CDs onto your iPod
What do you need?
- The latest version of iTunes
- CDs that your intend to copy music from
- Your iPod
- PC or Macintosh computer with a disc drive (to read the CDs)
We will be using the iTunes application to do all the work for us, so lets first set up the app to facilitate our copying process. Open the iTunes application and switch to the Preferences windows. (On a Mac, the menu is available under the iTunes main menu. On a PC, go to the Edit menu and you can find the Preferences in there.
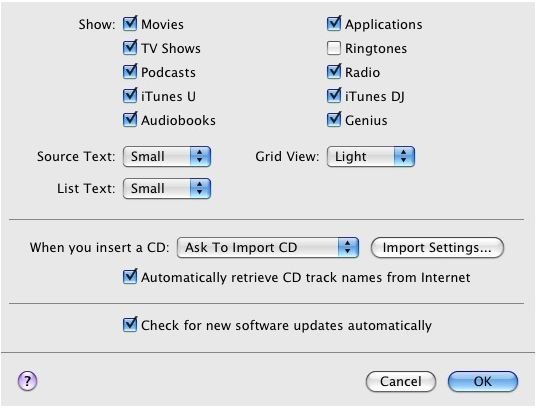
On the General tab, you can find a setting to choose an action to perform when you insert a CD. (Click any image to enlarge.)
As shown below, the setting you choose here will determine whether the CD gets automatically copied to your computer or asks you first before doing so. I prefer using the “Ask to Import” setting but you can choose anything your think would suit you the best. Also see to it that the “Automatically retrieve CD tracks and names from the Internet” box is checked. This will help you easily tag your tracks.

Setting up iTunes to copy CDs
Next, we need to tweak the “Import Settings“ so click on that button.
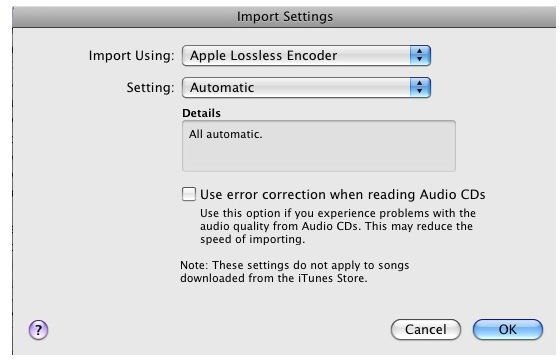
If you plan to listen to your copied CDs only on the iPod or iTunes you can go ahead and use the default Apple Lossless Encoder. If, however, you require compatibility with other computers and portable music players, choose the MP3 Encoder.

Once you choose the MP3 encoder, an additional set of customization options becomes available.
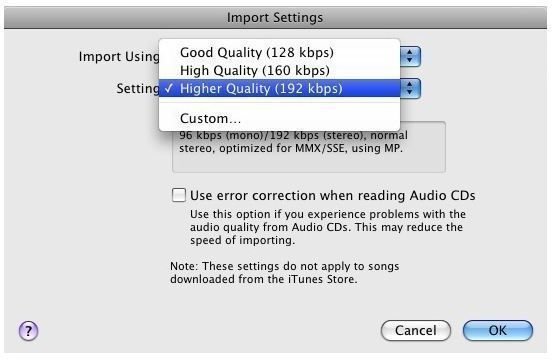
You can now adjust the quality of the audio track that will be copied to your computer or iPod. You can choose any of the three standard import standards. If you’re the techy kind, you can choose the custom setting and adjust several other parameters of your copied music although this is not required for casual users.
Tag your tracks & sync to iPod
Once all the of the above settings have been set up, you’re done. You don’t have to do this every time you copy a CD, this is a one-time only setting and will be applied to all CDs that you copy.

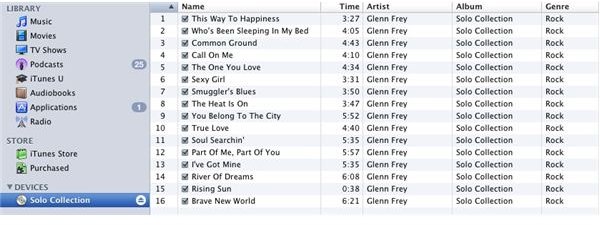
Now just insert the audio CD into your disc drive and it should come up on iTunes. Then, iTunes will try to identify the CD by downloading identifying track data from an online database called Gracenote. This step is only accomplished when you’re connected to the Internet, it is highly recommended that you proceed with this step since it will allow you to organize your music later. Once the music CD has been identified, the relevant data is shown in the iTunes window
Depending on your settings, a window will pop up asking if you want to copy your CD to iTunes.

Once you say yes, the music will be copied to your iTunes Library and will be synced to your iPod if you’ve allowed iTunes to automatically load music onto your iPod. If you’ve not set up auto sync, you may have to manually drag and drop the album onto your iPod.


