Are you tired of just simply guessing the location of the fishes in the middle of the ocean or lake? Have you been staying in your boat the whole day without catching a single fish? Learn how to use a fishfinder to better your chances of success next time you’re out on the water.
Getting Started
Fishfinders are powered by SOund Navigation and Ranging (SONAR) which is a navigating system used in locating fish, measuring the depths of the ocean and can even determine if the bottom is hard or soft. Fishfinders use a transducer that emits sound waves or high frequency sounds underwater until it hits something including the bottom of the ocean, rocks, corals and fish. As soon as the sound is blocked, it bounces back like an echo reflecting an image presenting that object to the display monitor commonly, the CRT and liquid crystals. However, image display does not show the exact object image; more learning and practice is required to determine which is what.
For help on finding the best fishfinder for your needs, What is a Good Fresh Water Fishfinder may be of interest. Additionally, you may want to consider reading What is the Best Fishfinder for Saltwater Fishing .
Mounting the Transducer
As soon as you have your fishfinder unit, the next thing you should do is mount it in your boat. The recommended location to mount the transducer is either in the trolling motor or transom motor but make sure that the wiring harness can reach both the transducer and the unit. Proper mounting is important for accurate SONAR reading. Installation of fishfinders do not really require an expert, you just have to follow carefully the step by step procedures written in the owner’s manual, but if uncertain, then you may need help.
The Keypad
As soon as you are ready to use your fishfinder for the first time, you must turn on the power by pressing the Power/Backlight key of your unit. If it won’t turn on, you have to check for lose wirings or connections making sure that the red and black wires are connected in their proper placement; check also if the fuse is not blown and is properly installed.
The fishfinder unit has a keypad comprising of keys namely the arrows (up, down, left & right), menu and enter key to go over the menu options; and the power key for activating and deactivating the backlight.
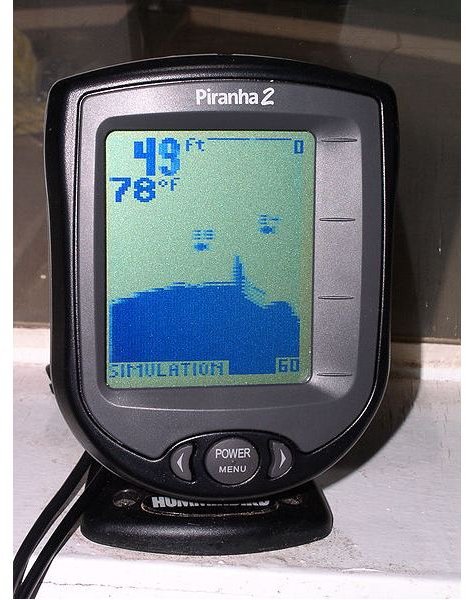
Simulation Mode
To master the functions of your fishfinder, simulation mode is provided. It activates instantly as soon as the unit recognize that there is no attached transducer. An actual sample image is projected in your monitor reflecting an underwater view. You can actually navigate and practice to become familiar. To end the simulation mode, just simply turn off the fishfinder.
Reading the Display
Displayed in the left upper corner of the screen, you will find the numerical display in this order from the top to bottom:
- Depth of the water in feet
- Temperature
- Speed in miles/hour (applicable only for transducers with speed monitoring capability)
- Distance in kilometers or miles (also applicable for transducers with speed monitoring capability)
- Current Battery Voltage
Fish can be determined easily from trees, rocks and other objects because it is represented by an arc. The fishfinder can also be set into target mode with the use of Fish ID settings wherein it sends you an alert if fishes are detected. It can be activated by turning on the Fish Alarm located in the menu settings. By activating the fish alarm, the screen will display various sizes of related targets only (arc symbols that represent the fishes). If it is turned off, every detailed objects hit by the soundwave will reflect in the display screen.
There are so much to learn with fishfinders and it requires reading and understanding the manual plus actual application and experience is a must to master this kind of fishing with modern technology .
Photo Courtesy of Wikimedia Commons; GNU Free Documentation License / Supplied by Andrew Tawker


