Want a hidden, encrypted folder on your USB flash drive for your sensitive data? We look at creating a folder hidden inside a hidden container using TrueCrypt and then test how it works in Windows.
The purpose of this article is to demonstrate, step-by-step, how to set up a hidden, encrypted folder on a USB flash memory card. For this, we’ll first use an open-source application called TrueCrypt . Although the TrueCrypt website has an excellent tutorial section, we’ll limit ourselves to just the specified deed, somewhat simplifying the process and, hopefully, making it more transparent and understandable to those who are new to the subject.
Installing TrueCrypt
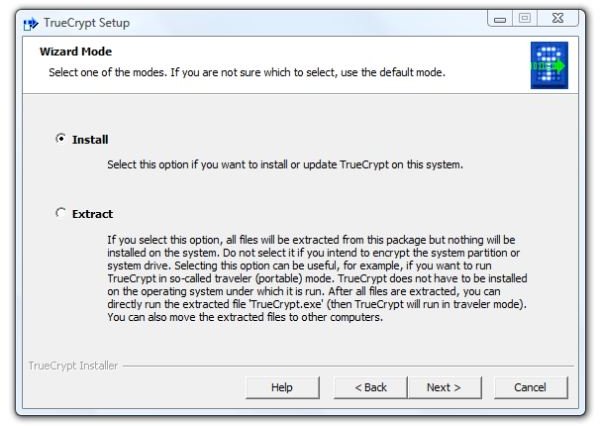
1. First, [download the application and run the installer](/tools/download the application and run the installer). You’ll immediately be faced with a choice: install it to the computer, or merely extract the files. Since we assume that you are doing this with the PC which you will primarily use the card, select “Install” for the normal mode and “Next” to continue.
Image
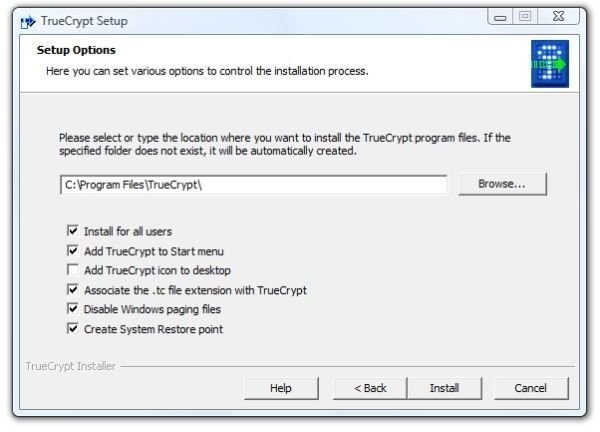
2. Then there are more choices. Do you want to install for all users on the PC? (Probably not if associates or other family members use the PC. Probably so if you are the sole operator of the PC.) Do you want to add TrueCrypt to the Start menu and put an icon on the desktop? (Maybe or maybe not, depending on your needs. The basic unit of security is trust, and I trust that I can control access to my computer. I also have enough desktop icons.) Disabling the Windows paging files (virtual memory on the hard drive) is for those paranoid enough to fear the black helicopters. Unless you are really, really worried about some of the content of memory ending up being written to the hard drive, which would take forensics to decipher, I suggest avoiding this setting. On the other hand, associating the .tc file extension with TrueCrypt may be something to not do. This from the theory that the PC doesn’t need to tell everybody and sundry who may be watching that any file in any open folder is a TrueCrypt file. (And that’s how paranoid I am.)
Image
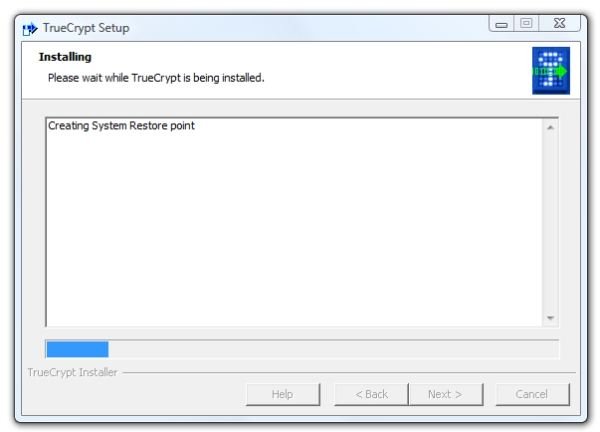
- Click “Install” and it will start creating a system restore point .
Image
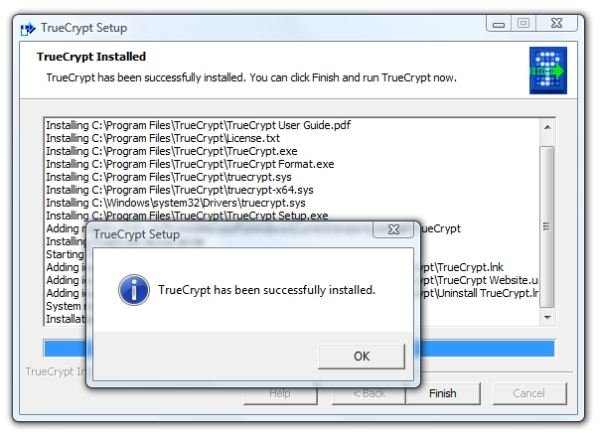
- Soon after the restore point is created, installation will be complete. Click “OK” and click “Finish”
Image
Creating TrueCrypt Containers on the Flash Drive
The next step is to insert the USB Flash drive that you wish to create the encrypted container on. If Autoplay is active in Windows, the pop-up dialog will tell you which drive letter is linked to the Flash drive. In our case, it’s Drive J:
1. Start TrueCrypt from the Start Menu. Don’t worry about your Flash Drive letter not being listed in the application window. Click “Create Volume” to run the Volume Creation wizard.
Image

2. Select “Create a file container” and click “Next.”
3. In the “Volume Type” dialog, select “Hidden TrueCrypt volume” and click “Next.”
4. In the “Volume Creation Mode” dialog, select “Normal mode” and click “Next.”
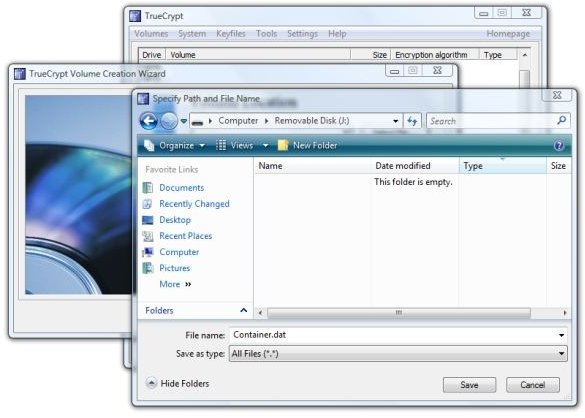
5. In the “Volume Location” dialog, click “Select File.” Then navigate to your Flash Drive and enter a filename for the container. It can be any filename you desire and have any extension, but do not select an existing file. Click “Open” to close the dialog.
Image
6. Back in the Creation Wizard, click “Next.” This will open the “Outer Volume” dialog, which is just information. Read it and click “Next.”
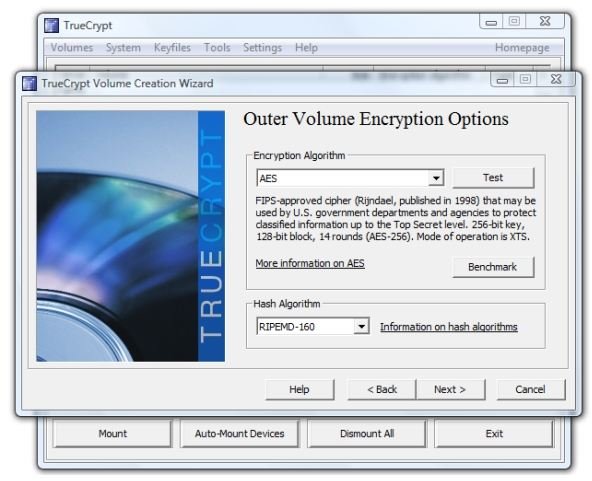
7. This opens the “Outer Volume Encryption Options” dialog. It’s fine to accept the defaults and click “Next.”
Image
8. In the “Outer Volume Size” dialog, enter your desired Outer Volume Size. Here we’ve specified 2048 MB. After entering the size, click “Next.”
Image

Next: Continuing creating the TrueCrypt folders and Trying it Out.
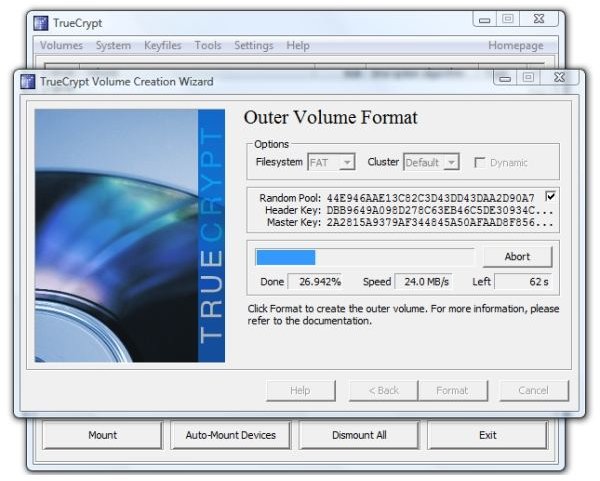
9. This will open the “Outer Volume Format” dialog. To get a “random seed” to increase the strength of your encryption, waggle your mouse over the dialog. TrueCrypt recommends doing this for at least 30 seconds. Then click “Format.”
Image
-
TrueCrypt will then create the outer volume. During this process, you’ll see the activity light on your drive flash.
-
The information dialog says, “Outer volume has been created and mounted as drive Z: To this volume you should now copy some sensitive-looking files that you actually do NOT want to hide.” Click “Open outer volume.” We then copied a PDF file (the parts list for a lawn tractor – I’d really hate for that to get out) into the standard Windows file dialog.
Advertisement
12. This opens a new information dialog. It says that “the maximum possible size of the hidden volume has been determined.” Click “Next” to continue.
13. This opens the “Hidden Volume Encryption Options” dialog, which is identical to the “Outer Volume Encryption Options “ seen in step 7. Again, it’s fine to accept the defaults and click “Next.”
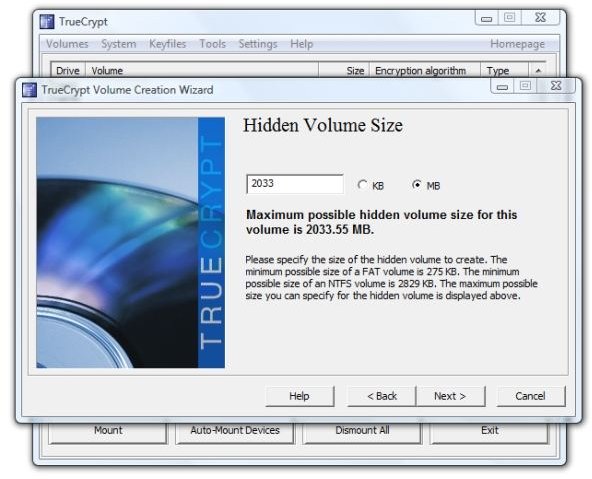
14. This opens the “Hidden Volume Size” dialog, which advises us that “the maximum possible hidden volume size for this volume is 2033.55 MB.” We selected 860 MB in order to leave some room for some more decoy files in the outer volume and clicked “Next.”
Image
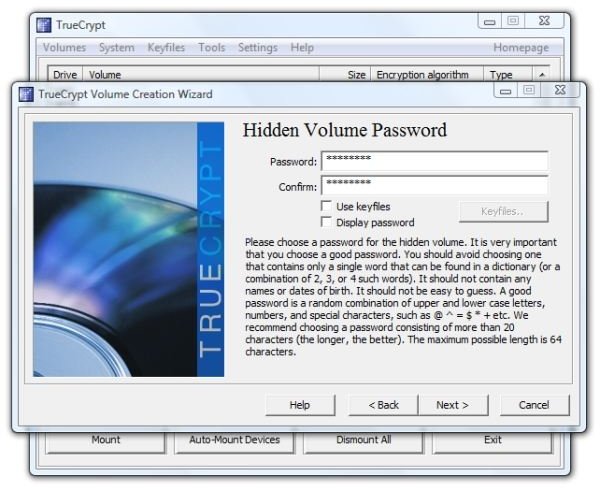
15. Then it asks for the hidden volume password. This should be a different password, of course, than you used for the outer volume. This should also be a strong password.
Image
16. Again, exercise your mouse over the application dialog for thirty seconds or more to get a random seed for your encryption and then click “Next.”
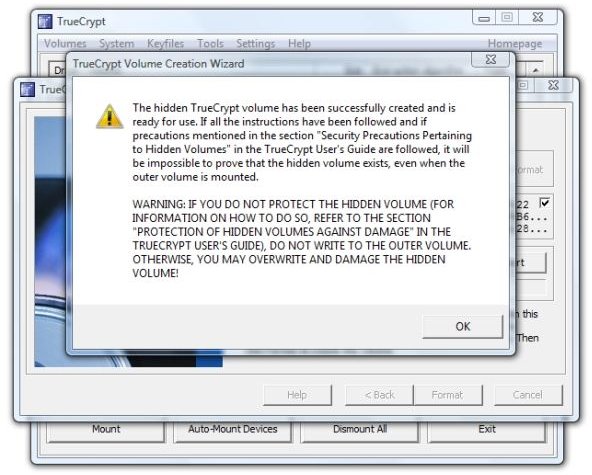
17. “Formatting” goes very quickly on the Hidden Volume, and then this dialog appears advising you that the “TrueCrypt volume has been successfully created and is ready for use.”
Image
And that’s the complete process. We are done with the Wizard, so click “Exit.”
Trying It Out
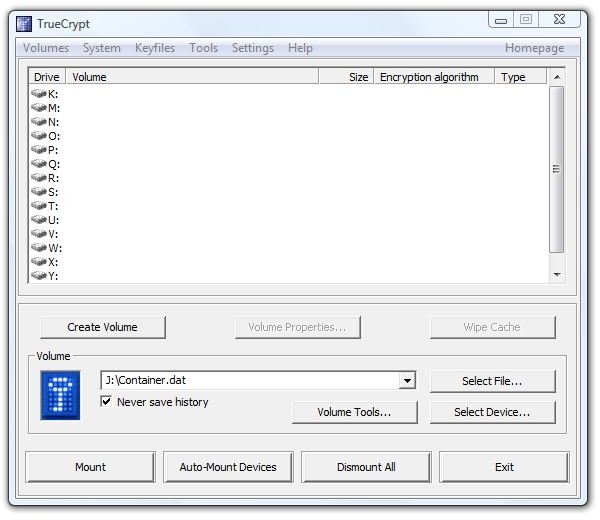
Back in the main TrueCrypt application dialog, let’s try out our newly created outer and hidden volume. Click “Open File” and navigate to your Flash Drive where you put the outer volume cleverly disguised as a filename. Click the filename and click “Open.”
Image
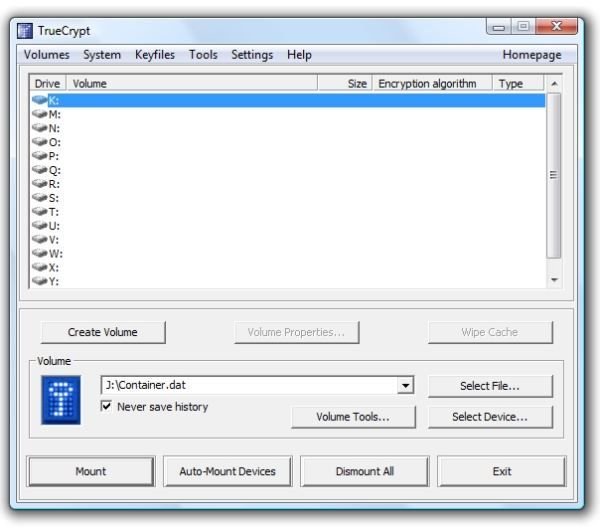
Click a free drive letter in the top of the dialog in which to mount the Outer Volume. On this PC, K: is the first free drive letter, so we clicked it.
Image
Click “Mount” and it will ask for the Outer Volume password.
Image
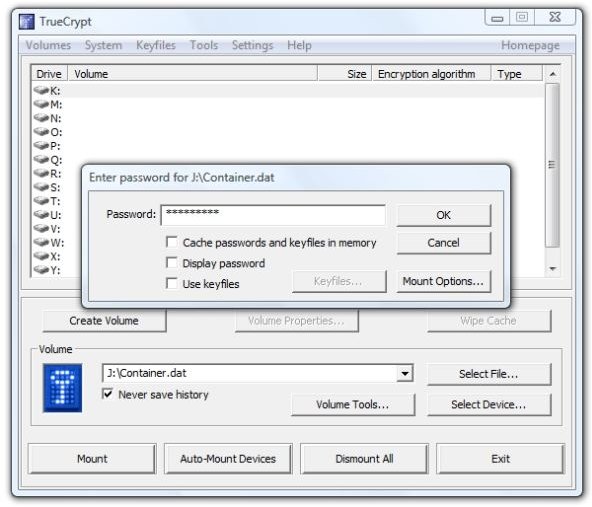
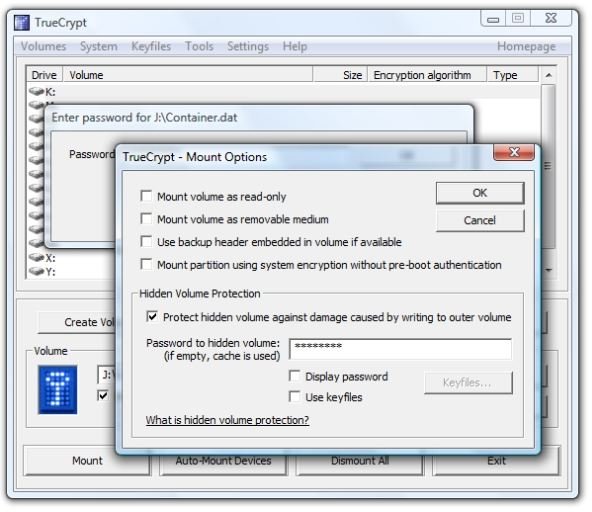
After entering the password, click on “Mount Options.” Select “Protect hidden volume against damage caused by writing to the outer volume” and enter your hidden volume password. This is a precaution. It allows us to manipulate files in the outer volume without corrupting or overwriting any of the data in the hidden volume. Click “OK.”
Image
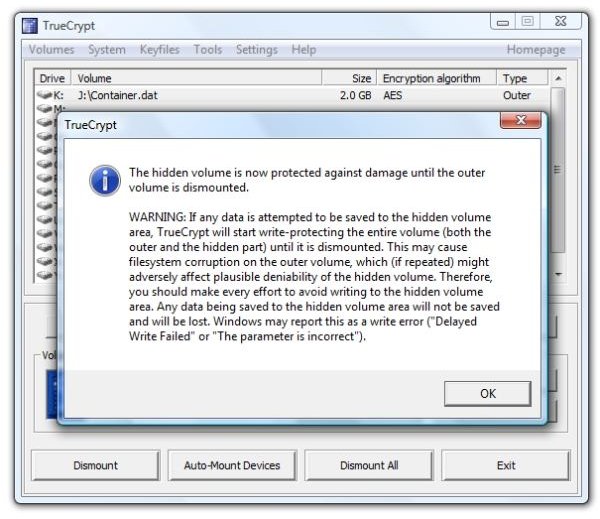
TrueCrypt then tells you that the hidden volume is protected against damage until the outer volume is dismounted.
Image
If you want to access the hidden volume space, click “Dismount” to un-mount the outer volume. Then click the drive letter where you want to mount the hidden volume and click “Mount.” Instead of using the outer volume’s password, enter the hidden volume’s password.
Next:Finishing Up, Related Articles, and Further Reading
Notice in the image below that the TrueCrypt window shows the “Type” of volume as “Hidden.”
Image
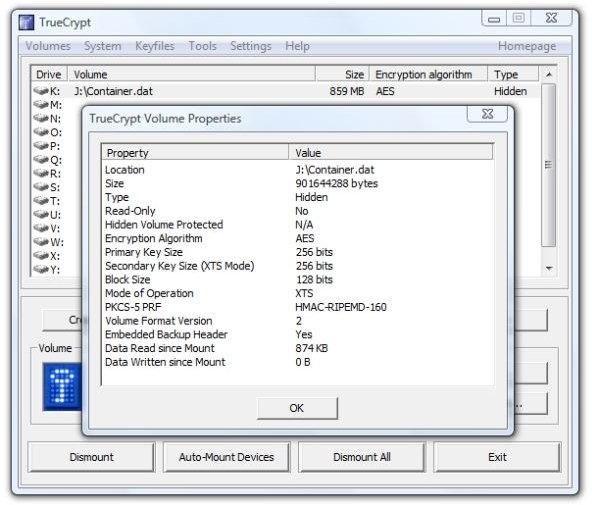
At this point, we have a file or folder on our Flash Drive that requires a password to access. Even if somebody in authority discovered this and forced us to divulge the password, the presence of the hidden partition could not be discovered because it looks like so much random data. Only we know that the hidden portion is there.
Let’s see what it looks like to a person “borrowing” your Flash drive. First, we’ll dismount it in TrueCrypt by clicking “Dismount” and “Exit.” In the system tray we clicked “Safely Remove Hardware” and selected “USB Mass Storage Drive J:”
Reinserting the flash drive, we selected “Open folder to view files” in the AutoPlay dialog, and here’s what we find when we double-click the (cleverly disguised) “container.dat” file. (It can be renamed and will still work.)
Image
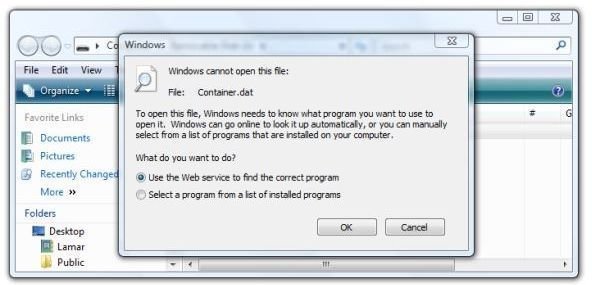
A couple of other things to note are that Windows Vista shows 2.0 GB used on the flash drive. If you click the container file and select “Properties,” Vista shows its true size. Thus it’s plain to the borrower that something is there. Windows does not ask for a password to open the outer volume. It also does not recognize the file as a container. It’s fairly useless to hide the container file, as an astute user would try showing hidden files first when faced with this mystery. Thus it may actually be better to make it look like a corrupted folder.
This also suggests that this technique is best only for those needing a very small, non-obvious amount of storage.
So we have sucessfully created a hidden, encrypted volume inside an encrypted container file on a USB flash drive. What if we want to encrypt the entire flash drive and run TrueCrypt from the drive itself?
We’ll look at that next.
Thanks for reading.
Continue Reading
Automatic, Transparent Encryption/Decryption for Your USB Flash Drive - Want to keep the data on your thumb drive away from prying eyes? TrueCrypt, running in “Traveler” mode on your flash drive, provides transparent, seamless encryption and decryption and can automatically run itself upon insertion. This article guide provides step-by-step instructions to set it up.
Further Reading
How to Test High-Definition Video on Your Laptop or PC - Want to find out what high-definition video looks like on your current Vista or high-end XP PC without spending any money or buying any additional equipment? You’ll find out quickly if your PC can handle 720p or 1080p video. All you need is a fast Net connection and Windows Media Player 9 or 11.
Broken Down on the Information Superhighway - In the war against terrorism and media piracy the lines have been drawn - or have they? Highly visible is the conflict between the pipe owners and the content pushers, but are secret deals and treaties that affect the global use of the Internet, music, and movies being made out of the public eye? Learn about the secretive “Anti-counterfeiting Trade Agreement” and who’s really behind ACTA.
How to Make a Bootable Disc in Vista - Need a backup method to start a Vista PC? Creating a bootable disc in Vista is not as easy as in previous versions of Windows, but it can be done. This article tells you how.


