Having frustrations getting your iPod to work in Windows? Or are you just looking for the quickest way to get it set up? Read on for a step-by-step process to give you a hand!
Getting started
All right, you have a brand new, shiny iPod out of the package and ready to use. If you’re having some problems getting it work on Winodws, this guide will help you. You’ll notice that the screenshots were taken with Windows XP, but the steps still apply even if you’re using Windows Vista or even Windows 7.
Step 1
If you refer to the instructions that came with your iPod, they will recommend installing iTunes on your computer. No worries, the program is free. On top of that, it is the only method of downloading software updates and is the easiest way to get media on your iPod. Unfortunately, programs like Windows Media Player will not sync music to your iPod.
To read more about iTunes, and to download a copy, visit this link: https://www.apple.com/itunes/download/
You’ll notice that Quicktime will install alongside of iTunes. This is mandatory in order to download music videos, or other forms of video from the iTunes store. It also doesn’t take up much hard drive space.
Upon installation, iTunes will also offer any other programs you may use, such as their web browser, Safari. You do not need to install it, but if you wish to learn more, you can read my review of it here at Bright Hub.
Step 2
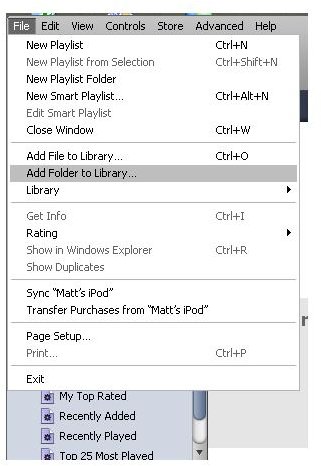
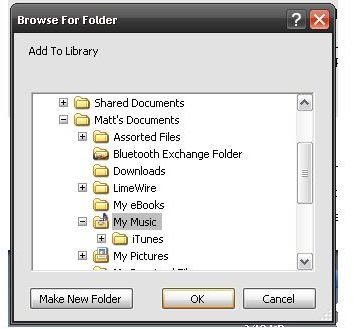
After installing iTunes, you’ll want to import music that you wish to transfer to your iPod. To do this, click on “File.” From there you can update your library one file at a time by choosing “Add File to Library.” Or, if you want to add an entire folder of music, you can choose “Add Folder to Library.”
Do this as many times as needed to make sure that all the music you want is accessible on iTunes.
Step 3
Now you’re ready to start adding media to your iPod.
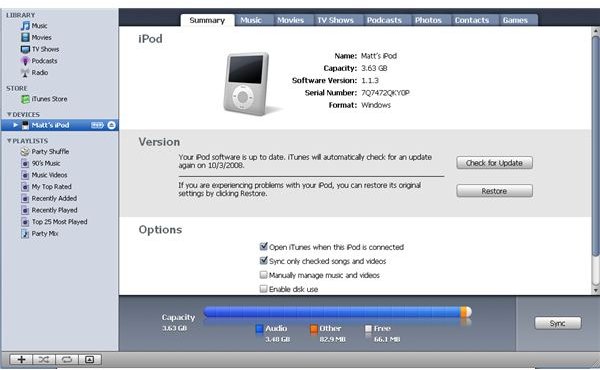
iTunes will ask you to give your iPod a name. What is important is that from this point on, you can only sync your iPod with that particular computer. If you try to add music from somebody else’s playlist on a different computer, it won’t work. If you force it, iTunes may erase all of the music you currently store on your iPod.
All the music you have in your library will begin to sync automatically. If you don’t want your iPod to do this in the future, check “Manually Manage Music and Videos.” You’ll also notice towards the bottom of the window a status bar. It will tell you how much space you have used up on your iPod. You can even check for software updates on your iPod and update it with new components.

Step 4
Be sure to let your iPod fully charge before you remove it from the USB slot. From that point on, you’re free to use it and start enjoying your music! Remember that iTunes and your iPod always sync together. What that means is that if you add or remove music from your library in iTunes, your iPod will automatically do the same the next time it syncs.
By default, the only way to charge your iPod is through a USB slot on your computer. If you don’t want to rely on this in the future, there are many accessories available that will allow you to charge your iPod via an electrical outlet or even your car.


