This tutorial for building Microsoft Access databases will take you step by step through the process, providing an explanation of each step and illustrations using actual screen shots of the process. At the end of this tutorial for building Microsoft Access databases are links for further learning.
Getting Started
Microsoft Access 2010 is used in this tutorial for building Microsoft Access databases. If you do not have Access 2010, you can download it as part of the Microsoft Office Professional download at the Microsoft Download Center . You can either purchase the program at the time of download or you can download a trial version for free that you can register at a later date via an online purchase. As you proceed, be sure to download Microsoft Office 2010 Professional because that is the version that includes Microsoft Access.
This tutorial for building Microsoft Office databases assumes the use of Windows 7. The computer used to create this tutorial runs Windows 7 Ultimate.
If you have a different version of Microsoft Access or Windows, you should still be able to follow the principles of this tutorial, although some screens and options may appear differently.
The Microsoft Access Interface
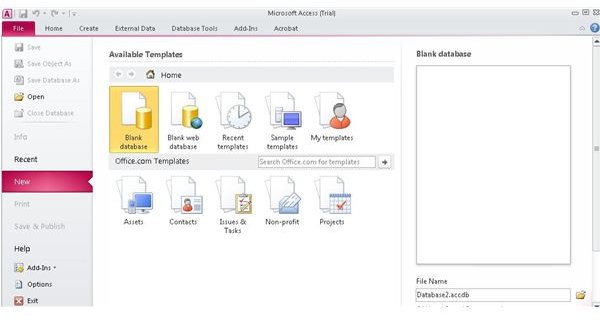
When you open Microsoft Access, you will be introduced to the Microsoft Access environment where you can build a new database. Click “New” in the side ribbon and then double click the “Blank Database” option to start a new database.
You now see the program interface where you can begin working.
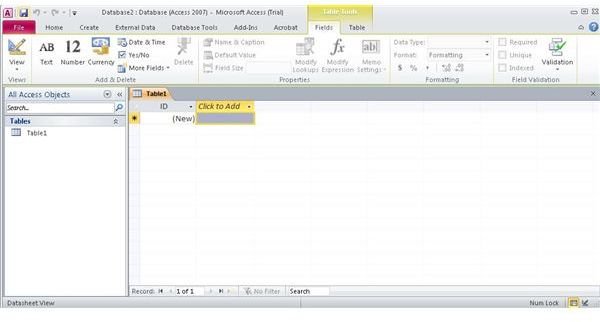
Image Credits: Screenshots taken by Bruce Tyson.
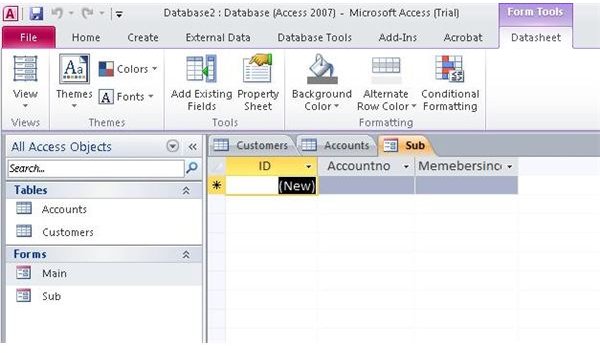
Creating Tables
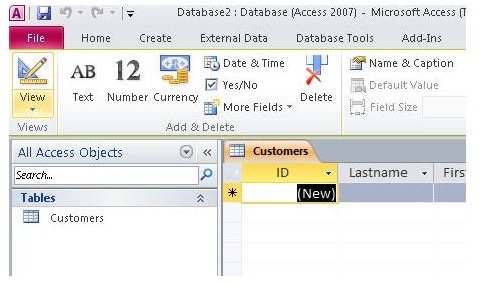
When you create a new Microsoft Access database, you will be taken directly to the “Tables” view. Tables provide the foundation of Microsoft Access databases. They work a little but like Excel spreadsheets where you create fields for each type of data you want to use.
We will demonstrate the creation of a database using basic customer information Including name, address, phone number, customer number and membership date. To do this, we will use two tables: “customers” and “accounts.”
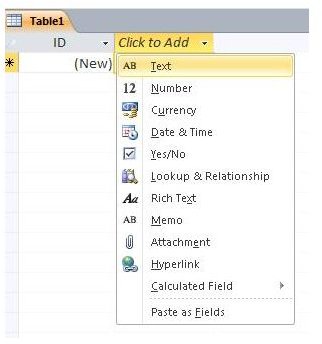
1. Name your fields. The easiest way to create fields is in the “Datasheet” view that you have on your screen. Left-click the “Click to Add” tab and select “Text”
Your new field is labeled “Field1.”
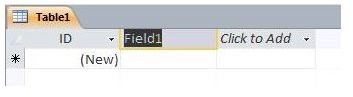
Place your cursor into the field and enter the real field name, “Lastname” and then press
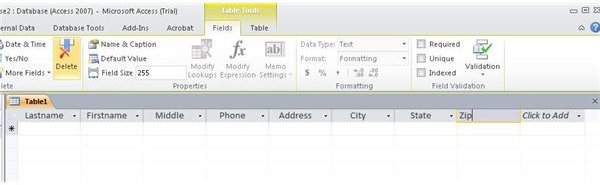
2. Richt click on the “Table1” tab and choose the “Save” option. Enter the name of your table (here we’ll use “Customers”) and then click “OK.”
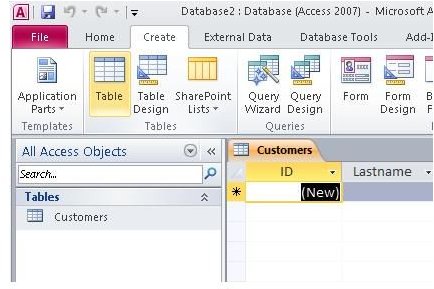
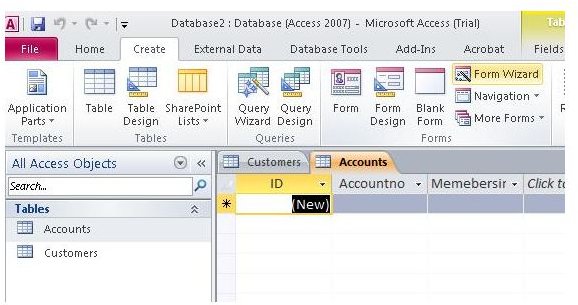
3. Next, we will create the “Accounts” table. This doesn’t have to be fancy because this is just an example. To do this, click on the “Create” option on the main ribbon and select “Table.”
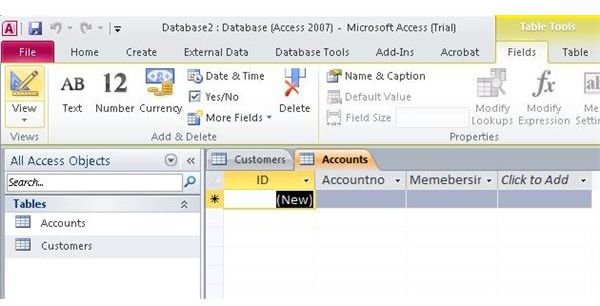
4. Click the “Click to Add” header and select “Number.” Replace “Field1” with “Accountno” to name the new field. Next, Click the “Click to Add” header and select “Date & Time.” Replace “Field1” with “Membersince.” Right click on the “Table1” tab and choose “Save.” Name the table “Accounts” and click “OK.”
The table portion of this tutorial for building Microsoft Access databases is now complete.
Continue on to page to so we can build a form and then enter data into our new database.
Image Credits: Screenshots taken by Bruce Tyson.
Creating Forms
In Microsoft Access, data can be typed directly into the tables (this works well for very small databases), but in databases with a large number of tables and fields you will find that data entry is made easier using “Forms .” This gives you the control over what fields are presented and how they appear so those who are entering or reviewing data can make sense of it.
Let’s create a form that will allow you to enter customer data that will populate the two tables we just made.
1.Click “Create” on the main menu and then click “Form Wizard.” A wizard will guide us through the form creation process. During practical use, you will find that you will also use the “Form Design” and “Blank Form” options. The wizard, however, simplifies the process of creating forms and creates the basis for forms that you can customize once the wizard has completed.
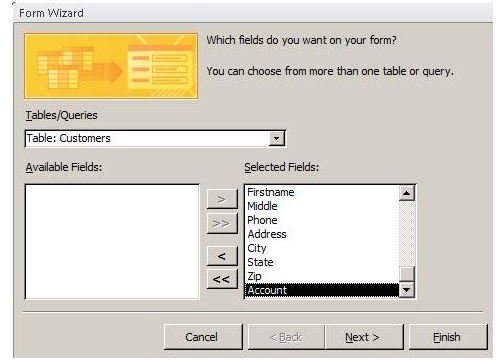
2. In the “Form Wizard” window, use the drop-down box to select the “Customers” table. Use the double right arrow button to select all the fields from “Customers” to appear on the new form. Click the “Next” button at the bottom of the window.
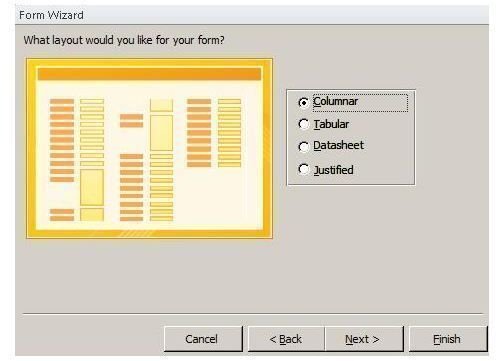
3. Next, choose the “Columnar” layout option. You can choose a different option if you want to. Click “Next.”
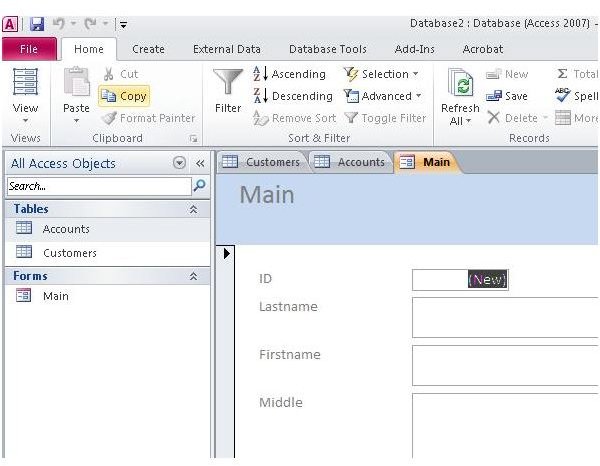
4. In the title field on the next window, enter “Main” and then click “Finish.” You will now see your form appear in the window.
7. Repeat the process to create a form with the “Accounts” table. Create this form in datasheet format. When finished, close the other tabs.
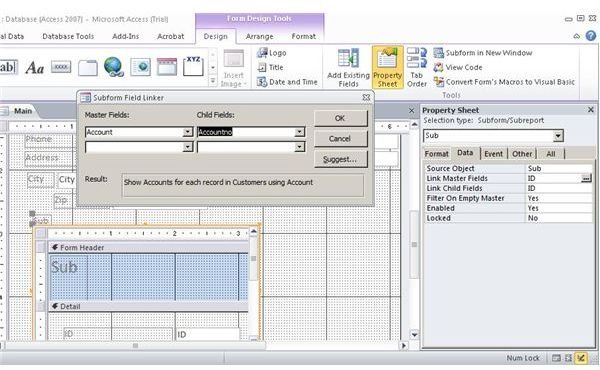
8. Now we will add the form “Sub” to the form “Main.” This will be a subform that will help with the relationship between the two tables. Do this by dragging it from the panel on the left into an empty area of the form.
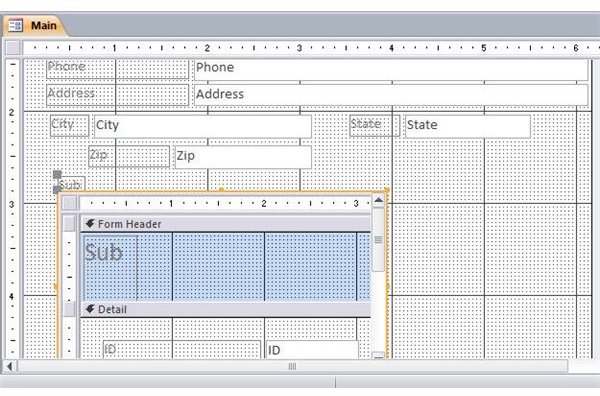
9. Right click on the form an set “Account” in the “Link Parent Fields” box and “Accountno” in the “Link Child Fields” form.
10. Right click on the “Main” tab and then choose “Save.” Next, right click on “Main” and choose “Form View.”
To finish this tutorial for building Microsoft Access databases, go to the next page.
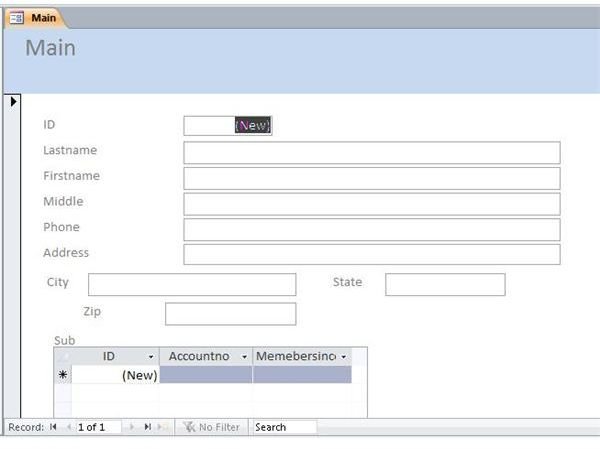
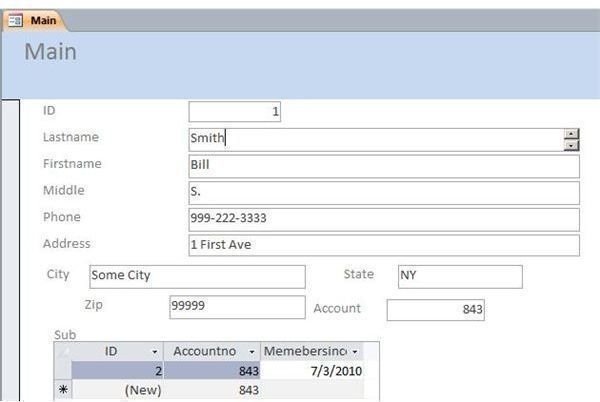
Entering Data
While in “Form View,” enter data into “Main,” Tabbing through the fields. Since we linked “Account” to “Accountno,” you will see that the value from “Main” automatically populates the value from “Sub.”
You now have created a Microsoft Access database with two tables and two forms. You have linked the two forms so that one table is automatically updated with data from the first. As a tutorial for building Microsoft Access databases, this demonstrates the basic guidelines that you can use to design a database for your particular needs. As you get started, here are a couple sources for more information that you can use. Check these out and then check on line where a lot of free help with Microsoft Access is available.
Image Credits: Screenshots taken by Bruce Tyson.
Microsoft TechNet
The Microsoft TechNet Web site is another good place to find a tips for building Microsoft Access Databases. You may find the articles here directed more toward specific design issues rather than general instruction. Still, if you need to learn a specific skill, this is a good place to look. For example, if you wanted to learn how to us ODBC with Microsoft Access, you might find results as pictured below.
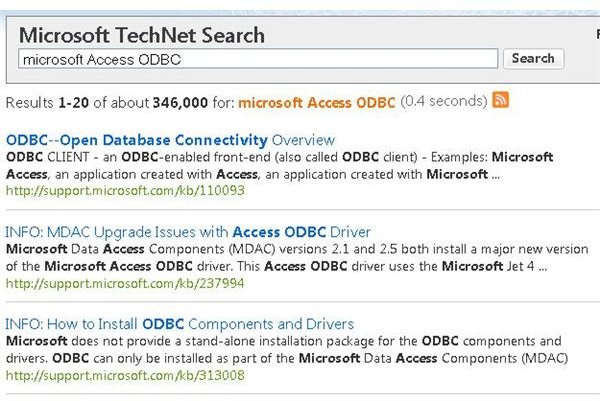
In this example, you will find a tutorial that gives you an ODBC overview, another one that tells you how to install ODBC components, and other tutorials that should help you learn how to implement the feature using Microsoft Access. Be sure to search for the questions or problems that you have.
Image Credits: Screenshots taken by Bruce Tyson.
The Microsoft Access Help System
Microsoft Access has a built in help system that offers a tutorial for building microsoft access databases. To get there, all you have to do is click the blue circle with a question mark at the top right of the Access window.
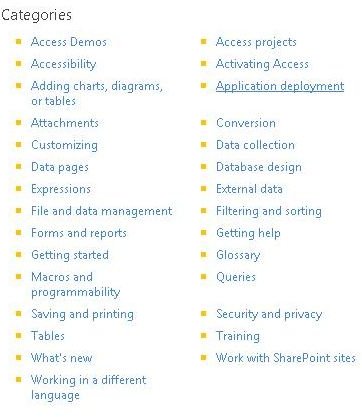
You will now see a concise list of tutorials available through the Microsoft Access help system.
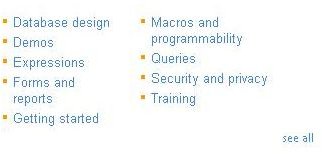
To see even more tutorials, click the “see all” link at the bottom right. Rather than browsing through these tutorials, you could choose to use the search function at the top of the window.
A tutorial for building Microsoft Access databases at virtually every level is available from this window. Although these tutorials might not cover everything, enough training is here to get you started off right in the program.
Image Credits: Screenshots taken by Bruce Tyson.


