Have you been tasked with creating a pamphlet but don’t know how? Don’t sweat it, read through this step by step tutorial to show you how to make a pamphlet using Microsoft Word. Screenshots of included of each step to help guide you along the way.
Creating a Pamphlet in Microsoft Word 2007
Creating a pamphlet or brochure in Microsoft Word 2007 may feel daunting at first, but just follow these easy steps to learn how to make a pamphlet using Microsoft Word. If you are feeling lost, click on the screenshot to get a better understanding of the steps.
There are many ways to lay out a pamphlet. This tutorial shows how to make a tri-fold pamphlet, as it is the most popular format. Since it is a trifold, we want the page to be on its side, in landscape mode. A portrait-mode trifold pamphlet would provide very little space to write on and would not look very pretty.
Step 1 - Setting Up the Page Layout
-
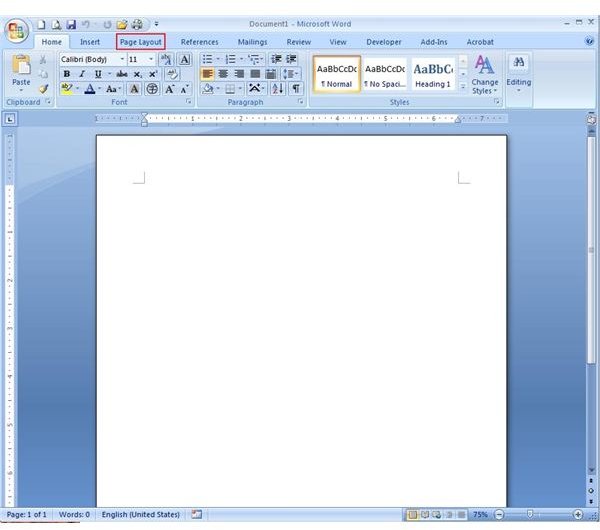
When Microsoft Word first opens, its default orientation mode is left to portrait. We want to change the orientation of the page to Landscape.
Advertisement -
On the top menu, find the Page Layout tab and click it to see new options .
-
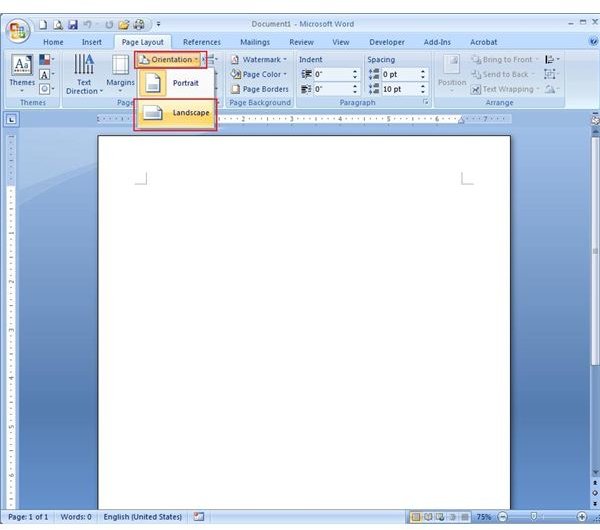
From the Page Layout menu options, click on Orientation to see a drop down selection.
Advertisement -
From the two choices between Portrait and Landscape, highlight and click on Landscape.
Step 2 - Setting Up the Page Margins
- Now that your pamphlet is on its side, it is time to add a little bit more space for you to work with. We can do this by expanding the page margins .
- Be careful of what you set your margins to, as certain printers have limits when it comes to margins. For this tutorial, I will be using a margin of .5 all around.
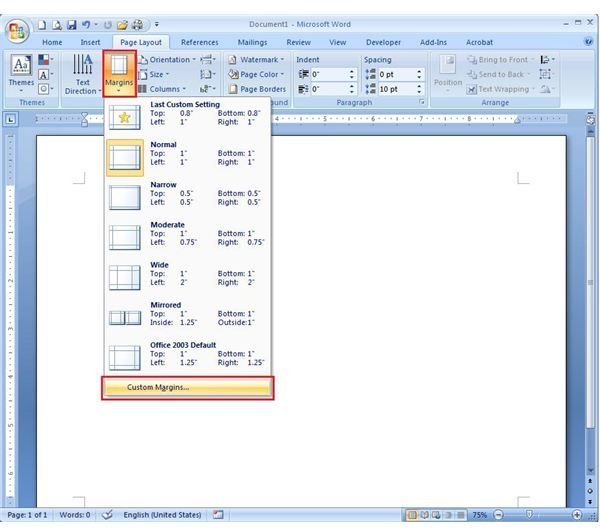
- Staying in the Page Layout tab, click on Margins to see a drop down selection.
- Highlight and click the Custom Margins… option.
- When you click the Custom Margins… option, a dialog box will pop up.
- From the dialog box, change the Top, Left, Bottom and Right numbers from 1" to 0.5" in the text boxes corresponding to each label.
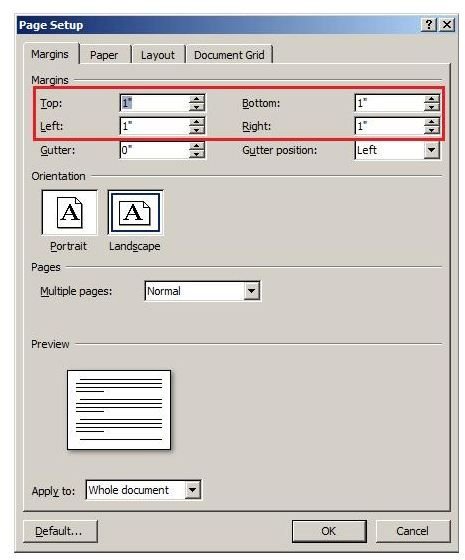
- Once you have set all the margins to 0.5" press the OK button to apply the changes.
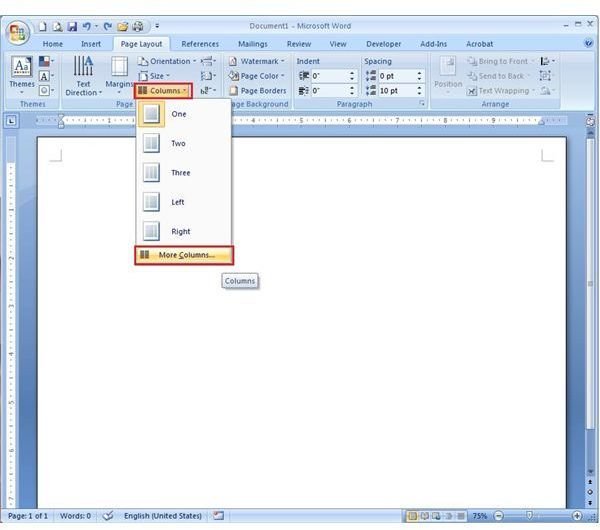
Step 3 - Setting Up the Columns
- Now it is time to set up your page into a trifold pamphlet. This means we need three columns in the sheet. Staying in the Page Layout tab, click on Columns, then scroll to the last option More Columns… and click the option.
- Important Note: Do not click on the Three option here as we want to set up the spacing correctly and using the Three option will only cause you to have a cluttered pamphlet.
- Once the More Columns… option is clicked you will receive a Columns pop up dialog box. From this pop up select Three.
- Now head into the Width and spacing section of the dialog box and change the Spacing: from 0.5" to 1". You will notice that the Width: section will change automatically. For the purposes of this tutorial, I chose one inch as a good choice for the space in between text, where your folds will occur. You can change it to any other value, though I recommend always keeping it about double the margin that you originally chose.
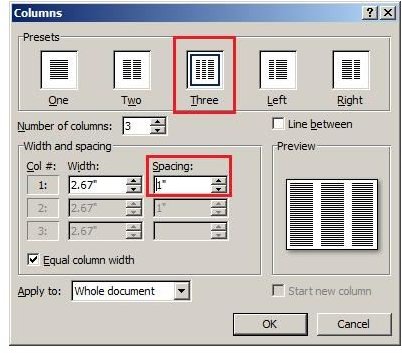
- Click OK in the Columns dialog box to return to your pamphlet.
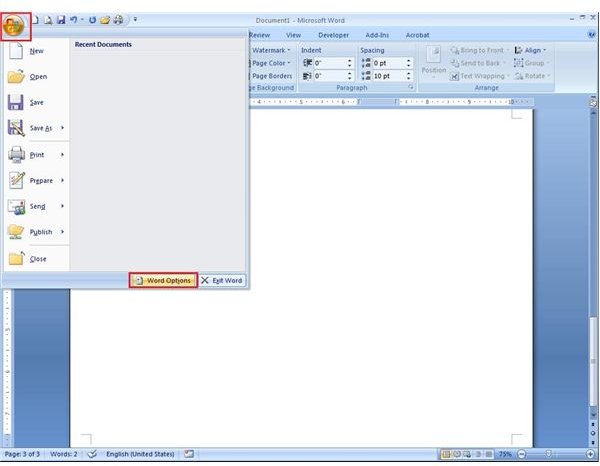
- It is very hard to see the columns you want to write in now. Let’s fix that by turning the Text Boundaries option on.
- Click on the big Windows Office Logo in the top left hand corner of the ribbon. You will see a drop down menu pop down. From there, click on Word Options.
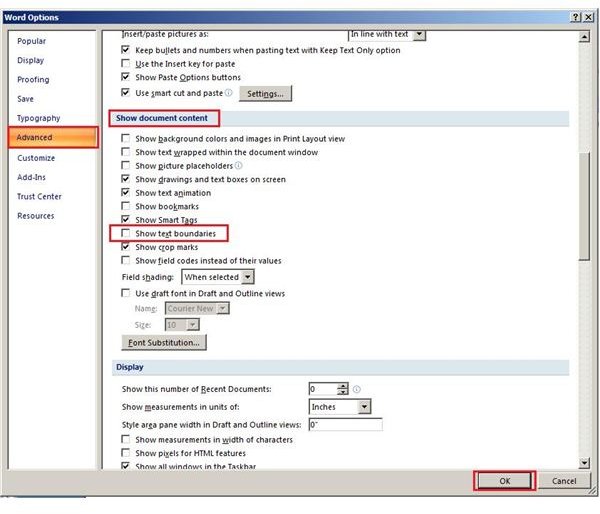
- When you click on Word Options, a dialog box will appear. On the left hand side, click on Advanced.
- Scroll down a little bit to find the Show document content section. In that section, click and checkmark the Show text boundaries option then press OK.
- Now you can view the columns for your pamphlet trifold in Microsoft Word.
Step 4 - Navigation through Columns
- You will notice that you cannot click through each column immediately. We will have to remedy this situation. While staying in the Page Layout tab, click on Breaks to see a drop down of options.
- Highlight and click on Column.

Creation of Pamphlet - Complete!
You have now created your first trifold pamphlet! From here, type any text into the three columns or insert pictures into the columns. Once finished, just print, fold and hand out! If you notice you cannot click into a specific column, remember, you need to follow Step 4 to ‘activate’ the column. Once you completed Step 4, you will be able to click in the columns for which you performed the step.
Now, Microsoft Word 2007 does have a Brochure builder but it is rather limited in functionality at times, and only contains certain template you can use. This tutorial allows you to create a pamphlet that you can customize to your own liking.


