Windows Live Mail offers many of the features you loved in Outlook Express and the speed of Windows Live services. Learn how to perform a Windows Live Mail install and start using this efficient email client.
Overview
There are two parts to a Windows Live Mail install: downloading the software and configuring your email account. Fortunately, neither is particularly difficult nor time consuming.
Download Windows Live Mail
To begin your Windows Live mail install, go to the Windows Live download site . Click the Download button on the right side of the page to begin installing the Windows Live Mail software. Click Run on the File Download window that opens. If prompted by a User Account Control message, click Yes or enter your password to continue.
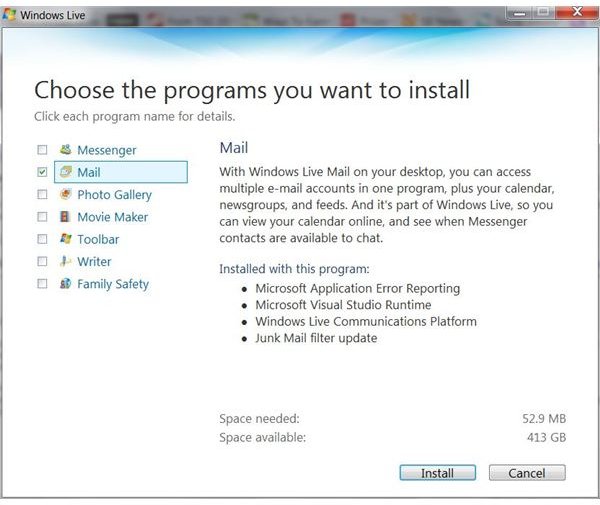
A Welcome to Windows Live window will appear next, scanning your computer for any Windows Live programs already installed on your computer. You will be presented with a list of applications from which you can choose, as well as those already installed, if applicable. Be sure to select the Mail check box, as well as any others you want to download and click the Install button.
Windows Live will check for any open programs that may interfere with your Windows Live Mail install. Save any work, close the windows as prompted and then click Continue.
The Windows Live Mail install may take several minutes. When the download is complete, you will have the options of setting Bing as your search provider, setting MSN as your home page and allowing Microsoft to collect information about you. Select the check boxes of any options you want and clear the check boxes of any you don’t. Click Continue to finish the Windows Live Mail install and move on to setting up your account.
Setting Up Windows Live Mail
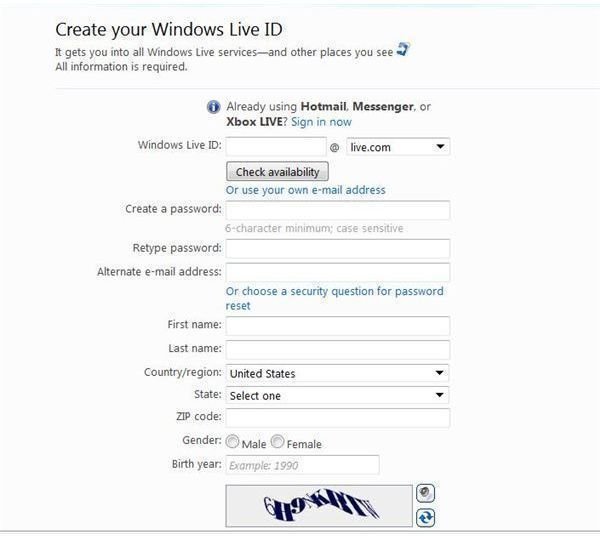
Now that you have downloaded the software, you can move on to the second element of your Windows Live Mail install, which is setting up your email account. Click the Sign Up button on the Welcome screen of the download window if you do not yet have a Windows Live user name and password. You will be taken to the Windows Live Sign Up page. You can also go directly to the Windows Live Sign Up website and create a new WIndows Live ID with a brand new Windows Live or Hotmail email address Read Creating a New Hotmail Account for comprehensive steps on setting up your new Windows Live Mail account.
If you already have a Windows Live ID, you can log right into your email account. You can log into the wemail version by going to Mail.Live.com in any version of Windows. To access the desktop version of Windows Live Mail, go to the Start Menu. In Windows XP, go to Programs, click Windows Live, and then click Windows Live Mail. If you are using Windows Vista or Windows 7, it’s even easier to open Windows Live Mail. Click the Start button, type Windows Live into the Start Search box and select Windows Live Mail from the programs list on the left side of the Start Menu.
When you start Windows Live Mail the first time, you will have the option of setting it as your default email client. Your Windows Live Mail install is now complete and you can begin to enjoy all that this application has to offer. However, if you’d like to try a different application, there are a number of other free email programs compatible with Windows 7 .


