This guide covers the steps needed to enable or disable hibernation in Windows 7, including how to verify whether or not hibernation is turned on and how to change the hibernation time setting.
HIbernation Settings
Although hibernation is most commonly used with laptop computers, it’s also available in desktop PCs. To modify the hibernation settings in Windows 7, you do need to be signed into an account that has administrator privileges, but the process itself really isn’t that bad at all. We’ll first look at how to turn hibernation on and off through a command prompt.
As an additional reference, you may also want to take a look at Comparing Sleep and Hibernation in Windows 7 .
Using the Command Prompt
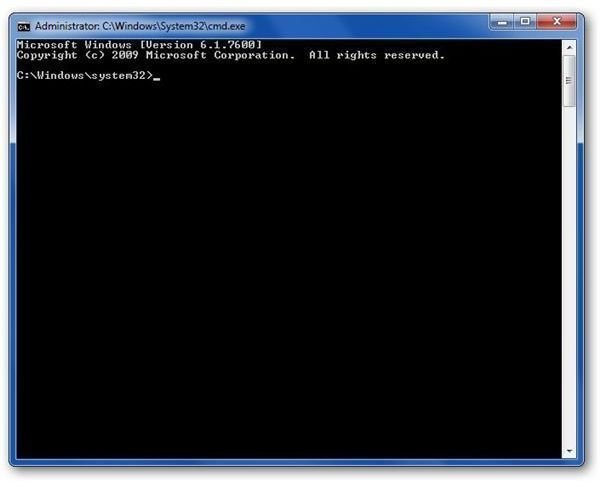
Since administrator privileges are required, we’ll have to use a command prompt with those privileges. To obtain this, perform the following steps.
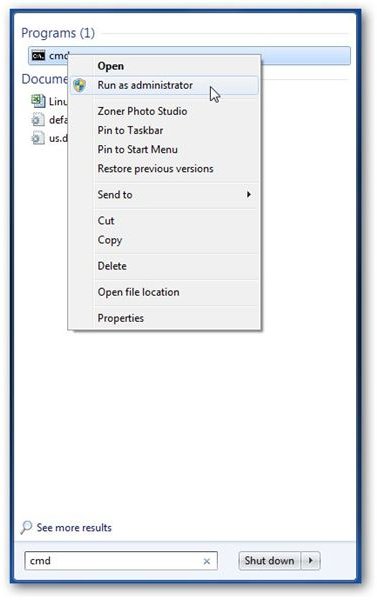
Step 1: Click on the Start button and enter cmd in the search box. See the screenshot to the left – click the image for a larger view.
Step 2: In the list of programs that appears after searching, right-click on cmd and select Run as administrator. This will bring up the window shown to the right.
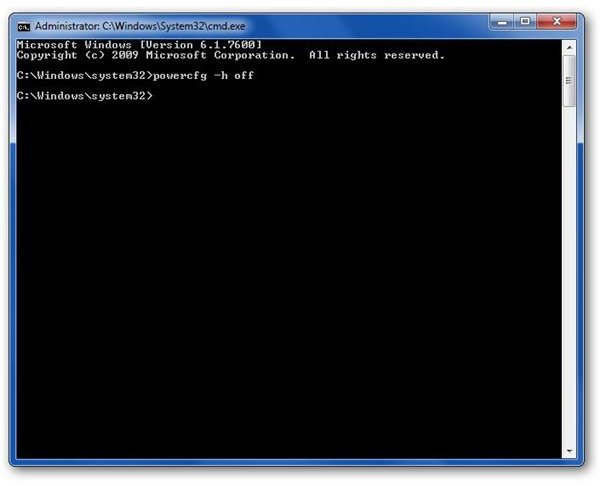
To disable hibernation, type the following line in the new window and then hit Enter:
powercfg -h off
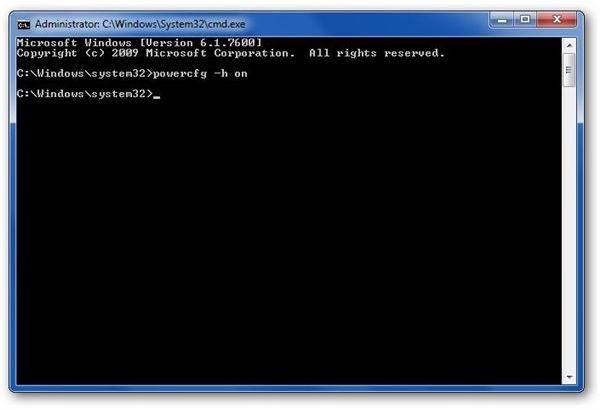
If you want to enable hibernation instead, type the following line and hit Enter:
powercfg -h on
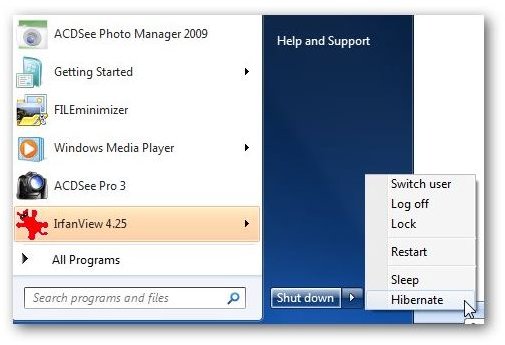
With hibernation successfully enabled, you should see it as a Shut down option in Windows 7, like in the screenshot below.
But what if you have enabled hibernation and the option is still missing from the Shut down menu as in the image below?
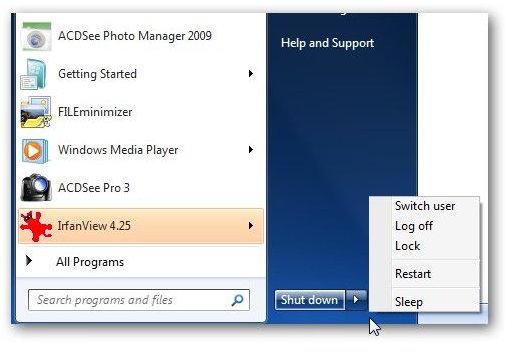
In this case, it is very likely that the hybrid sleep settings in Windows 7 are preventing the Hibernate option from appearing. This can be corrected by turning off hybrid sleep. For more information on how to do this, see How to Change Sleep State Settings in Windows 7 .
Changing Hibernation Time Settings
Once hibernation is enabled, you can set the length of idle time you want to pass before Windows 7 goes into hibernation. To do this, perform the following steps.
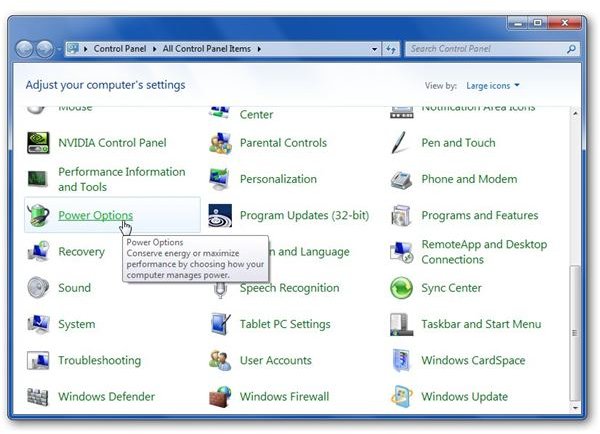
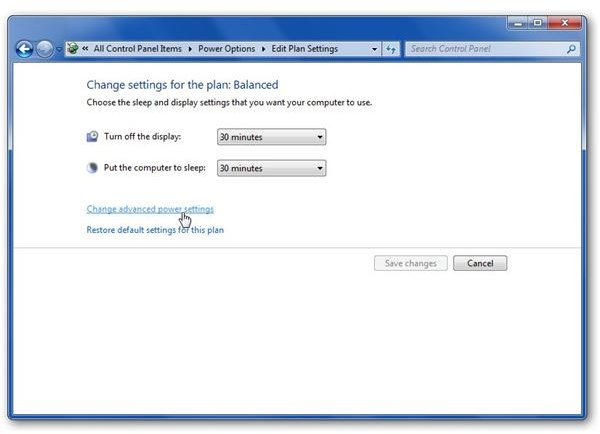
Step 1: Open the Control Panel, select to view the options by Large icons or Small icons. Then, click on Power Options.
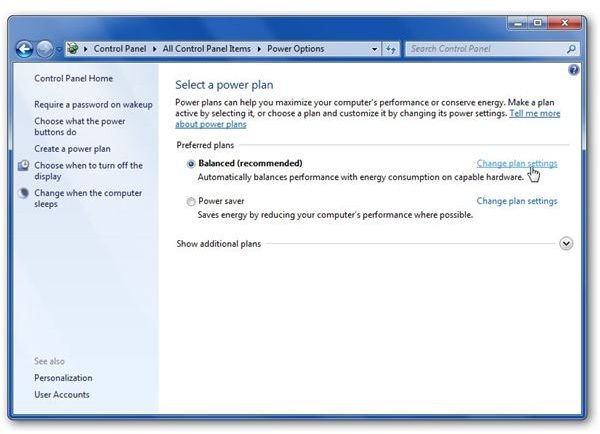
Step 2: Click on the Change plan settings link associated with the current power plan you are using.
Step 3: Click on the Change advanced power settings link.
Step 4: This action will open a new Power Options window. In this window, first expand the Sleep category and then expand the Hibernate after category by clicking on the + symbol preceding each division.
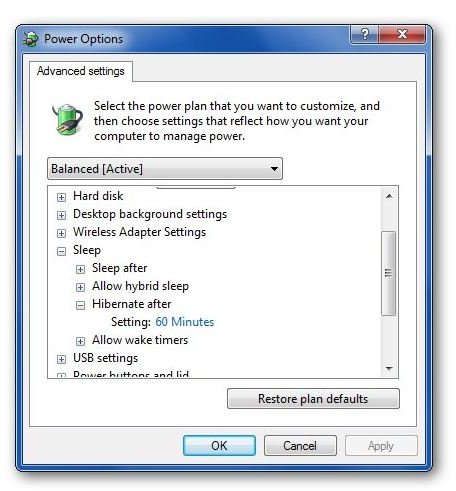
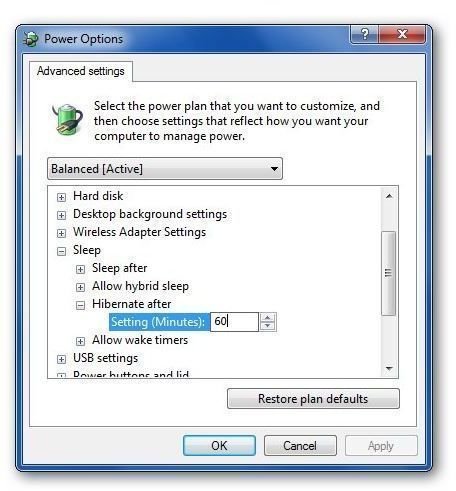
Step 5: Under Hibernate after click on the blue text to the right of Setting. This will allow you to enter a new number of minutes for the hibernation setting.
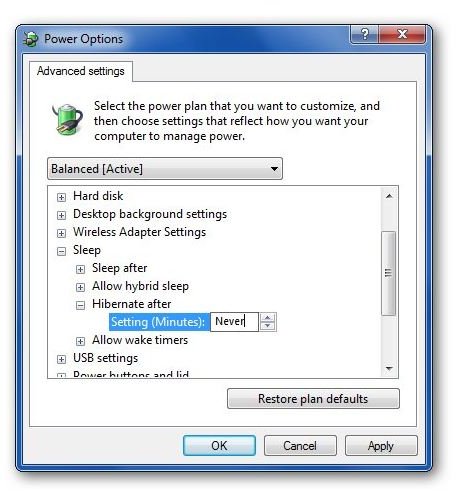
Note that you can also disable hibernation here by typing the word Never into the box instead of a number.
Step 6: When done, click Apply and then OK to return to the Control Panel. Click on the Save Changes button unless it has been grayed out. Then, close out the Control Panel.


