
In Part 1 we discussed the benefits of using a virtual machine and how to create one. In this post we show how to configure some features in order to use the VM.
The Virtual Machine Console
In the graphic below, you see that we have one virtual machine loaded on the console.
Fig1: Virtual Machine Console
So let’s look at the settings that you can modify. Notice that we have a VM called London-2261. We have three hard disks 1,2, and 3 which can be loaded as well. London-2261.vhd will be your main system, but disk 2 and disk 3 will also be available to use. Notice that they are all vhd’s
Now the Undo Disks setting is enabled. This will allow you to retain the original vhd. You can keep changes from being implemented.
The Networking setting shows one network adapter. You can set this for local only or for use with the network adaptor of the base machine your VM sits on.
The memory setting is also important. This is the amount of memory that your VM will use. It is dependent upon the actual physical memory that your base system has. If you base system has two gig, your virtual machine system may have only 50% of that value. Adjust this value to as high as you can. But there is a proviso to watch. I you intend to run more than one virtual machine on your base computer, then if you set the vm memory very high, you will not be able to run the other vm’s. A rule of thumb is that if you have 2 gig or RAM, then keep the vm memory to about 25 of that value, say 512 MB for each vm.
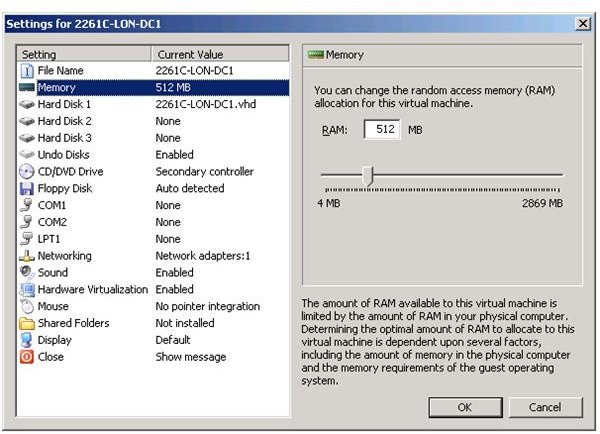
The other settings, COM1, COM2, LPT1 can be accessed when the virtual machine is running.
Working with the Virtual Machine
After the VM is launched from the console, you will find the following authentication screen:
Fig3: The access screen
The next screen is:
Fig4: The logon screen
Once in your virtual machine is ready to be used.
Fig5: A virtual machine ready to be used.
Now we want to configure the VM to access files from the Base Computer. For that purpose we will use the folder icon located below the start button.
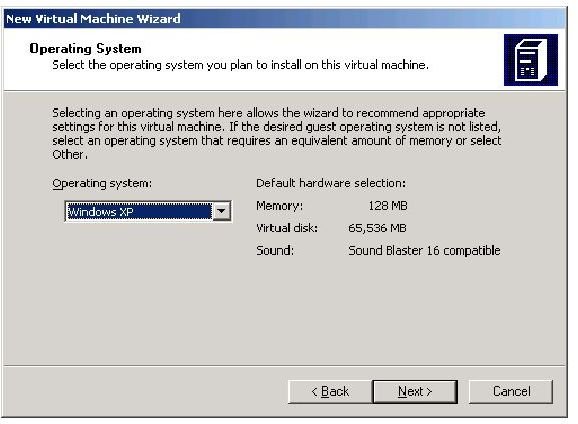
Fig6: Accessing the folder to the base computer
We can create an access to a folder on the computer by right clicking on the folder icon. You will get the following screen.
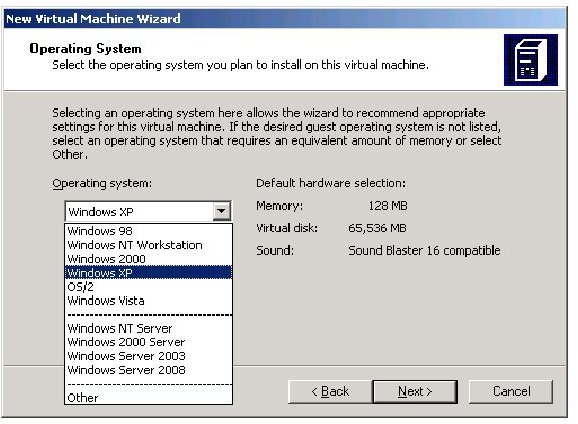
Fig7: Showing the various folders
Next select the drive letter you want to give the share, the default is Z, but you can select others not already in use. Find the folder that you want to share. In our example, we want the downloads folder that is on the C:\ drive of the local machine.
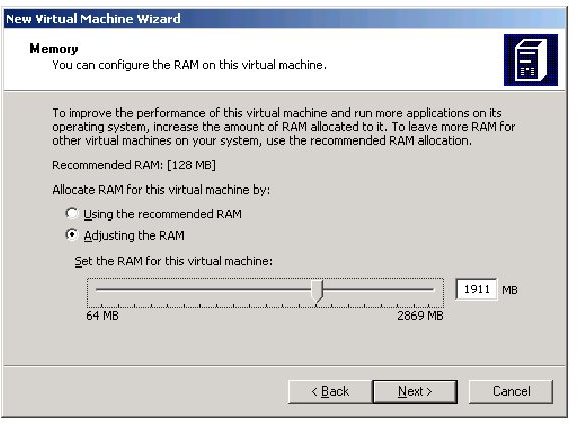
Fig 8: Accessing the C:\downloads folder
On the local machine, the drive letter will be “Z.” You can use the start button, explore and access the material. In the same vein, you can access the local CD Rom drive to install other applications. Now you are ready to configure your VM to run the application that you want.
Shutting down the computer
After you are done with you work, you may want to shut down the virtual machine. If that is so, here are the steps to follow.
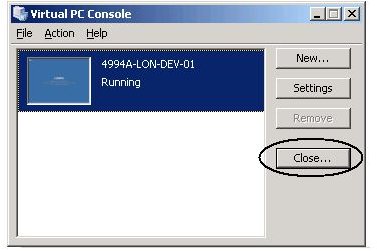
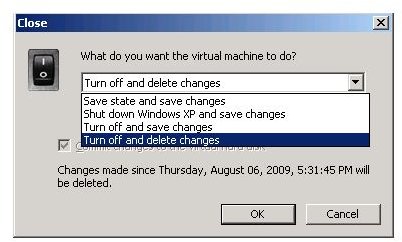
Go to the Virtual PC Console and select close. There will be four options available. The one highlighted, “Turn off and delete changes” will be the fastest. It will do what it says, your changes will not be saved. For example, if you install MS Office 2007, you will lose the installation.
The next one, “Turn off and save changes” will turn off the VM and it will save your configuration. This will not shut down the computer in an orderly manner, i.e., it will shut down the computer in the virtual console by simulating a power turn-off.
“Shut down Windows XP and save changes” will turn off the computer using the shut down protocol from Windows. That is it formally turns off all the processes and exits the operating system. It will also save all of the changes made to the virtual machine.
“Save state and save changes” will save the VM by keeping it in ready mode even if you turn it off. It will also save all of the changes made to the virtual machine.
Conclusion
Before the virtual machine is launched, one can use the Virtual PC Console to make modifications to the VM, such as the amount of memory to be use, the network adapter to be used, and the hard disk vhd’s to be used. Once the virtual machine is launched one can connect to the base computer and install applications. Upon completion, one can shut down the computer and keep the changes or lose them.
These two articles go a long way to show you how to configure and use a Microsoft Virtual Machine. There are many benefits to using a virtual machine. You can test your software or applications before putting them into production. You can design virtual networks to see if your network is feasible, you can even test security featurers on the vm system. You can construct many operational features without having to purchase hardware to test your system. The low cost is one of its best selling points.


