Any time you are dealing with a large number of files in a directory, it may be useful for you to print out a copy of the contents of the directory to make it easier for you to work with. This article will show you a few different ways to perform this task.
Method 1: Quick and Dirty
If you find yourself needing a quick printout of the files contained in a directory, the simplest option is to use Windows built in Print Screen function. Open the directory you wish to print out and hit the Print Screen button on your keyboard. Open Microsoft Paint, paste the image and print it out. It is not pretty and is not very practical for directories with many files, but in a pinch, it will work.
Method 2: Using the Command Prompt
The second method takes a few seconds longer to perform, but the output is much more manageable as you can either print it out as a hardcopy or keep the file created that contains the listing of file names.
- Go to Start, Run, type “cmd” and hit the ENTER key
- Go to the location you wish to print out by using the “cd” command
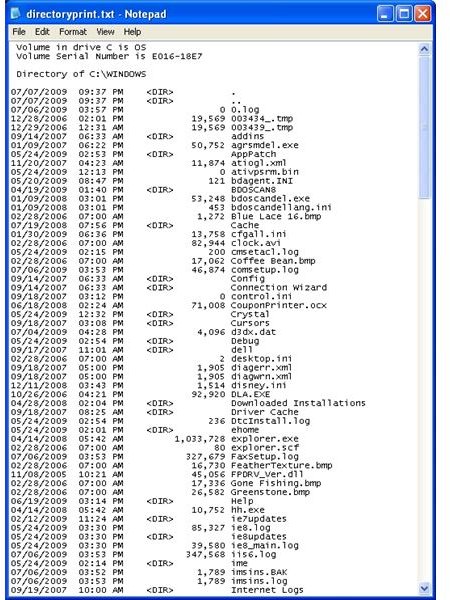
- Once in the directory you wish to print out, type the following command: “dir > directoryprint.txt” and hit the ENTER key
- A file will now be created listing all of the files in the directory (Figure 1)
Method 3: The Fancy Method
This method will add a shell command when you right-click on a folder, enabling you to print out the directory contents to your default printer. Note that much of this procedure is taken from a Microsoft support article listed here , although some of the procedure appears to have steps missing.
NOTE – after you get the shell command to work, there is a bug in Windows XP. When you double click a folder to open it, the search window will open.
Start Notepad by going to Start, Run, type “notepad” and click OK. Copy the following text into Notepad and save the document to C:\Windows as PrintDir.bat.
@echo off
dir %1 /-p /o:gn > “%temp%\Listing”
start /w notepad /p “%temp%\Listing”
del “%temp%\Listing” exit
- Close Notepad
- Open My Computer and go to Tools, Folder Options
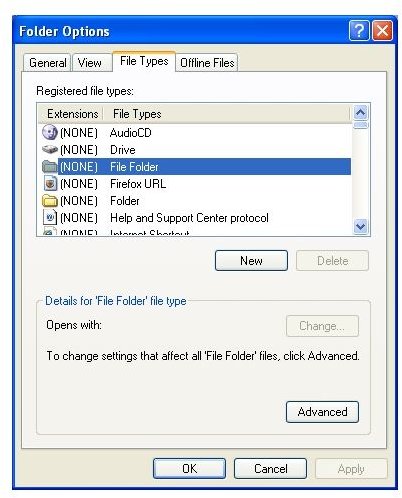
- Click on the File Types tab
- Towards the top of the list, click on File Folders (Figure 2)
- Click the Advanced button to open the Edit File Type window
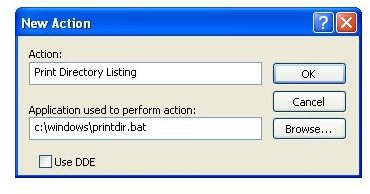
- In the Action field, enter “Print Directory Listing”
- In the “Application Used to perform action” field, browse to the BAT file you created earlier (Figure 3)
- Click Ok, Ok, and Close so you are back at My Computer
- To test, browse to a directory under My Computer and right click. Select “Print Directory Listing”. You should now have the directory listing printed out to your default printer.
As mentioned above, you will now need to fix the shell so when you double click on folders, they will open as before. Additional information can be found here .
- Go to Start, Run and type “regedt32” Click OK
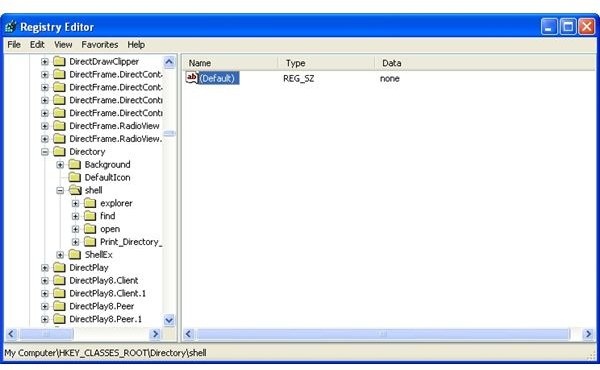
- Browse to HKEY_CLASSES_ROOT\Directory\shell. Click on the Shell folder
- In the right-hand window pane, double click on “default” (Figure 4)
- In the “Value Data” field type “none”
- Click OK and close out the Registry editor. Explorer should work as expected now
Images