If you have Microsoft Office 2003 or later, you have access to a program called Picture Manager that can crop, remove red eye and otherwise improve the appearance of your digital and scanned photos. Learn how to access and use Microsoft Picture Manager.
Open Microsoft Picture Manager
There are a couple different ways to open Microsoft Picture Manager. The first is probably the most common way to open any program: via the Start Menu. From the Start menu, point to All Programs, open the Microsoft Office folder and then open Microsoft Office Tools. Microsoft Picture Manager will likely be at the bottom of the Office Tools list. Or, if you are using Windows Vista (or Windows 7), click the Start button and type Picture Manager into the “Start Search” field and Microsoft Picture Manager will appear at the top of the Programs list in the left pane of the Start menu.
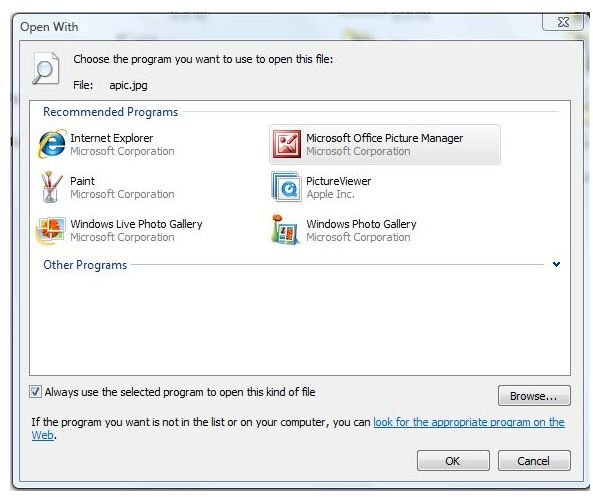
Another way to open Microsoft Picture Manager is from a picture you want to open. Right click the picture and point to Open With. Click on Microsoft Office Picture Manager from the right-click menu, and Microsoft Picture Manager will open along with the picture. If you want to set Microsoft Picture Manager as the default program used to open picture files, you can set this from the right-click menu as well. Again, right click a picture and select Open With. Instead of selecting Microsoft Office Picture Manager, though, click on Choose Default Program. Select Microsoft Office Picture Manager in the Open With window. Make sure Always Use the Selected Program to Open This Kind of File is selected and click OK. If you have several types of picture files (such as gifs, jpgs, and so on), you will need to perform these steps on a picture of each file type.
Edit a Photo in Microsoft Picture Manager
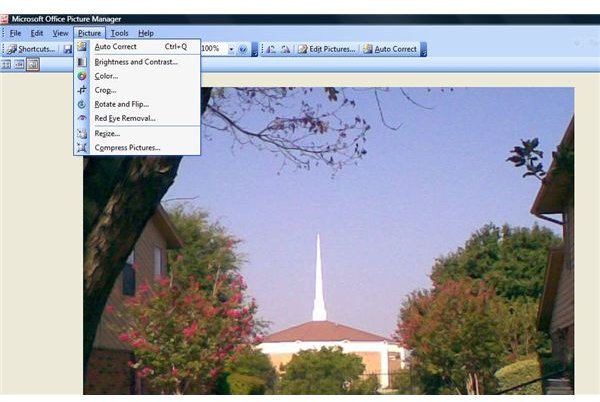
Once you have a photo opened in Microsoft Picture Manager, you can begin editing it. You will notice that the Picture Manager toolbar is similar to other Microsoft Office applications, with the familiar File, Edit and View menus. To make changes to a picture, though, you will want to go to the Picture menu.
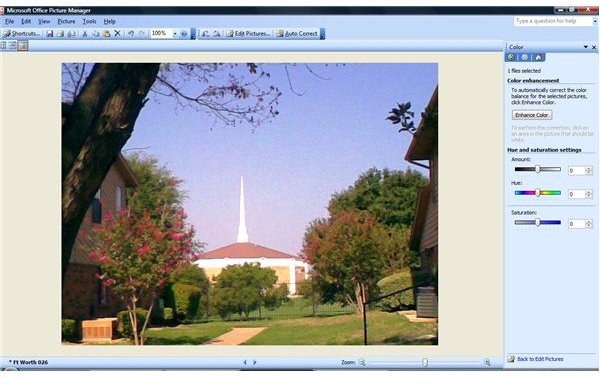
The first item in the Picture menu is Auto Correct, which will adjust brightness, sharpness and colors automatically. Click on Brightness and Contrast in the Picture menu and the Brightness and Contrast task pane will open. You can opt to click the Auto Brightness button and Microsoft Picture Manager will adjust the brightness automatically. Otherwise, use the Brightness and Contrast sliders to adjust them manually. Click on Color and the Color Enhancement pane will open. Again, you can choose to click the Enhance Color button to allow Microsoft Picture Manager to automatically make color adjustments, or use the Hue and Saturation sliders.
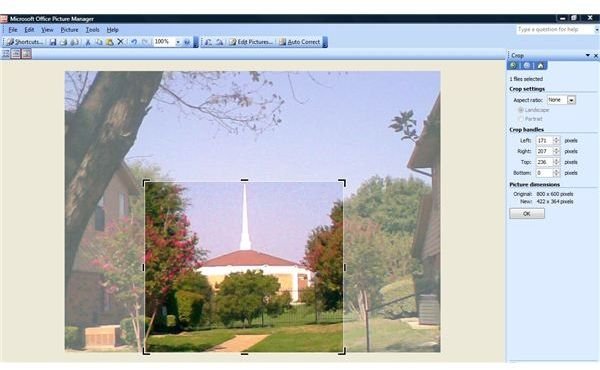
The next item in the Picture menu is Crop. When you click this, crop handles will appear on the picture. Drag these handles to contain the area you want to keep and then click OK to crop the picture. Alternatively, you can use the Aspect Ratio settings or the Crop Handles to set specific dimensions.
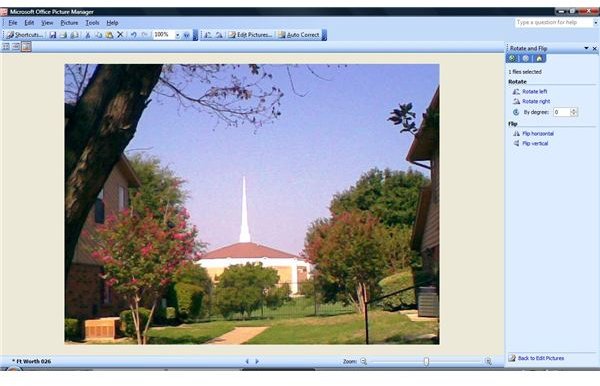
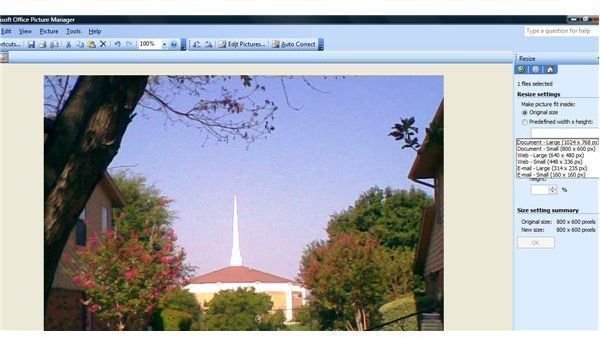
Click Rotate and Flip in the Picture menu and rotate or flip the picture from the task pane. You can rotate it left, right or by degree, or flip a picture horizontally or vertically. Select Red Eye Removal and use the red eye tool to click on eyes in the picture. Click OK in the task pane to remove red eye. Choose Resize from the Picture menu to change the size of the picture, or use the Compress Pictures tool to reduce file size.
When you are finished editing the photo in Microsoft Picture Manager, go to the File menu and save the changes.
For more help to get the most out of Microsoft Picture Manager, check out the Bright Hub article Basic Keyboard Shortcuts for Microsoft Picture Manager .


