Are the fonts that came with your edition of XP corrupted? Did you uninstall some, and now you want them back? Bright Hub tells you how to fix your fonts.
There are different ways to lose the fonts in your copy of Windows XP. Sometimes you add other fonts to your collection and then delete them, accidentally deleting more than you intended. Another possibility is a program you installed has affected the original XP fonts. Sometimes there doesn’t seem to be a reason, but the fonts on your system are garbled and don’t work as you expect.
Create a Restore Point
The single easiest solution is to go to a restore point on your computer that is earlier than when the fonts were corrupted. This will not affect documents or pictures you have added since the restore point, but it will remove any programs you installed, and any
Windows updates installed since the restore point. Remember to reinstall the Windows updates again after you have reverted to the earlier configuration.
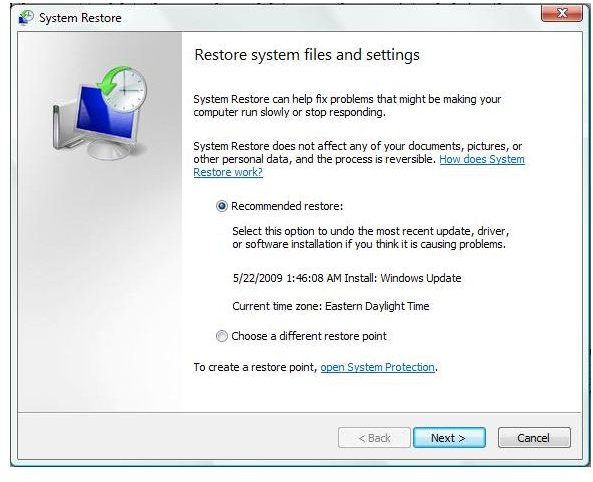
Go to the Control Panel → Backup and Restore Center. Click on System Restore, below Restore Files. It will ask you for permission, so give it. A new window will come up: System Restore. It will show you the last restore point the system has made. You will also see an option to choose a different restore point. Click that, and
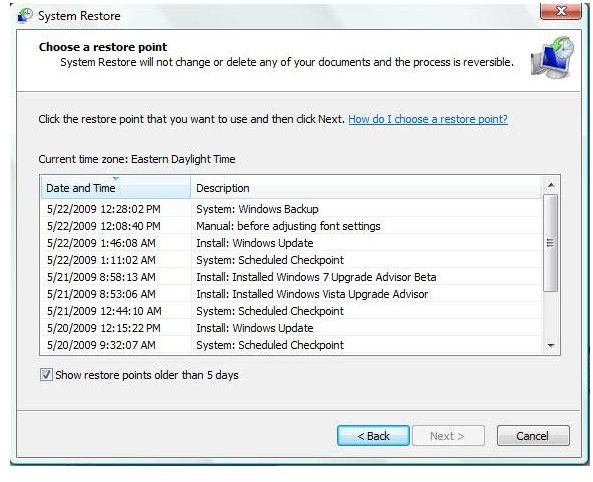
select a point prior to when you began to have trouble with your fonts. Be sure to check the box for Show restore points older than 5 days. Select a restore point that will predate when you noticed the problems with your fonts. Click Next. Remember - you can reverse a system restore point, unless you used System Restore in Safe mode. You reverse it by opening System Restore, click on Undo System Restore, and next. Select the choice you want, and click on Finish.
Check your fonts. Do you see the fonts you were missing listed in the Fonts file? Computer → Local Disk (C:) → Windows → Fonts. Attached is a download showing all the fonts that were originally included with Windows XP. Check these against the fonts you have installed, looking in Control panel in Fonts.
Check the application that was showing garbled fonts. Is it now correct? If so, your problem is solved. Reinstall all your missing Windows updates. Make a new restore point. Now, if you think that a program you installed has caused the problem, but you are not sure which one, install each program separately and check your fonts to make sure they are correct each time. If they are still intact, create a new restore point that will include that program.
Progress through all the programs you had installed since your first restore point, creating a restore point after each one, if things are still fine. That way, if the next program you install garbles your fonts, you will not have to restore everything all over again. Even after you isolate a program which affected your fonts, go back to the restore point you just made, and check any other programs you haven’t already, using this same method. It is possible that there is more than one culprit. If it turns out that this happened because of a name brand program, such as Photoshop or Norton, contact the website and tell them the problem. They may have a patch for you to install to fix the problem.
If you are having troubles with the way your fonts display, such as enlarged or minuscule text, there are a couple of things you can try to fix the problem.
First, create a restore point. Whenever you are going to be altering system information on your PC, be sure to have a restore point. Sometimes your changes can make things even worse, so the ability to return to the original state is important.
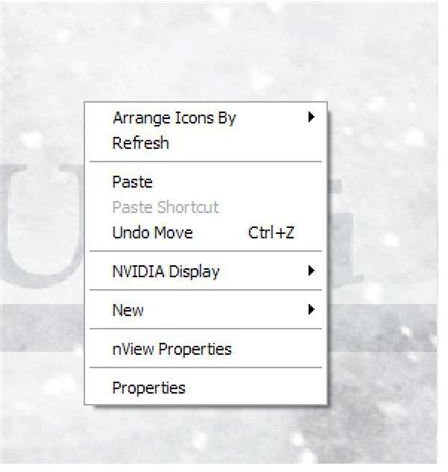
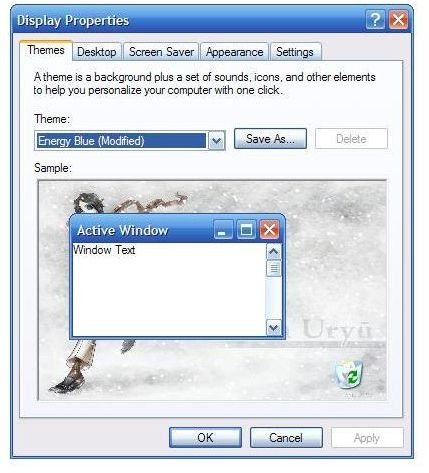
Sometimes you can alter the size of the text attached to your icons and windows by using the display properties in Windows. Double click on the desktop and select properties. Go to the Appearance tab. Here you can select normal, large or extra large fonts for all your windows. Try switching your fonts to a different size, apply and close the window, and reboot. All your labels should now appear larger Go back to display properties and set font size to normal, reboot again, and you may find the fonts have reset themselves to their normal behavior.
You can also go into advanced options on the display properties appearance tab, and change the individual font and point size for the lettering in every object in Windows. If you have trouble reading the labels on your desktop icons, you can select icons, and then tweak the font and the point size for icon labels.
Display properties


Finally, if you think you have deleted some essential fonts used in Windows, you can use a workaround to restore all the fonts that Windows uses on a regular basis, and even get copies of the new fonts Microsoft released with Vista.
Make your restore point.
Go to Microsoft and download the Word viewer and the Compatibility pack for Microsoft Word, Excel and PowerPoint 2007. I save these to my desktop, so they are easy to find. You can find links for these in the articles How to read Word Files without Microsoft Word, and How to read Excel Files without Microsoft Excel . It does not matter if you already have MS Office installed, or use another Office suite. When you install these, they put all of Microsoft’s standard fonts into your fonts file. Your missing fonts will be replaced, and you will also have the new sets of Vista fonts, all of which start with C for some reason. This idea came from the blog Digital Inspiration , who say they thank GlobalNerdy, who thanks Matt Thomas for the idea.
If you have refilled your font file, and some fonts still are corrupted, you should write down which fonts are problematic. Make a restore point. Uninstall the Compatibility pack and the Word viewer through Control panel, as they will not replace a font that appears to be in the font file. Make sure you have your downloads from Microsoft on your desktop. Open the Fonts file in Control Panel. Using the list you made of the corrupted fonts, delete each one. Install the Compatibility pack and the Word viewer again. They should now replace the missing standard fonts in your font file. Open a word processing document and select one of the previously corrupted fonts. It should now work correctly.
If none of these solutions solves your fonts problem, one rather drastic solution will. Back up all your documents, videos, music and pictures. Check Control panel, at the icon for removing programs, and make a note of every program you have installed since you first put Windows XP on your computer. You may also find you still have the zipped installation bundles for some of these programs in your downloads file. Back those up as well, as it will save you hunting them down to reinstall. Check your backup to make sure it has clean copies of your files. Setting up a restore point will do you no good when you will be reinstalling Windows XP. This will repair or completely reinstall a fresh copy of Windows XP to your computer, and you will now have a complete, clean copy of all fonts.
You will need the original disk to install Windows XP, and a copy of your product key. This can often be found in a sticker on the bottom or back of your computer, if you do not have the envelope with the installation disk and product key, you can use someone else’s XP installation disk, as long as you have your unique product key. When it asks for the product key, provide the product key for the copy of XP originally on your PC.
Microsoft Links for Repairing and Reinstalling Windows XP
Here are the links to Microsoft Support articles on repairing and reinstalling Windows XP on your computer, as they give specific details on the process, which go beyond the scope of this article.
How to Install or Upgrade Windows XP .
You receive an error message after you enter the product key when you try to install Windows XP .
Description of the Windows XP Recovery Console for advanced users .
Microsoft Help and Support contact information .
I hope this Bright Hub article has been able to resolve your font problems.


