If you are fed up with the default theme and you want your Windows XP computer to look like Windows Vista, you are at the right place. Here we go step by step and apply our Windows Vista style XP theme.
Introduction
At some point, the default XP Theme (named Luna
) gets boring and we want to give a little make up to our computers. Theming support is not advertised much by Microsoft for Windows XP, and many users are not aware that they can make such a change. Of course, at BrightHub we have our recipe; here is how to apply a Windows Vista style XP theme.
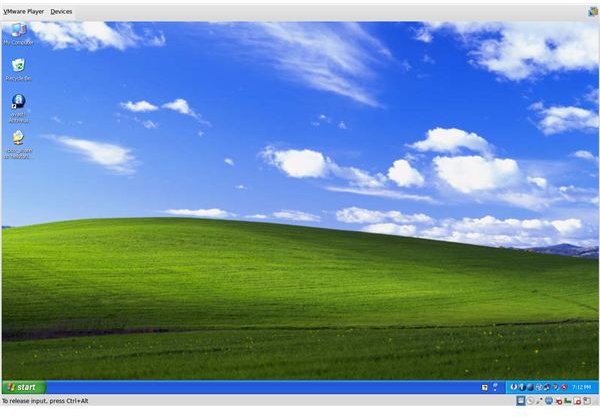
Before we begin, please note that we will do a little bit of downloading and installation, meaning that you will allocate some of your computer resources to the themes. So if your computer is not powerful enough, you might want to give theming another thought. Also, there are some things that intermingle with the system files, so proceed at your own risk. It will be wise to back up everything before proceeding. We also have the “Before” and “After” images. The screenshot on the left is “Before” image, which shows my Windows XP Desktop before going on to make it look like Windows Vista. The “After” image is in the conclusion section in the next page.
Changing the Window Look
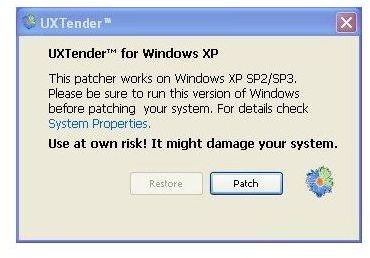
First, we need to make XP allow installation of unsigned themes because Microsoft blocks the installation of them. To do so, download the UXTheme Patcher . When you are downloading the program, make sure that the file you download is for your system (for example if you are using XP with Service Pack 3, download the file that is for SP3) otherwise you might end up with an unusable Windows XP installation. UXTheme Patcher is a small program that will change your uxtheme.dll file to make XP accept unsigned themes. After the download, double click on the file and select “Patch.” When it confirms the patch is applied successfully, reboot.
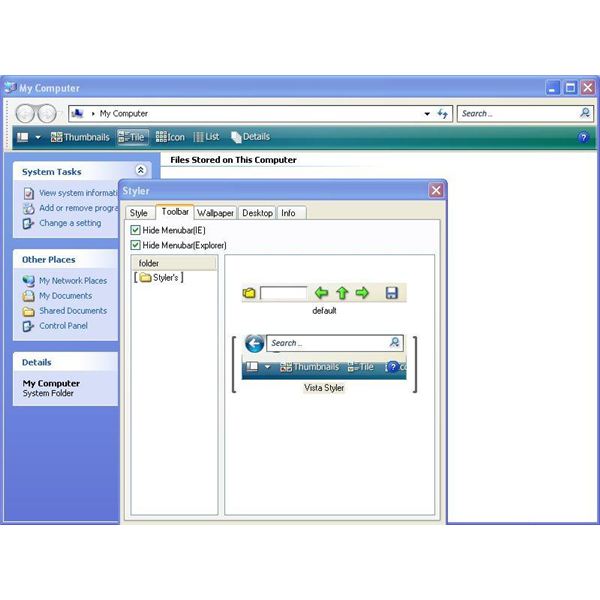
Then we need to install Styler. You can download the file from CrystalXP site. The installation is simple, go through it, and copy the “Vista Styler” folder to C:\Program Files\Styler\TB\skins\Styler’s. Log off and log back in. When you reach your desktop, open My Computer, right click on the icon bar and untick Standard buttons, Address Bar and Links, and tick the Styler Toolbar. You will see a small floppy disk icon on your window. Click on it and select Skin -> Styler’s -> Vista VG. You will immediately see the effects, but we are not done. Double click the Styler’s icon on the taskbar, which will open the program’s options. Switch to the Toolbar tab, tick Hide Menubar (IE) and Hide Menubar (Explorer) and make sure that the Vista VG is selected. Now we have set windows to look Windows Vista style.
For the breadcrumb navigation, you have to download and install the QT Tab Bar from its Wiki site . To install this feature, you have to have the .Net Framework 2.0 installed.
Changing the Start Menu
We are continuing our quest to make Windows XP look like Vista. Go to Vishal Gupta’s website and download Vista VG with Ultimate Theme with Search Bar (just fyi, the Search Bar is no more than an eye candy - it’s fake.) When you open the file you downloaded, you will see four folders. Go into the Fonts folder and copy all the files inside to C:\Windows\Fonts folder. This will install the Segoe font, which is the default system font in Windows Vista. Then copy the “Theme” folder to C:\Windows\Resources\Themes folder.
Not done yet. Right-click on your desktop, select Properties and switch to the Appearance tab. Under Windows and Buttons and select Aero 32. Click Apply and then OK and exit. Go back to where you have the four folders that were extracted when you opened the theme. Go into the Bottom Common Tasks folder, where you will see the shellstyle.dll file. Copy this file to C:\Windows\Resources\Themes\Vista VG Ultimate\Shell\Aero32 folder. If, under Windows and Buttons you selected some other style such as “Black 32,” then you have to copy the shellstyle.dll file to the C:\Windows\Resources\Themes\Vista VG Ultimate\Shell\Black32 folder. From which folder you copy the shellstyle.dll file depends on which “Windows and Buttons” you are using.
Changing the Icons & Viewing Graphically the Drive Status
OK, Windows XP icons do not fit in our Vista view. To change our icons, we will download the Stardock’s Icon Packager program. It is a trial version, but it this is not important for our purposes, since we will only use it for a couple of minutes. When you download and install, head on to download Vista Icon Pack for Windows XP . After you download the icon pack, open it with Icon Packager. Done.
Just a note: you can uninstall the Icon Packager program from your system if you will no longer use it. I also advise running a tuning utility (such as CCleaner) to clean up the relevant registry entries and other leftover files.
Of course, we will take care about our drive status icons in the “My Computer” view. To do that we download the Drive Status . After the download, we open the rar file and install the program. Now we see all the status of our drives in a graphical way under the icons.
Transparency & Window Previews
Approaching our final step, we will add thumbnail previews, which will allow us to see the contents of the opened windows when we hover our mouse pointer to the taskbar. We revisit the Crystal XP site and download the Visual Tooltip program. For the true transparency of the window titles, we download True Transparency program from the same website. There is no additional task here. Install and enjoy.
Conclusion
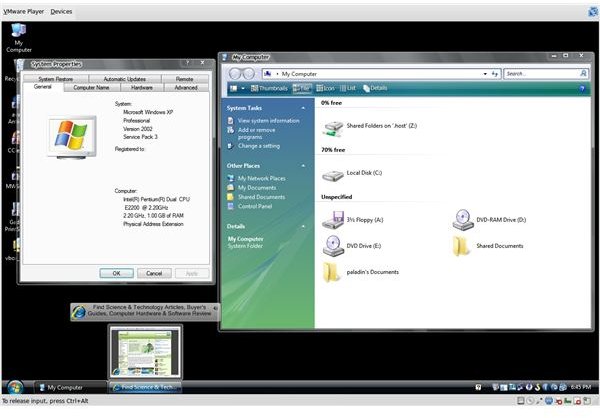
If you are still with me, you have successfully installed Windows Vista style XP theme to your computer and are enjoying it (the screenshot on the left is the “after” image). However, please note that all the programs/items that we have installed steal from your computer’s resources. If you have a relatively new computer, you are most likely to ignore this but if you have an older one you will possibly experience some slowdown. If Windows XP complains that some system files are changed during the process and wants to revert the process, doing so will not enable you to carry on changing your theme.
What’s more, we have covered the basics to change your Windows XP theme. If you want to try additional themes, you can follow the instructions from the theme’s developer and install more or less the same way. Unsigned themes will not be a matter for you because we have patched the uxtheme.dll at the very beginning.
This post is part of the series: Theming Windows XP to Look Like Windows Vista or Windows 7
Want to give your Windows XP a new look? You can change your good old Windows XP to look like Windows Vista without sacrificing too much performance. Or maybe you want to jump over to Windows 7 directly? Here we go step by step to change our Windows XP’s look to Windows Vista and Windows 7.


